


Written by Nell, Contributing Writer
We all have the desire to make something beautiful for a new child in a loved one’s life. Whether it is a boy or a girl, a long-awaited journey or an unexpected surprise, that life is precious.
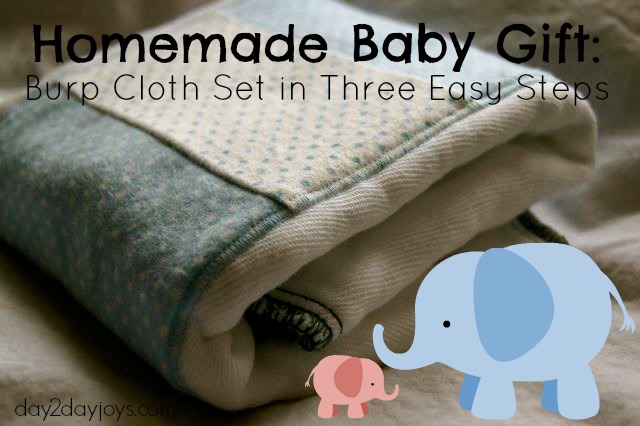
Before I started my Etsy shop, before I knew much about fabrics or patterns or this that & the other, I made these simple burp cloth sets for friends with new little ones. They make the perfect shower gift! Or visiting gift. And they’re not too fancy no one will use them–nor are they too plain that they’ll get used as a diaper accidentally. You can personalize them as much as you want with monogramming, or let the clean lines of the fabric speak for themselves.
Use your imagination! If the nursery has a theme, you can follow it, or select a fabric that ties in with something your friends love, like culinary arts or horses.
Start your sewing machine’s engine, or select a hearty needle to sew it by hand, get the prefold diaper & the decorating fabric and you’re off to the races.
How to make Homemade Burp Clothes:
1) Select fabric & burp cloths.
Use 100% cotton or cotton flannel, not anything synthetic as it doesn’t breathe or absorb as well. I’d suggest cotton flannel as it is very absorbent and will wash & wear well for baby fluids. For your prefold diaper, go to a good baby store and touch their prefold diapers–my local favorite is Peapods–to see which one you like the look & feel of. The Gerber brand at Babies R Us works too, but don’t get a thin birds eye pack. The more durable, the better!
2) Cut the fabric to fit down the middle panel of the prefold.
Measure, giving yourself at least 1/4 inch on each of the four sides so you can hem it in. My hems were a bit, well, irregular, at first. Pin the fabric so you know where you need to sew the hem. Press with a warm iron and your hem will stay in place for you. Before you sew the fabric on, if you have the inclination or ability, you can do some monogramming here or applique. The possibilities are endless.
3) Sew, snip, wash, done!
Sew four straight lines, or a zig zag stitch, to hem the fabric in that middle panel. Tah-dah! Then snip your spare thread, which if you rotate your fabric, should only be in one spot. I waited to wash mine until they were completely assembled instead of the usual wash-prefold-and-fabric-separately because I wanted them to get some shrinkage together. They wore well in a quick rinse cycle with a gentle detergent and then a trip in the dryer. Pull them out, fold them, and feel great about the gift you’ve made!
Have you ever made a homemade gift for a baby shower?
*this post is linked to: Encourage One Another, Titus 2sdays, and WFMW*


These are great! I have made burp cloths before, but Mine weren’t so simple to make. I actually used terry towel fabric instead of a prefold and the sewed a cool fabric to the back for decoration. They turned out pretty well, but i think next time, I will be doing it this way.