The post Understanding GMO’s and What They Mean To Us appeared first on Day2Day Joys.
]]>
Written by Kari @ Live on Purpose, Contributing Writer
Wouldn’t it be wonderful if eating healthy didn’t have to be so complicated? I love talking to my grandmother, who is 83, and just listening to how different things were so many years ago. Do you know there was a day and time when people just ate. Yep – it was that simple. They grew gardens, they raised cattle, pigs, goats and sheep. They knew how to prolong their winter supply and utilize everything they had so it didn’t go to waste. Many towns had small, family owned markets to get stuff like flour, sugar and spices. There may have been more labor involved in their eating, but they never had to wonder if the food they were eating was “real” or “fake”, if it had chemicals sprayed all over it or if they animal had been treated humanely. They just ate.
Not so much today. Unfortunately, most people spend hours upon hours every week just trying to see if the food they are buying and eating is healthy or toxic. Think of all the label reading, menu scouring, waiter questioning and google searches that go into your weekly eating habits.
One of the most misunderstood and sometimes unheard of issues with our food supply today is GMO’s – genetically modified organisms. Yes, I teach classes, do consultations and host small group challenges – and so many people still have never even heard of the term, GMO.
When I first heard about this issue years ago, I was fascinated and have researched it over the past 10 years with somewhat of a vengeance. So much so, that I do everything I can to avoid eating foods with GMO’s as mush as I can, although I found that when we travel it’s not super easy.
What exactly are GENETICALLY MODIFIED ORGANISMS Or GENETICALLY ENGINEERED INGREDIENTS?
Without getting into controversy here, I want to mention that there is much debate on the ethical boundaries of GMO’s and the fact that many countries ban any products with GMO’s and it’s illegal to grow anything with GMO’s – yet The United States allows them, grows them and supports them and their health benefits. In fact, many third party studies have shown such damaging effects of GMO, so we should be more cautious about these considering they never had studies done with genetically modified ingredients in the past. It’s also good to point out that the FDA does not require labeling and doesn’t feel it’s necessary as long as the companies declare it to be
safe.
Basically, food is altered in an unnatural way that is damaging our soil, hurting family farms and is disrupting the healthy functions of the physical body, in humans and animals. When you understand that this is an area that is understudied and short term and long term effects are mostly unknown still, we need to have better diligence when it comes to consuming foods containing these.
Personally I think the biggest concern is that the government and agencies do not feel we have the right to know what foods on the market contain GMO’s. This is disturbing, so it’s a good idea to do research on these foods, which companies use them and don’t and how to know what to look for when you are grocery shopping.
Below you will find a good list of companies that are GMO-free! Although there is no complete list that I have found – these are good resources and helpful for those who don’t have the time to do the research themselves. Get acquainted with the names. Print off the list and carry it with you when you go shopping. Look for stamps on foods that say “NON-GMO VERIFIED” or “CERTIFIED ORGANIC USDA”. These simple steps will help you narrow down your selections so you know which foods are safe to eat. They may not be as safe as going to your backyard, but for those who have to buy their food at the store – these two things will make a huge difference in your food choices.
Choose dairy that states it’s from grass fed cows. Ask if your meat is raised and finished on grass – you don’t want meat from a grain-fed cow, even if it’s organic meat. When buying chicken and eggs – you want pasture-raised. This will be the healthiest and most beneficial to your body.
Shopping doesn’t have to be hard, but unless you do a little research and have some resources you can turn to – it may be a part of your weekly routine that you dread. Get informed, be proactive and shop easy!
- GreenPeace PDF Guide to NON-GMO companies – click here
- GMO-Free Foods from Nourished Kitchen – click here
- NON-GMO Companies by Healthy Family – click here
- NON-GMO Shopping Guides and Tips Downloadable – click here
A couple quotes to think on:
“As far as genetic engineering for food, that is the great experiment that has failed. They literally have the entire world market against them. All those dreams… the blind will see, the lame will walk… has turned out to be science fiction. They are basically chemical companies selling more chemicals. They’ve been able to spread these herbicide-promoting plants around because it is more convenient for farmers who can just mass-spray their crops. But they’ve given absolutely nothing to the consumer while causing more chemical pollution and contamination.” – Lawyer, Andrew Kimbrell, executive director of the Center for Food Safety (USA)
“Any scientist who tells you they know that GMOs are safe and not to worry about it, is either ignorant of the history of science or is deliberately lying. Nobody knows what the long-term effect will be.” – Geneticist, David Suzuki, giving the 2008 Commonwealth Lecture in London
How will you be proactive when it comes to avoiding genetically modified foods?
The post Understanding GMO’s and What They Mean To Us appeared first on Day2Day Joys.
]]>The post Christmas Wreath Card Display appeared first on Day2Day Joys.
]]>
Written by Kari, Contributing Writer
I know there are hundreds of ways to display those beautiful Christmas cards we get each year. I’ve done most of them over the course of my beautiful life. Everything form hanging them from decorative ribbon to placing them in a crystal bowl. A couple years ago I was reading Living Magazine and found a quick and inexpensive way to display cards. I needed a change and this was perfect.
A simple wooden wreath.
Well, more like an embroidery hoop with mini-clothespins, but like I said, a simple wooden wreath. It worked perfect.
What does this have to do with health, which is what I usually write about? Nothing. Not only am I passionate about teaching and educating people on health – I enjoy being crafty too! So, this is just a look at another side of me!
It cost less than $10 for the supplies and didn’t take long at all to make. The glue drying is the most time consuming part of it all. This is when you get to play with your kids, watch Netflix or eat cookies. Or all three. You can choose the size and number of hoops you’ll need depending on how many cards you usually get. I did one large and two medium. They really look beautiful once they fill up and make it so easy for everyone to scan and look at the cards when they are visiting your home.
Now, wouldn’t you say that these simple wooden wreaths make your own Christmas scene look so much better? I thought so! Now go make one for you!

Christmas Wreath Card Display
What You’ll Need:
- a couple needlework/embroidery hoops – I did one large and 2 medium sizes
- a couple packages of mini-clothespins
- craft glue
- ribbon for hanging
What You’ll Need To Do
- I glued the mini clothespins every two inches around the hoop. I alternated the pins – one facing out, one facing in.
- let them dry overnight (simply because I got side tracked and didn’t get back to it the same day).
- Once dry, I attached the ribbon and hung it on display.
Like I said, when they are completely filled, they look really pretty – like a big wheel of cards. It’s nice to be able to see them all and be reminded how blessed we are to know so many wonderful and loving people – which always makes my heart happy.
What is your favorite way to display your Christmas cards?
The post Christmas Wreath Card Display appeared first on Day2Day Joys.
]]>The post Tips For Eating Healthy During The Holidays appeared first on Day2Day Joys.
]]>
Written by Kari @ Kari Newsom Contributing Writer
It’s that time of year again.
As a Health and Nutrition Coach, I always have people ask me for some tips on how to successfully celebrate special occasions without completely going off the deep end when it comes time to eat.
The first and most important thing I always tell people is this:
ENJOY THE CELEBRATION!!!
All to often we try so hard to do ‘the right thing’ about the whole ‘eating during the holiday’ issue, that we actually end up NOT enjoying this time of year.
Don’t do that anymore. Eating healthy and making healthier choices isn’t about being miserable. I promise.
There are a couple pointers I like to give people who don’t want to go crazy, over indulge and completely get off track with their healthy lifestyle.
If you are like the average person, this time of year {or any celebration for that matter} can be a challenging time.
My family typically eats extremely healthy, BUT I don’t freak out and go crazy that I’m not getting my organic and fresh foods. I am always thankful that someone would take the time to prepare a meal for us to enjoy – whether it’s considered ‘healthy’ in my book or not. Since 98% of the time we eat extremely healthy and disciplined at home, I never feel guilty when those occasions arise where we aren’t able to eat that way.
If there are certain foods that you absolutely cannot eat (if you have allergies or have celiac, etc.) then speak with the host for that day and explain your situation and ask if it would be okay if you brought some of your own items so you can still sit down and enjoy the meal with everyone else. Many times you will find that the host may offer to make some dishes according to your needs. If your eating preferences are just that, preferences, then it’s up to you to make smart choices while you are filling your plate.
Here are a few tips that might help you out this Thanksgiving holiday:
1. Eat a Smaller Meal Beforehand
If you are prone to eating TONS of food and filling your plate to overflowing, then going back for seconds and thirds – try eating a small meal before you go to your Thanksgiving celebration. It doesn’t have to be a rich meal, just a small meal that will help fill you up enough where gorging out on food doesn’t look so appealing to you! You’ll still get to enjoy the food on the table, you just won’t be shoveling it all in your mouth like there’s no tomorrow.
2. Water
Drinking a glass of water about 30 minutes before sitting down to eat can make a person feel full, so you won’t end up eating as much.
3. Self-Control
Make a decision to only have one plate of food, which means smaller portions of each item. Not always easy, but your stomach will thank you for it once dessert time rolls around.
4. Mini Size It
If you are a dessert sampler like some {GUILTY], then don’t take full size servings of each dessert. Cut in half, thirds or quarters so you can sample all the wonderful goodies, without consuming the amount of an entire pie or cake by the time you’re done.
5. Control Your Eyes
If your eyes are always bigger than your stomach, then it’s about discipline, discipline, discipline! Just CONTROL yourself when filling your plate!!! Yes, it smells so good and looks amazing and Aunt Susie’s mashed potatoes are the bomb, but you don’t need a mountain of food to enjoy all that goodness.
Studies show that the first couple bites of food are the most intense and satisfying – taste wise. Even with amazing desserts, the more bites you take, the magnitude of it’s greatness starts to taper down a bit after the first few bites.
6. Going Back
Are seconds bad? I don’t think so, as long as your first servings weren’t gi-normous to begin with. Just remember that you don’t need to over do it! When your body tells you to stop eating – then STOP EATING!
7. Enjoy The Company
Make a conscious effort to enjoy the people around you. Aren’t we all gathering on Thanksgiving (or whatever celebration) to spend time with each other? Yes, so enjoy your company, engage in conversation, laugh and CHEW SLOWLY. This is a guarantee that you won’t eat as much when you talk with people and give your food a chance to settle and your brain is told that you’re full (this usually takes about 15-20 minutes to occur.)
8. Chew Chew Chew
Along with chewing slowly, we should all chew each bite 20-30 times before swallowing completely! I know you think I sound crazy, but you will reduce the amount of food you eat by quite a bit. Why? Since you’re taking the time to chew your food purposely, you won’t be gulping down large portions every 5 seconds and by the time you’ve been eating for 15-20 minutes and your body is saying ‘STOP, I’M FULL’ – you won’t have consumed nearly as much food. Also, chewing this many times is the most important part of digestions since it breaks down your food to a point that once it hits your stomach, your stomach won’t need to work so hard to continue the digestion process.
9. Nix Tons of Liquids While Eating
Try not to drink a ton of liquid while you are eating. The reason is because it dilutes your digestive juices in your stomach and then it takes so much longer for your body to digest your food. This can lead to you feeling so full that you feel sick to your stomach. Give your food a chance to do its job once its in your body!
All in all, we need to demonstrate self control and we are more than capable of doing that! Take time to enjoy the food that has been prepared for you and enjoy the people surrounding you. These holidays have a purpose behind them, so focus on those purposes instead of making the food the center and most important aspect of the day.
Most importantly, when it comes to the food you eat, pray over your food and thank God for the nourishment to your bodies and protecting you from any harm. Thank Him for the family and friends that are surrounding you and the many blessings you have in your life. Thank Him for the life you have. If you are reading this, then you are alive! What a wonderful thing. On top of that, you can’t be reading this post without a computer, ipad or smart phone! Be thankful! You are blessed! Now, be a blessing to others!
What simple things do you do during holiday celebrations to avoid over-indulging?
The post Tips For Eating Healthy During The Holidays appeared first on Day2Day Joys.
]]>The post Spiced Pumpkin Pie with Flaky Pastry Crust appeared first on Day2Day Joys.
]]>
Written by Kari @ KariNewsom.com, Contributing Writer
Autumn is officially here! At least in Colorado! We are having beautiful and warm days (high 70’s to low 80’s), but the nights are cool and crisp! Leaves are turning bright yellow, orange and red – and the morning has brought a slight haze these past few days.
Typically I am more of a warm-weather person. I’m all about the sun, flip flops and being outside. That being said, I’m still a Colorado girl at heart. I like to get bundled up in chunky sweaters, wool socks and fur lined shoes. I like jumping in the Jeep with my husband and kids, all bundled up, to drive to the mountains to see the Aspen’s turning. And since we’re Colorado natives, no matter what the weather, you roll the windows down, crank the heat and put those hats on and enjoy the drive!
The other thing I like about autumn is that I start spending more time in the kitchen again, making delicious and yummy smelling foods! A few years ago I wanted to make a pumpkin pie – a pie that I’ve never liked. As in ever. I figured it was because store bought pumpkin pies were not close to one made from scratch, so I wanted to try making one COMPLETELY from scratch to see if I could like a real pumpkin pie!
I have to say, when I took the first bite of this from-scratch creation, I instantly became hooked. This is a tad more involved than other recipes – okay, a lot more involved, so make your special occasions more special by incorporating this into the menu. It is absolutely delicious! If you’re already a pumpkin pie lover – then you MUST try this and add it to your favorite’s list! It’s on ours, which is why we included it in my first cookbook – Real Food. Real Kitchen. So Good!

Spiced Pumpkin Pie with
Flaky Pastry Crust
Yield: 2-3 pies
What you need:
*for the flaky pastry crust
- 3 ¾ cups white spelt flour
- 1 tablespoon cane sugar
- 1 1/2 teaspoon sea salt
- 1/2 teaspoon baking powder, aluminum-free
- 1 ¾ cup cold real butter
- 2/3 cups ice cold filtered water
- 2 tablespoons full-fat plain yogurt
- 1 teaspoon white vinegar
*for the spiced pumpkin pie filling and topping
(this will fill at least 2 pie dishes, depending on the size you make – believe me you’ll be glad you have more than one)
- TOPPING
1/2 cup (1 stick) real butter , at room temperature - 1 cup spelt flour
- 2/3 cup packed brown sugar
- 1 cup chopped pecans
- 1 teaspoon cinnamon
- 1 teaspoon vanilla
- FILLING
1 1/2 cups packed dark brown sugar - 1 teaspoon sea salt
- 2 teaspoon cinnamon
- 4 tablespoons of freshly grated ginger
- 1/2 teaspoon ground clove
- 1/2 teaspoon allspice
- 4 eggs, from pasture-raised chickens
- 2 egg yolks, from pasture-raised chickens
- 2 teaspoon finely grated orange rind
- 29 ounces pure pumpkin, pureed
- 2 (12oz) cans evaporated milk
What You Do:
FOR THE FLAKY PASTRY CRUST:
- In a VERY large bowl, combine the flour, sugar, salt and baking powder and blend well.
- With a pastry blender – or 2 butter knives, cut in the cold butter until you have chunks the size of peas.
- In a measuring glass, mix cold water, yogurt and vinegar together. Add liquid, all at once, to the flour mixture.
- Stir quickly to distribute the liquid BUT DO NOT over mix. The consistency of the dough at this point will be a tad crumbly.
- Allow the dough to rest in the fridge for 2 hours or overnight. When the dough is ready it will break and not stretch.
- Divide into three portions and shape into discs. For the ones you won’t be using right now, wrap in wax paper and store in an freezer safe zip lock bag and place in the freezer for up to one month or in the fridge for up to 3 days. If you do freeze it, thaw it in the fridge overnight – do not leave it out on the counter to thaw out.
- When ready to use, roll out to around 12″ diameter so it will fit right in a 9″ pie dish. Transfer dough to the pie dish and trim the edge so it’s hanging over the edge by 1/2″. Fold over the edge and shape as desired. With a fork, prick the bottom and sides of the crust and place in the freezer for 10 minutes.
- To “blind bake” the crust, place a piece of parchment paper in the pie dish, on top of the crust and fill with dry beans so it’s weighted down. Place pie crust on a cookie sheet and bake for 30 minutes at 350F degrees. After 30 minutes, remove the parchment paper and beans and bake for 5 more minutes. Remove from the oven and cool before placing any filling inside.
For Spiced Pumpkin Pie Filling and Topping:
- Preheat oven to 425F degrees.
- Combine all the TOPPING ingredients in a medium size bowl and set aside.
- Combine all the FILLING ingredients in a large bowl and whisk well. Pour this mixture into the cooled down pie crusts.
- Bake pies for 15 minutes. Reduce the oven temp to 350F degrees and bake for an additional 30 minutes.
- Remove from the oven and sprinkle the topping on both pies. Return to the oven and bake for 15 minutes or until a knife inserted in the center of the pie comes out clean. If you find the edges begin to burn while finishing the bake time, place foil over the edges to during those last 15 minutes of baking.
SUBSTITUTIONS:
- White spelt flour: whole white wheat, whole wheat pastry, unbleached & unenriched white flour
- Cane sugar: coconut sugar, palm sugar
- Full-fat plain yogurt: full-fat sour cream, crème fraiche
- Brown sugar: coconut sugar or cane sugar with 2 tablespoons of molasses added
- Freshly grated ginger: use 1 teaspoon ground ginger if you can’t get fresh ginger
HEALTH MADE EASY:
if using canned pumpkin puree, choose organic | make your own puree using “pie pumpkins”, which is a pretty simple process | since it makes 3 pies, you can either bless someone else with one or freeze them for up to a couple months | the fresh ginger really makes a difference in the taste, I prefer fresh over ground
What is your favorite autumn recipe that makes you smile from ear to ear?
The post Spiced Pumpkin Pie with Flaky Pastry Crust appeared first on Day2Day Joys.
]]>The post Whipped Naked Magnesium Butter appeared first on Day2Day Joys.
]]>
Written by Kari @ Living Strong Wellness, Contributing Writer
It seems these days that good, restful sleep is hard to come by. Not only with adults, but children as well. As this is not an exciting fact, it is a reality and I believe we have a wonderful variety of natural options to help us.
For instance, there are herbal teas, essential oils, supplements and something I want to share with you today – magnesium butter.
Ahhh, this stuff is amazing. Why do I love it so much? Because it provides our body something that is lacking so severely in today’s generation – magnesium.
There are many benefits of healthy magnesium levels. To mention just a few:
- Magnesium helps muscle and nerve function. Serving as calcium’s vital partner, magnesium will allow calcium to do it’s job to build muscle growth.
- Magnesium plays an important role in gut health. Without good levels of magnesium aid in the absorption of copper, potassium, vitamin D and zinc. It also helps regulate blood sugar levels, which will lessen the risk for diabetes.
- Magnesium can help lower blood pressure or keep blood pressure low by allowing your muscles to relax, contract and push blood through the arteries and veins without force.
- Magnesium helps melatonin (the sleep regulating hormone) stay balanced, which allows for more peaceful sleep.
- Magnesium can help balance stress hormones, eliminating stress and tension and allowing for a more relaxed state of being (which in return will help with rest as well).
The list goes on and on, but those five points alone should get people’s attention when it comes to supplementing with safe sources of magnesium. Data from 2012 stated that 48% of the American population, 79% over the age of 55, were deficient in magnesium. This isn’t good, especially when it is such a vital mineral and nutrient for our bodies.
Along with taking a liquid mineral supplement, we use magnesium butter every evening before we go to bed. We just spread a thin layer either behind our knees or on our inner arm (where the skin in thin) and that’s it! I have made this for several family members and friends and they all love it and can tell a huge difference in their quality of sleep (especially the adults…go figure)!
The recipe is simple and last a long time on the shelf! We always use it, so we go through a 4 ounce container in about 3-4 months (three of us use it). Since the recipe doesn’t contain water, it would probably last a good 6-8 months if kept clean (wash hands before using the butter) and can always be extended to 12-18 months or longer if refrigerated!
You can make this recipe ‘naked’, meaning adding no essential oils, or you can add your favorite calming and sleep inducing oils such as lavender, cedarwood, vetiver, ylang ylang or sandalwood! If you are using therapeutic grade essential oils, only use a total of 40 drops of oils combined for this amount, which is one cup.
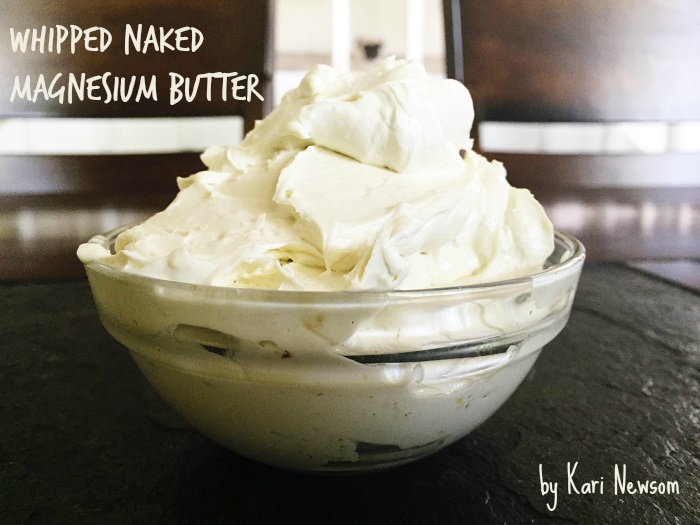
The end result with the color will vary depending on the type of shea butter you use. We use a raw shea butter that has a deep, deep yellow tone and rich scent and amazing benefits that trump refined and bleached shea butters.
Whipped Naked Magnesium Butter
What You’ll Need:
- 3/8 cups virgin coconut oil
- 3/8 cups raw shea butter
- ¼ cup magnesium oil (how to make it yourself)
- ¼ cup almond or jojoba oil
What You’ll Do:
- Melt the virgin coconut oil and raw shea butter over low heat just until it’s all liquid.
- Add the almond or jojoba oil, pour into a medium glass bowl and allow to cool to room temp. You can leave on the counter for an hour or so or you can stick it in the fridge to speed up the process. I like the fridge :o)
- Using a hand mixer or immersion blender, take your room temp oil mix, turn on the blender and slowly add the room temp magnesium oil.
- Mix or blend this until it is creamy. You can’t have any separation, which means, no water droplets anywhere. This can take a few minutes if the oils are room temp. If they are too warm, it will take longer.
- Place the bowl in the fridge for around 30 minutes. You want to see it starting to harden and solidify.
- Once it’s solidifying, remove the bowl and using the mixer or blender with a whisk attachment, whip the mixture until light and fluffy! If you are adding essential oils, do it during this step.
- Store in a glass jar or container and place in a cool, dark place.
I hope you enjoy the wonderful benefits of this magnesium butter that is safe for you and your entire family!
What is your favorite natural solution for calming and peaceful sleep?
The post Whipped Naked Magnesium Butter appeared first on Day2Day Joys.
]]>The post The Succesful Transition from Summer to School appeared first on Day2Day Joys.
]]>
Written by Kari, Contributing Writer
Getting ready for the new school year means many things in our home. Our sleep schedule has to change, our chores change, we supplement differently and we have to ease back into a daily routine.
So, here’s how we make the transition:
How do you transition your kids back into the school season?
The post The Succesful Transition from Summer to School appeared first on Day2Day Joys.
]]>The post Tropical Delight Smoothie appeared first on Day2Day Joys.
]]>
Tropical Delight Smoothie
What you need:
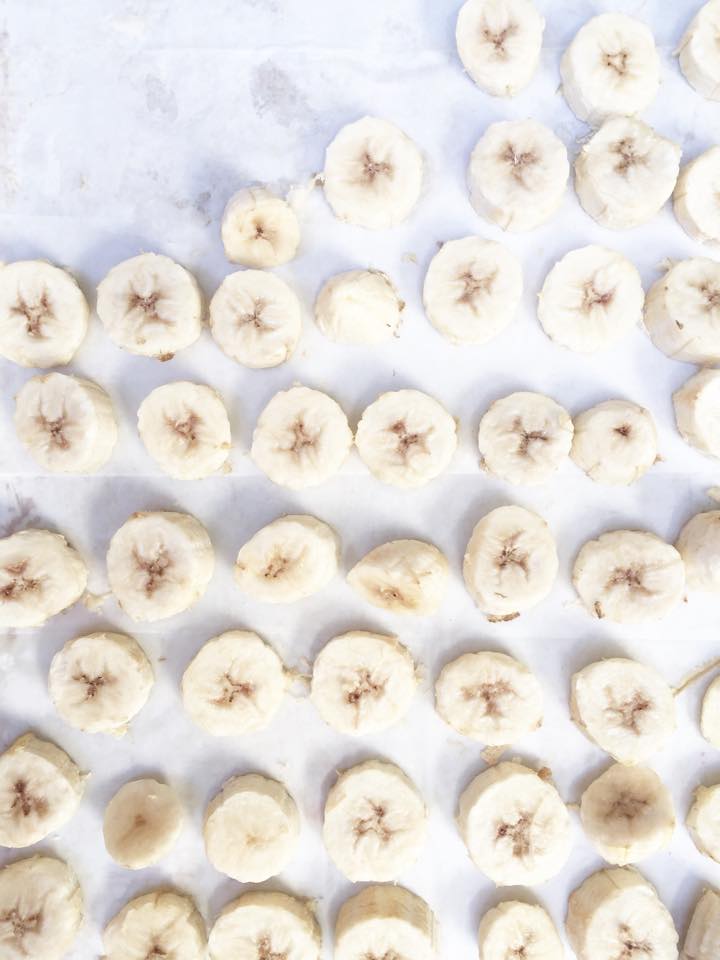
1 banana, sliced (either fresh or frozen)
1/2 cup pineapple, fresh or frozen
1/2 cup ice (this is optional and typically used when the fruit you are using isn’t frozen, if you are using frozen fruit, it usually is plenty cold and you won’t need the ice)
What to do:
What is your family’s favorite smoothie?
The post Tropical Delight Smoothie appeared first on Day2Day Joys.
]]>The post Quiet Nights! Stop Snoring Naturally appeared first on Day2Day Joys.
]]>
Written by Kari, Contributing Writer
Sometimes certain subjects aren’t exciting to talk about, but they affect our lives in more ways than we know. One of those is snoring. Yes, snoring and this is something that I have had to deal with in my 15 years of marriage. After 15 years of trying almost every way to eliminate this problem, it is FINALLY solved and we’ve had two months of snore-free nights. Now, I want to share with you how we got to this amazing place of peaceful and restful sleep – naturally!
First, lets look at some realistic statistics on this topic:
- 30% of people 30 or older snore
- 40% of people 40 or older snore
- 19% of adult females snore
- 59% of people who say their partner snores
- 5.6% of children snore habitually
- 28% of people who say they experience sleep apnea
- 38 decibels – the average decibel level of a snore
- Approximately 9% of all men and 4% of all women between the ages of 30 and 60 are affected by sleep apnea.
- Sleep apnea may occur in as much as 20 to 40 percent of the adult population that are snorers.
- The partner of someone afflicted with sleep apnea loses approximately one hour of sleep per evening and may wake up as many as 21 times per hour, a side-effect of apnea known as “Spousal Arousal Syndrome”.
- People that are suffering from obstructive sleep apnea are as much as six times more likely to be involved in a car crash then those without sleep disorders. This is due to the fact that they are drowsy from the condition.
- According to the National Highway Traffic Safety Administration, drowsy driving is responsible for at least 100,000 automobile crashes as well as 1,550 fatalities per year.
Now that we know this, isn’t it time we do something about it? On top of it, do something about it naturally.
Many of you already know the wonderful benefits of using therapeutic grade essential oils. Now, for me, I was always skeptical when it came to the properties of essential oils, although I’ve used them over the course of the past 22 years – mostly just for the scent, not the health benefits.
A few months ago, I came to a point I was pretty fed up with my husband’s snoring. Not fed up with my husband, but with the nearly sleepless nights I was getting because of this issue. Not only that – but sleep apnea had become a part of this issue, which is never fun. Laying awake at night, listening to the person you love stop breathing for short periods of time, waiting to hear them start breathing again. I also knew how this was affecting him. Read the statistics above if you need a reminder.
As a last resort, I asked a friend who used essential oils if there were any known oils that would help with snoring issues. She went through her book and gave me the names of some oil blends that were said to help eliminate snoring. I went ahead and ordered them along with the handbook, still skeptical, but desperate for something to work. Something that wouldn’t involve pills, surgery or machines.
Before we began applying the oils, I read through the essential oils handbook twice to make sure I had knowledge before blindly slathering therapeutic grade oils over my husband. I learned the why and how of using oils, the application, the cautions and everything I needed to know to understand why these should work.
Finally, the experimenting again. That’s how I looked at it – an experiment and I only gave it a week. I didn’t even jump in with both feet – I guess I was just hoping for the best and going for it.
Well, long story short, I began applying these 3 oil blends alternately (very important when using blends) every night on my husband’s chest and back and I am happy to say that we have had two months of snore-free nights! At first I thought it was a fluke, so we decided to stop using the oils for a couple nights, but the snoring returned, so we went back to using the oil blends.
Since seeing the results personally of using therapeutic grade essential oils, I pulled out all the books and information I’ve collected over the past 22 years and have had my nose in those books drinking in everything I’ve overlooked all these years. I am now also taking classes through a highly respectable certification program and have become a distributor of certified therapeutic grade essential oils through a non-MLM company.
I chose this company because it was the brand I first used and saw results with and I liked the fact that I can offer them to my clients a lower price than those from other companies since all middle men are removed. They are a wonderful, small company that sells high quality, therapeutic grade essential oils that work wonderfully!
If you would like to try to get some much needed rest in your home, you can take the steps we took and purchase our “Quiet Nights ~ Stop The Snoring Kit”! The kit is already a savings of 25% and you can get an extra 15% off by using the coupon code STOPSNORINGNOW!
We hope you find much success in using these oils as we did!
What are your favorite essential oil blends for natural remedies?
statistics gathered from:
http://www.exploringsnoring.com/snoring-statistics/
http://www.statisticbrain.com/snoring-statistics/
The post Quiet Nights! Stop Snoring Naturally appeared first on Day2Day Joys.
]]>The post All Purpose Citrus Cleaner appeared first on Day2Day Joys.
]]>Cleaning.
We all have to do it and if you think about it, this is a constant activity in our lives. Whether we are personally the ones cleaning our homes or someone else is, the fact is, you have to use cleaners.
Unfortunately, the cleaners most people have in their home are extremely toxic and dangerous to our health. If you think about how often cleaners are used in our home, you can get a good picture of how many chemicals you have floating around, embedded in the carpet, bedding, towels and clothes.
Our homes are letting off chemical vapors every second of the day. For instance, chemicals from paint, new carpet, furniture and all the cleaning products, air fresheners and perfumes we use – just to name a few.
 That’s a lot of foreign substance going into our body every single day. Thankfully our bodies were wonderfully created to be able to keep us from being badly affected by these kinds of toxins. Unfortunately, we are in a state of toxic overload in this generation and our bodies are having a harder time keeping these chemicals from harming us.
Research shows how these chemical-laden products can cause issues in the central nervous system, in the lungs, neurologically and so much more. I don’t know about you, but I don’t want any part of my body harmed by the stuff I clean with.
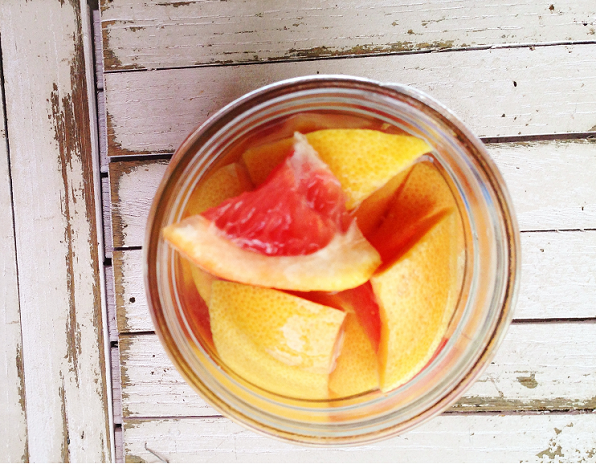 One of the best ways we can lessen the impact of toxic chemical exposure is by making your own cleaning products. It’s easy, simple and extremely inexpensive. Recipes bombard the Google search pages and so many contain 5 ingredients or less.
Our home has been commercial cleaning product free for about 8 years now and I’ll never go back to using that toxic stuff. My house gets just as clean, if not cleaner, by using simple, homemade cleaners using ingredients such as baking soda, borax, lemon juice, olive oil, vinegar, liquid soap and essential oils. The recipe I am sharing today is for an all purpose cleaner and it might be one of the simplest recipes to make. It uses white vinegar and grapefruit (with some added oranges, lemons and limes if I have any). That’s it. I appreciate that the natural elements of the grapefruit contain wonderful cleaning and sanitizing agents. The citrus scent also beats any commercial product out there! There is probably a lingering scent of the vinegar, although I’m so use to using it, i don’t notice it. If so, and you don’t like that, you can add a high quality grade essential oil that will help with the scent as well as the antimicrobial properties of the cleanser.
All Purpose Citrus Cleaner:
What You Need:
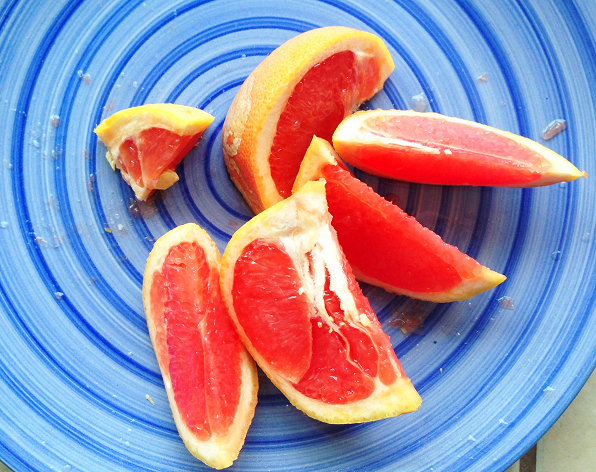
- 2 organic grapefruits (and any organic oranges or lemons peels/flesh you may have)
- white vinegar (approximately 3+ cups)
- you can also just use the peels so you don’t have to waste those every time you eat citrus fruit
What You Do:
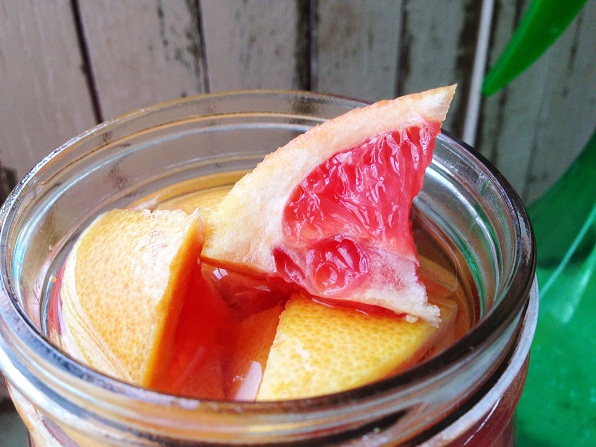
- Slice the grapefruit or oranges.
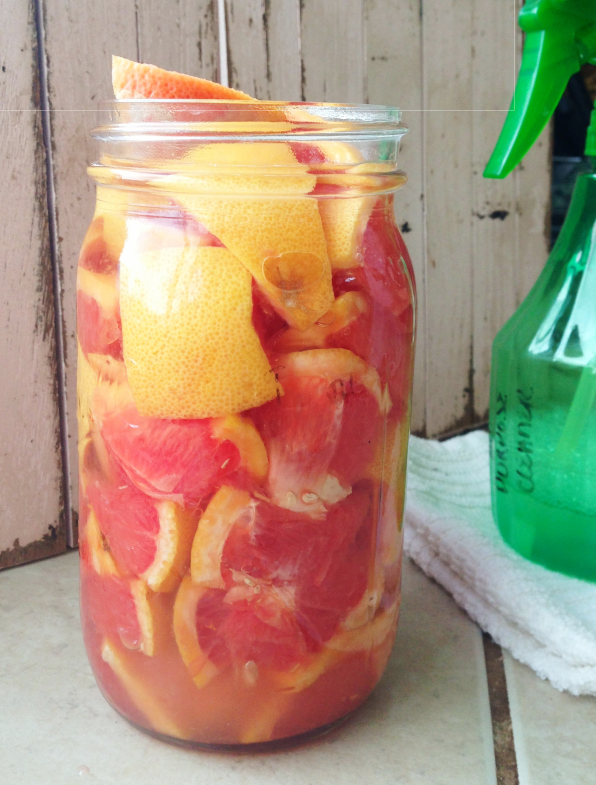
- Place all of them in a 1 quart glass jar. If you’re like me and want bulk, use a larger jar, fill it with the citrus fruits then fill with vinegar.
- Fill the jar with white vinegar, leaving about 1” at the top.
- Set jar in a windowsill for at least 2 weeks to allow the vinegar to pull out all the good stuff from the citrus fruit. If you are using just the peels, allow it to steep a week or two longer.
- Once it’s ready, strain the vinegar and then squeeze the grapefruit (while in the strainer) to get all the juice out.
- Use as a concentrate. I like to use a 1:2 ratio water to citrus liquid. Pour into a spray bottle and store any extra in a glass jar in a cool, dark place.
- Use as an all purpose cleaner on counter tops, porcelain fixtures in the bathroom, tile, walls, etc. If you are unsure about finish on your walls or furniture, test a small area first before using. I do not use it on mirrors – the oils in it will cause streaking.
- Breathe in. Ahhhhh.
There you have it. A simple, easy, yummy-smelling citrus all purpose cleaner! I promise you – once you switch over to making your own products, you’ll love the results. Not only in your home, but in your pocketbook as well! The best benefit will be the fact that you aren’t harming your family’s health every time you clean. It makes cleaning worth while!
Do you make your own safe cleaning products? What is your favorite?
The post All Purpose Citrus Cleaner appeared first on Day2Day Joys.
]]>The post Protein Packed Nut Butter Bites appeared first on Day2Day Joys.
]]>
Written by Contributing Writer, Kari at Living Strong, Health & Wellness
Snack time!
Personally, I’m not a big “snacker”. I can go meal to meal without needing any extra food to keep me going. Although, having a family, I need to have a plan on hand for our meals and snacks and then I need to make sure they are ready and available to eat!
My kids, on the other hand, seem to need a snack every 30 minutes. I can understand why since they are on the go, non-stop, active kids. This can present a problem when you are wanting to feed your family healthy foods that nourish the body. Unfortunately, the quick and convenient, grab and go processed options you find on the grocery store shelves don’t make the cut for me. It’s hard enough to make sure they have nourishing and healthy lunches everyday – then to add in snacks to mix, that means more creative ideas are needed!
I know it would be easier to go this route, but I’ve spent too many years building a strong foundation of health in my family, this is one area I don’t want to skimp on. This means I need to be creative in the kitchen when it comes to snacks.
I have a long list of snacks that we rely on, but one of our favorites are these Nut Butter Bites! The kids love helping with them as well – which I think makes them even more enjoyable. Kids love helping and being a part of creating the food they eat.
These amazingly healthy bites are a great snack for my active kids and only a couple are needed for them to feel satisfied. Packed with protein from the nut butter, a healthy source of energy from raw honey, good and healthy fat from the coconut and extremely low in sodium – you can ‘t go wrong with these delicious treats! They are more like a dessert than a snack. That’s always a plus!
To top off these already great nut butter bites, roll them in sucanat (unrefined cane sugar), shredded coconut, cocoa powder or mini chocolate chips (we like Enjoy Life! allergen-free brand). Hands down, these are healthier than any overly processed and refined ‘snack’ you can get off a shelf.
Sure, there’s a few minutes of time involved, but isn’t your family worth it? Of course they are!
Along with many other healthy snacks, appetizers, beverages, main dishes and desserts, this recipe can be found in my cookbook, Real Food. Real Kitchen. So Good! I hope you and your family enjoy these as much as we do!
- ½ cup organic natural peanut butter (no added ingredients, just peanuts) or nut butter of choice
- ½ cup organic raw honey
- ½ – 1 cup organic unsweetened coconut, finely shredded
- ⅓ cup organic mini dark chocolate chips, soy-free (we like Enjoy Life! brand, allergen-free)
- sucanat (unrefined sugar) for rolling the bites (other options: you can roll them in coconut, chocolate chips or cocoa powder)
- In a medium size bowl, mix the peanut butter and honey until combined thoroughly.
- Add the chocolate chips. You can add more or less according to your taste (I always add the larger amount).
- Add the coconut in ¼ cup amounts until the consistency reaches a thick, yet semi-sticky state.
- You don’t want it so sticky that you can’t roll it, but you don’t want it so dry that it wont hold together. Find the happy medium.
- Once you are able to roll them and they still have some stickiness to them, roll into balls and then roll in the sucanat.
- Place on wax or parchment paper on a baking sheet or plate.
- Refrigerate for a while so they can harden up a bit, transfer to a glass jar and keep in the fridge.
What is your favorite healthy snack?
The post Protein Packed Nut Butter Bites appeared first on Day2Day Joys.
]]>

