The post Spiced Pumpkin Pie with Flaky Pastry Crust appeared first on Day2Day Joys.
]]>
Written by Kari @ KariNewsom.com, Contributing Writer
Autumn is officially here! At least in Colorado! We are having beautiful and warm days (high 70’s to low 80’s), but the nights are cool and crisp! Leaves are turning bright yellow, orange and red – and the morning has brought a slight haze these past few days.
Typically I am more of a warm-weather person. I’m all about the sun, flip flops and being outside. That being said, I’m still a Colorado girl at heart. I like to get bundled up in chunky sweaters, wool socks and fur lined shoes. I like jumping in the Jeep with my husband and kids, all bundled up, to drive to the mountains to see the Aspen’s turning. And since we’re Colorado natives, no matter what the weather, you roll the windows down, crank the heat and put those hats on and enjoy the drive!
The other thing I like about autumn is that I start spending more time in the kitchen again, making delicious and yummy smelling foods! A few years ago I wanted to make a pumpkin pie – a pie that I’ve never liked. As in ever. I figured it was because store bought pumpkin pies were not close to one made from scratch, so I wanted to try making one COMPLETELY from scratch to see if I could like a real pumpkin pie!
I have to say, when I took the first bite of this from-scratch creation, I instantly became hooked. This is a tad more involved than other recipes – okay, a lot more involved, so make your special occasions more special by incorporating this into the menu. It is absolutely delicious! If you’re already a pumpkin pie lover – then you MUST try this and add it to your favorite’s list! It’s on ours, which is why we included it in my first cookbook – Real Food. Real Kitchen. So Good!

Spiced Pumpkin Pie with
Flaky Pastry Crust
Yield: 2-3 pies
What you need:
*for the flaky pastry crust
- 3 ¾ cups white spelt flour
- 1 tablespoon cane sugar
- 1 1/2 teaspoon sea salt
- 1/2 teaspoon baking powder, aluminum-free
- 1 ¾ cup cold real butter
- 2/3 cups ice cold filtered water
- 2 tablespoons full-fat plain yogurt
- 1 teaspoon white vinegar
*for the spiced pumpkin pie filling and topping
(this will fill at least 2 pie dishes, depending on the size you make – believe me you’ll be glad you have more than one)
- TOPPING
1/2 cup (1 stick) real butter , at room temperature - 1 cup spelt flour
- 2/3 cup packed brown sugar
- 1 cup chopped pecans
- 1 teaspoon cinnamon
- 1 teaspoon vanilla
- FILLING
1 1/2 cups packed dark brown sugar - 1 teaspoon sea salt
- 2 teaspoon cinnamon
- 4 tablespoons of freshly grated ginger
- 1/2 teaspoon ground clove
- 1/2 teaspoon allspice
- 4 eggs, from pasture-raised chickens
- 2 egg yolks, from pasture-raised chickens
- 2 teaspoon finely grated orange rind
- 29 ounces pure pumpkin, pureed
- 2 (12oz) cans evaporated milk
What You Do:
FOR THE FLAKY PASTRY CRUST:
- In a VERY large bowl, combine the flour, sugar, salt and baking powder and blend well.
- With a pastry blender – or 2 butter knives, cut in the cold butter until you have chunks the size of peas.
- In a measuring glass, mix cold water, yogurt and vinegar together. Add liquid, all at once, to the flour mixture.
- Stir quickly to distribute the liquid BUT DO NOT over mix. The consistency of the dough at this point will be a tad crumbly.
- Allow the dough to rest in the fridge for 2 hours or overnight. When the dough is ready it will break and not stretch.
- Divide into three portions and shape into discs. For the ones you won’t be using right now, wrap in wax paper and store in an freezer safe zip lock bag and place in the freezer for up to one month or in the fridge for up to 3 days. If you do freeze it, thaw it in the fridge overnight – do not leave it out on the counter to thaw out.
- When ready to use, roll out to around 12″ diameter so it will fit right in a 9″ pie dish. Transfer dough to the pie dish and trim the edge so it’s hanging over the edge by 1/2″. Fold over the edge and shape as desired. With a fork, prick the bottom and sides of the crust and place in the freezer for 10 minutes.
- To “blind bake” the crust, place a piece of parchment paper in the pie dish, on top of the crust and fill with dry beans so it’s weighted down. Place pie crust on a cookie sheet and bake for 30 minutes at 350F degrees. After 30 minutes, remove the parchment paper and beans and bake for 5 more minutes. Remove from the oven and cool before placing any filling inside.
For Spiced Pumpkin Pie Filling and Topping:
- Preheat oven to 425F degrees.
- Combine all the TOPPING ingredients in a medium size bowl and set aside.
- Combine all the FILLING ingredients in a large bowl and whisk well. Pour this mixture into the cooled down pie crusts.
- Bake pies for 15 minutes. Reduce the oven temp to 350F degrees and bake for an additional 30 minutes.
- Remove from the oven and sprinkle the topping on both pies. Return to the oven and bake for 15 minutes or until a knife inserted in the center of the pie comes out clean. If you find the edges begin to burn while finishing the bake time, place foil over the edges to during those last 15 minutes of baking.
SUBSTITUTIONS:
- White spelt flour: whole white wheat, whole wheat pastry, unbleached & unenriched white flour
- Cane sugar: coconut sugar, palm sugar
- Full-fat plain yogurt: full-fat sour cream, crème fraiche
- Brown sugar: coconut sugar or cane sugar with 2 tablespoons of molasses added
- Freshly grated ginger: use 1 teaspoon ground ginger if you can’t get fresh ginger
HEALTH MADE EASY:
if using canned pumpkin puree, choose organic | make your own puree using “pie pumpkins”, which is a pretty simple process | since it makes 3 pies, you can either bless someone else with one or freeze them for up to a couple months | the fresh ginger really makes a difference in the taste, I prefer fresh over ground
What is your favorite autumn recipe that makes you smile from ear to ear?
The post Spiced Pumpkin Pie with Flaky Pastry Crust appeared first on Day2Day Joys.
]]>The post All Shook Up: Fun Homemade Whipped Cream appeared first on Day2Day Joys.
]]>
Written by KT @ One Organic Mama, Contributing Writer
I’ll be honest, I’m not a huge fan of sugaring up the kids with whipped cream and candy – BUT – this was fun, they had to work for their whipped cream  AND it was super easy.
When I was in my last few weeks of pregnancy, a few months ago and getting outside with the kids for physical activity has been a challenge! It is easy to send them outside – but they like when they have a task or when I am out there with them  this was a super fun task – and they got to enjoy their hard work!!!
Mason Jar Whipped Cream
- 1 mason jar with a lid
- 2-3 TBS of (organic) whipping cream
- TINY sprinkle of (organic, raw) sugar *or stevia
- TINY drop of vanilla extract
- LOTS AND LOTS OF SHAKING.
I sent the boys to the yard to run and shake their jars… expending any energy that could possibly be gained with the sugar in the whipped cream. They had a blast!! It might take some adult shaking – but all the kids got their jars pretty close  and ready to be put on some FRESH strawberries that are just coming into season!
It made a great addition to our movie night on Friday!! Because their little hands are warm, and because they are going to have to shake it longer than an adult would (or a mixer would) – chill the cream and jars well (I put both in the freezer).
What’s the best thing you’ve made in a mason jar?
The post All Shook Up: Fun Homemade Whipped Cream appeared first on Day2Day Joys.
]]>The post Quick and Easy Homemade Brown Sugar appeared first on Day2Day Joys.
]]>It’s true that too much sugar isn’t good for you, but I’m not likely to completely give up on the occasional sweet treat.
Instead, we focus on limiting sugar in our day to day diets and choosing healthier alternatives to processed desserts.
Making our own treats is healthier and it saves us money to boot. I’ve also found that I can simplify my grocery shopping and save more money by learning to make own of the basics for many treats at home.
Costco (one of my favorite stores!) sells organic sugar in ten pounds bags (a lot, I know, but it lasts a long time and freezes well) which I then use for regular sugar, powdered sugar, and brown sugar when I need it.
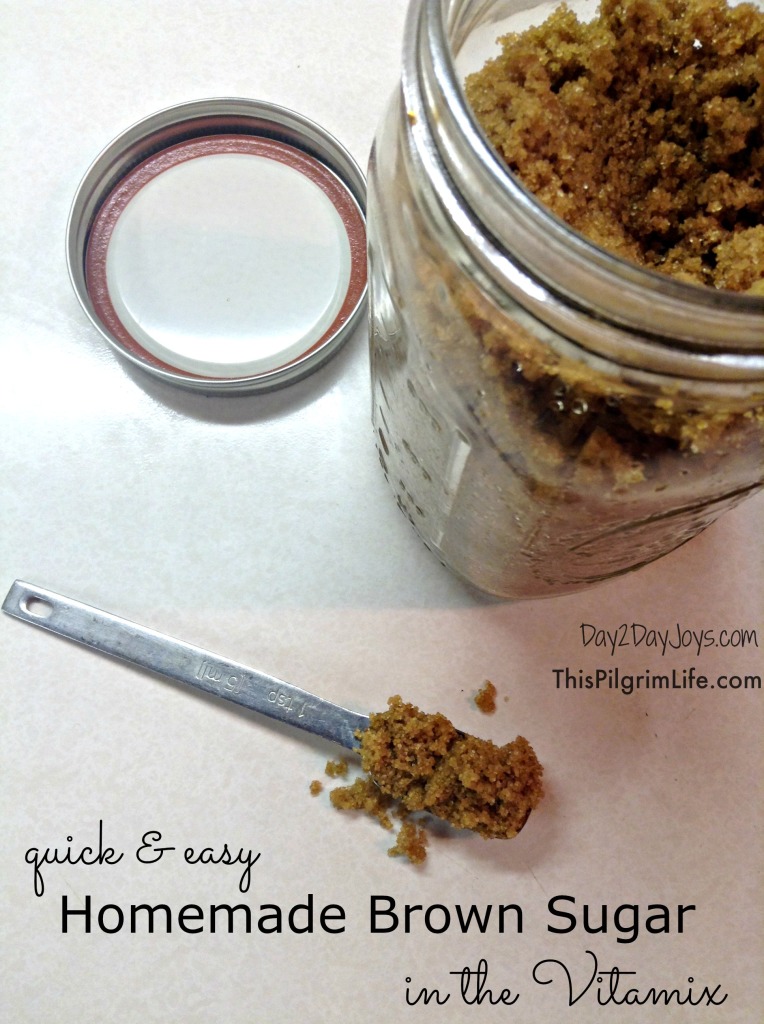
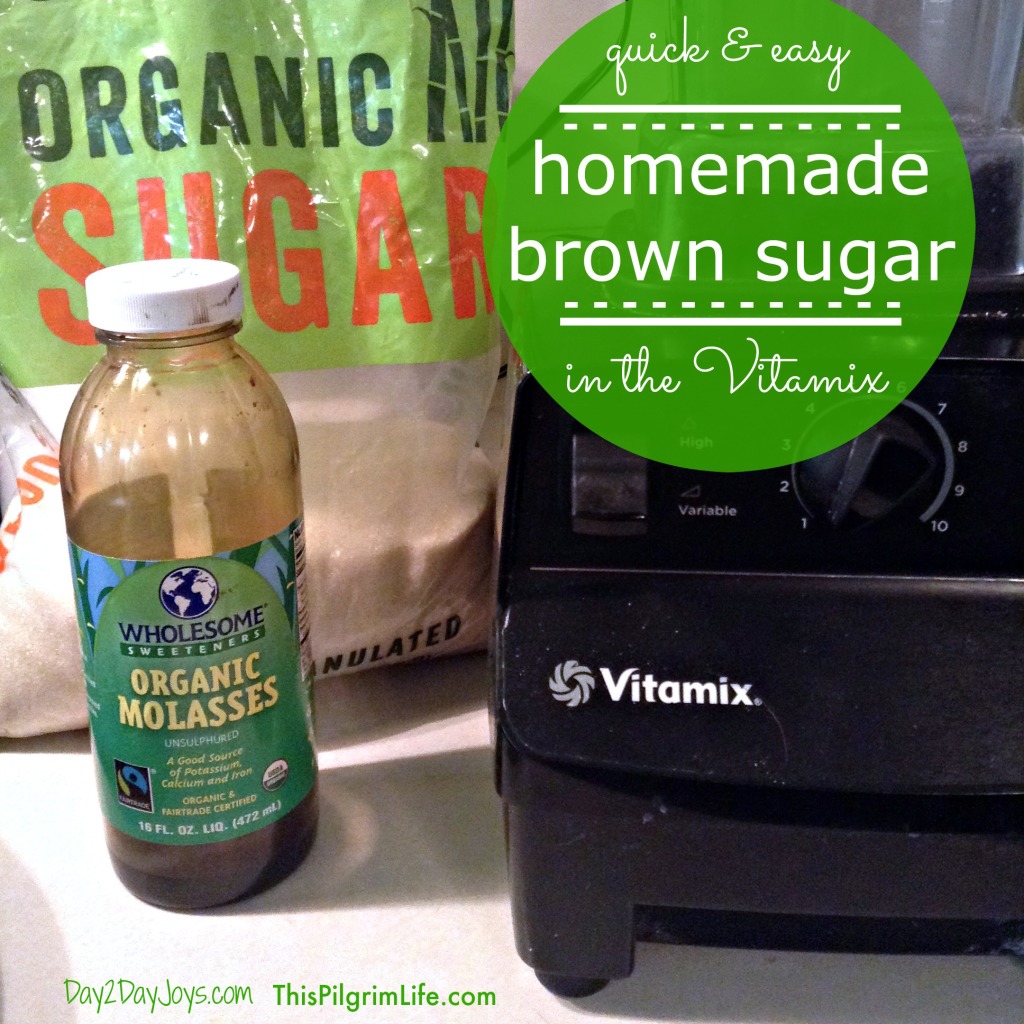
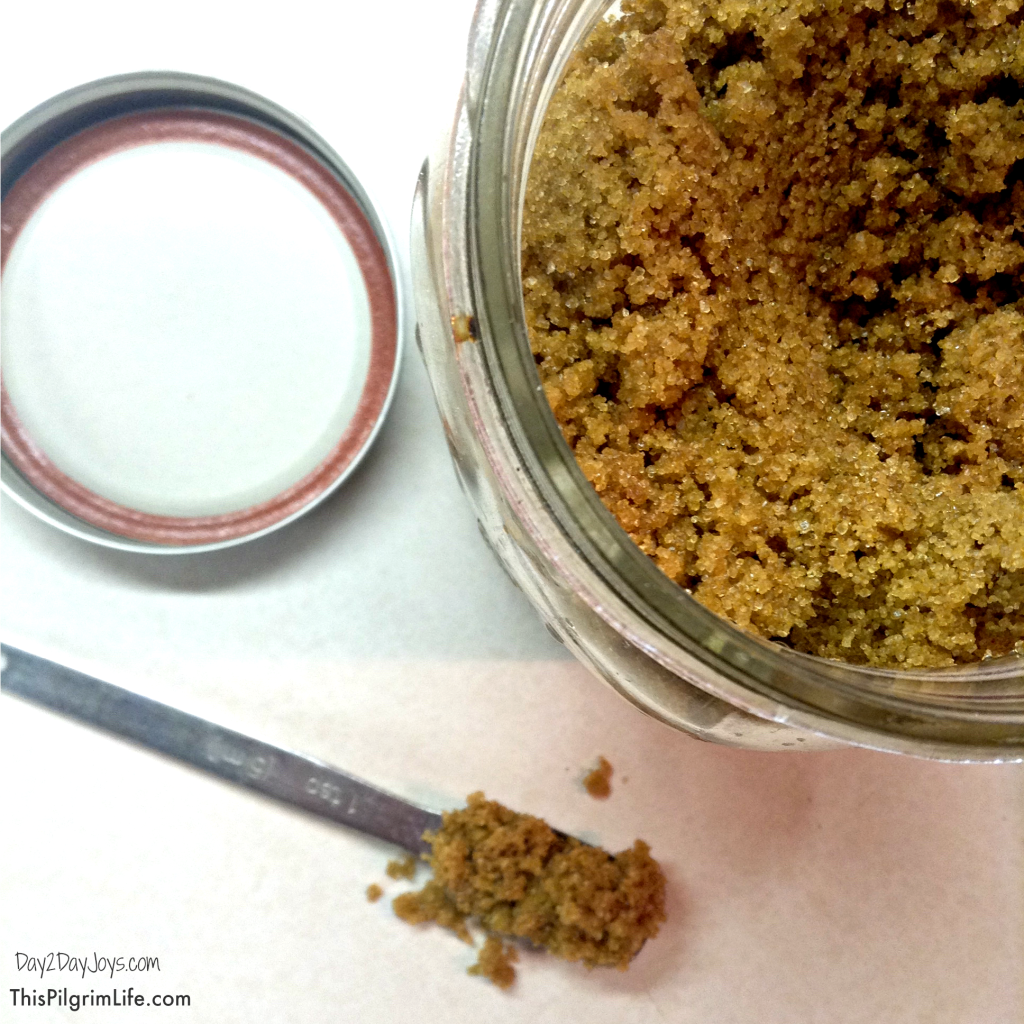
Making brown sugar takes about 5 minutes. It really is a super simple process. I’ve made it before in my stand mixer and that works well, but I’ve found I get a better consistency in my Vitamix— and I don’t have to pull out my mixer.
*Note from Rachel: you can also use this same method using xylitol for a sugar free version
Making Brown Sugar in the Vitamix
Add 2 cups of granulated sugar into the Vitamix container. Turn the mixer to a 5-7 speed (about medium-high) or until the sugar starts to move. Slowly drizzle 3 tablespoons* molasses through the opening in the lid. Mix until the sugar takes on a uniform brown color.
IMPORTANT: Use the tamper to make sure the sugar is being evenly distributed throughout the container. Turn off the Vitamix and use a long spatula once during mixing to redistribute the sugar at the bottom of the container.
*You can adjust the amount of molasses you use to make a lighter or darker brown sugar.
One of the best things about learning to make ingredients and staples at home is no longer needing to run to the store for everything when you realize you’ve run out.
Plus, things just usually taste better when they’re homemade!
What is one kitchen staple that you’ve learned to make at home?
The post Quick and Easy Homemade Brown Sugar appeared first on Day2Day Joys.
]]>The post Protein Packed Nut Butter Bites appeared first on Day2Day Joys.
]]>
Written by Contributing Writer, Kari at Living Strong, Health & Wellness
Snack time!
Personally, I’m not a big “snacker”. I can go meal to meal without needing any extra food to keep me going. Although, having a family, I need to have a plan on hand for our meals and snacks and then I need to make sure they are ready and available to eat!
My kids, on the other hand, seem to need a snack every 30 minutes. I can understand why since they are on the go, non-stop, active kids. This can present a problem when you are wanting to feed your family healthy foods that nourish the body. Unfortunately, the quick and convenient, grab and go processed options you find on the grocery store shelves don’t make the cut for me. It’s hard enough to make sure they have nourishing and healthy lunches everyday – then to add in snacks to mix, that means more creative ideas are needed!
I know it would be easier to go this route, but I’ve spent too many years building a strong foundation of health in my family, this is one area I don’t want to skimp on. This means I need to be creative in the kitchen when it comes to snacks.
I have a long list of snacks that we rely on, but one of our favorites are these Nut Butter Bites! The kids love helping with them as well – which I think makes them even more enjoyable. Kids love helping and being a part of creating the food they eat.
These amazingly healthy bites are a great snack for my active kids and only a couple are needed for them to feel satisfied. Packed with protein from the nut butter, a healthy source of energy from raw honey, good and healthy fat from the coconut and extremely low in sodium – you can ‘t go wrong with these delicious treats! They are more like a dessert than a snack. That’s always a plus!
To top off these already great nut butter bites, roll them in sucanat (unrefined cane sugar), shredded coconut, cocoa powder or mini chocolate chips (we like Enjoy Life! allergen-free brand). Hands down, these are healthier than any overly processed and refined ‘snack’ you can get off a shelf.
Sure, there’s a few minutes of time involved, but isn’t your family worth it? Of course they are!
Along with many other healthy snacks, appetizers, beverages, main dishes and desserts, this recipe can be found in my cookbook, Real Food. Real Kitchen. So Good! I hope you and your family enjoy these as much as we do!
- ½ cup organic natural peanut butter (no added ingredients, just peanuts) or nut butter of choice
- ½ cup organic raw honey
- ½ – 1 cup organic unsweetened coconut, finely shredded
- ⅓ cup organic mini dark chocolate chips, soy-free (we like Enjoy Life! brand, allergen-free)
- sucanat (unrefined sugar) for rolling the bites (other options: you can roll them in coconut, chocolate chips or cocoa powder)
- In a medium size bowl, mix the peanut butter and honey until combined thoroughly.
- Add the chocolate chips. You can add more or less according to your taste (I always add the larger amount).
- Add the coconut in ¼ cup amounts until the consistency reaches a thick, yet semi-sticky state.
- You don’t want it so sticky that you can’t roll it, but you don’t want it so dry that it wont hold together. Find the happy medium.
- Once you are able to roll them and they still have some stickiness to them, roll into balls and then roll in the sucanat.
- Place on wax or parchment paper on a baking sheet or plate.
- Refrigerate for a while so they can harden up a bit, transfer to a glass jar and keep in the fridge.
What is your favorite healthy snack?
The post Protein Packed Nut Butter Bites appeared first on Day2Day Joys.
]]>The post Chocolate Avocado Popsicles appeared first on Day2Day Joys.
]]>
The middle of summer means a lot of heat, sun and hopefully fun.
In the midst of summer business of swim lessons, vacation Bible school, and staying up later, we love to have fun outside. We go to splash pads to keep cool, play in the back yard with the hose and often go for bike rides in the evening as the sun is setting.
Always remember to use a good sunscreen or cover up in the sun to prevent skin damage.
Another thing we love is a delicious, healthy popsicle. If you’re wanting a healthy choice, you don’t have to get ones from the grocery store full of unhealthy sweeteners and the bright colors. You can easily make your own!
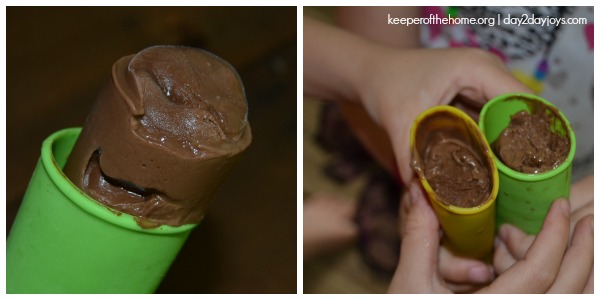
If you purchase some molds you can make your own popsicles over and over again. We’ve had our molds for about three years. I like the silicone push pop molds because they help with the dripping that popsicles often do in the summer months. However, if you don’t have any molds handy, you can easily make these in ice cube trays with popsicle sticks.
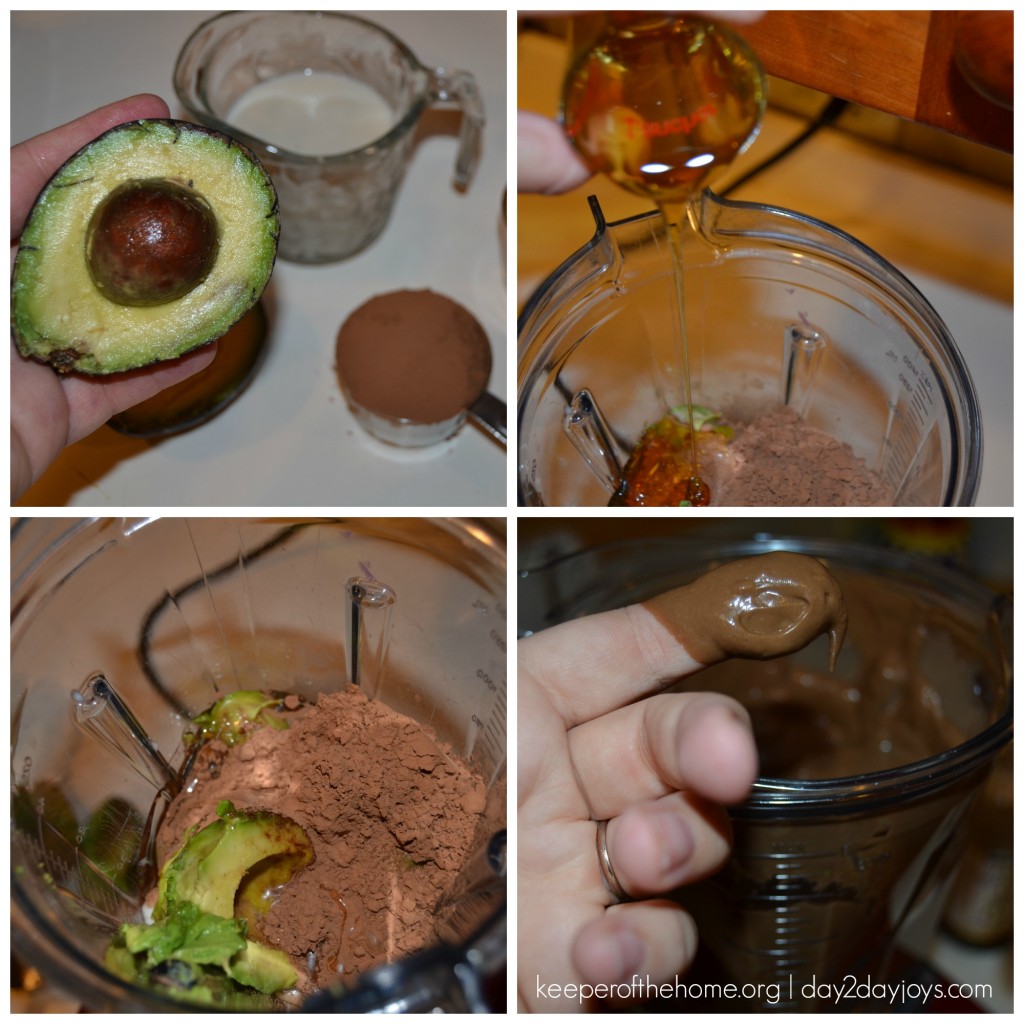
Today, I ‘d like to share with you this recipe, you can find it over at Keeper of the Home.
Do you ever make your own popsicles? What are your favorite recipes?
The post Chocolate Avocado Popsicles appeared first on Day2Day Joys.
]]>The post Jammin Strawberry Jam appeared first on Day2Day Joys.
]]>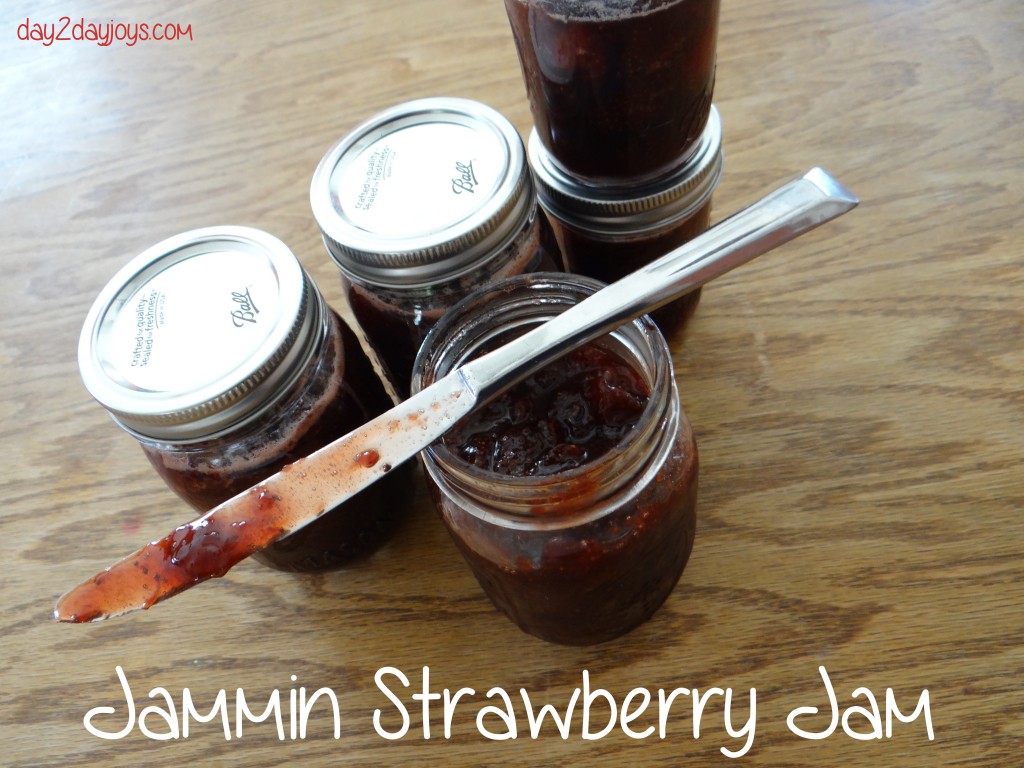
Are you guys getting overwhelmed with fresh, ripe, delicious, sugary, fruit? My goodness, spring and summer are just the best eating!!
My kiddos and I love to go picking. We pick anything we can get our hands on (in Massachusetts… strawberries, cherries, blueberries, peaches, apples, etc). Last year I canned tomatoes and applesauce… this year I wanted to try jam. We LOVED the results of this jammin jam!
How to make Jammin Starwberry Jam:
What you need:
- 10 cups of cleaned, de-topped, mashed, strawberries
- Zest of 2 lemons
- 4 cups of sugar
- 4 cups of honey
* I think all honey would be fine, it makes your jam a little more runny – but then it can double as ice cream topping. (see below…)
What to do:
- If you’re going to can your jam – get all your supplies ready – get your pot boiling, jars sterilizing, tops and rings hot and clean.
- In the meantime put all of your strawberries, sugar and honey into a pot (I used a big dutch oven type pot). You need time and patience people.
- Stand by the pot of strawberries, boiling away and skim skim skim! Be careful not to let the mixture burn to the bottom (I am still pot scrubbing!).
- The boiling berries produce this foam. You need to remove it (as much as you can).
- Get yourself a big bowl and put it right next to you, and a big, flatish spoon, and skim!
- After about half an hour (or whenever the foaming dies down), you’re ready to add your zest, and fill up your jars and process them for 10 minutes, and then set them aside to cool and pop!
- Enjoy!
Do you jam? Can? What’s your favorite summer item to preserve?
The post Jammin Strawberry Jam appeared first on Day2Day Joys.
]]>The post Jazz Up Your Summer BBQ Menu With Real Food Recipes appeared first on Day2Day Joys.
]]>
Written by Kari @ Living Strong, Health and Wellness, Contributing Writer
With summer in full swing and the Fourth of July right around the corner, we all know that this means a lot of picnics, bbq’s and get togethers are on the calendar. This also means that this will involve a lot of, you guessed it, food!
Is it possible to eat healthy during all these summer festivities? Yes, yes and yes! Eating healthy doesn’t mean that these celebrations have to be boring! In fact, I believe that you can have even better tasting food when you choose real foods prepared properly and with love! Nothing off the grocery store shelf can hold a candle to the greatness of real food!
A couple months ago I released my first cookbook that addresses the reality and simplicity of delicious and healthy food! On my journey to live a healthier lifestyle, I was finding that eating healthy usually meant bland, boring and just plain not good! My family felt the same! I knew that real food could taste amazing, be nourishing and keep you satisfied, so I went to work creating, experimenting and indulging.
Below are two wonderful recipes that can be found in my cookbook that you can incorporate into your summer celebrations! Kari’s Restaurant Style Salsa – to go with those big bowls of tortilla chips and Easy Peasy Peanut Butter Drops for a protein packed sweet treat. I know you will enjoy these real food treats and feel good knowing that you are feeding your family foods that will not harm them.
What You’ll Need:
- 1 can (28 ounce) whole tomatoes, with juice (I use Muir Glen Organic Fire Roasted Tomatoes
)
- 1 can (28 ounce) diced tomatoes with green chilies
- 1/4 cup yellow onion, chopped
- 2 to 3 cloves of garlic
- 1 teaspoon, unrefined sugar (cane, sucanat, coconut) or honey
- 1/2 teaspoon sea salt
- 1/2 teaspoon ground cumin
- 1 cup fresh cilantro
- 2 to 3 tablespoons lime juice (from the actual lime is best, if they aren’t in season, use lime juice)
- 2 small cans diced chilies (hot if you like the zing, otherwise use mild)
- 1 tablespoon diced jalapenos (add these very last to make the salsa more hot) (optional)
- 1/2 to 1 smoked chili pepper (optional – these add zing too)
What You’ll Do:
- Pour one can of the tomatoes in the blender, add the onion, garlic, sugar, sea salt and cumin.
- Blend until smooth.
- Pour this into a large mixing bowl.
- Now, pour the other can of tomatoes in the blender and add the cilantro, lime juice, diced chilies and jalapenos.
- Blend until smooth.
- Add this into the bowl with the other half of the salsa.
- Mix well with a bamboo spoon until combined thoroughly.
- Now it’s taste testing time. Grab some chips and and test it out. Does it need more heat? Add the smoked chili pepper. A little more cumin? Lime juice? This is your time to get creative and create a taste that you and your whole family will love.
- If you need to add more ingredients, scoop a couple cups of salsa back into the blender, add the extra ingredients, blend and pour back into the bowl. Mix again and test again.
- Store in glass jars – this typically makes 2 quarts of salsa.
- Refrigerate. Over the course of a couple days, the flavors will have time to mesh together and you’ll get a wonderful, amazing and fresh salsa!
Easy Peasy Peanut Butter Drops
(Packed with Protein and Energy)
What You’ll Need:
- 1/2 cup natural peanut butter (or another nut butter of choice)
- 1/2 cup raw honey
- 1/2-1 cup unsweetened, finely shredded coconut
- 1/4 –1/3 cup mini dark chocolate chips
- Sucanat (unrefined sugar) for rolling the drops
What You’ll Do:
- In a medium size bowl, mix the peanut butter and honey until combined thoroughly.
- Add the chocolate chips. You can add more or less according to your taste (I always add the larger amount).
- Add the coconut in 1/4 cup amounts until the consistency reaches a thick, yet semi-sticky state.
- You don’t want it so sticky that you can’t roll it, but you don’t want it so dry that it wont hold together. Find the happy medium.
- Once you are able to roll them and they still have some stickiness to them, roll into balls and then roll in the sucanat.
- Place on wax or parchment paper on a baking sheet or plate.
- Refrigerate for a while so they can harden up a bit, transfer to a glass jar and keep in the fridge.
I hope you have a wonderful and amazing summer, making time to enjoy family, friends and delicious food. Take time to cherish these moments and be thankful for the many blessings that God has poured out upon our lives!
**note from Rachel: Make sure you check out Kari’s new cookbook Real Food. Real Kitchen. So Good.: Health Made Easy. It’s actually on sale on amazon right now!

What is your favorite summer dish that brings a smile to your face and everyone who tries it?
The post Jazz Up Your Summer BBQ Menu With Real Food Recipes appeared first on Day2Day Joys.
]]>The post Coconut Milk Brown Rice Pudding appeared first on Day2Day Joys.
]]>Spring is going to be arriving soon, probably not as soon as some of us might like.  For many of you, it has been a very cold, long winter! So, I am here with some warm and cozy comfort food for you today. Coconut Milk Brown Rice, a simple and not too sweet treat!
Coconut milk contains essential fatty acids for a healthy heart and immune system and even healthy hair and skin. It is so versatile as well, as it can be used in pasta, rice, meat and even dessert dishes. Rice pudding has long been a favorite of mine, but traditional store bought versions are full of sugar and overly processed. Try this for a different healthier twist on an old favorite!

Coconut Milk Brown Rice Pudding
What you need:
- 1 (13-16 ounce) can Coconut Milk
- 1 Tbsp Maple Syrup
- 2 cups cooked Brown Rice
- 1 teaspoon Vanilla Extract
- Cinnamon (optional)
- Raisins, shredded Coconut, Walnuts or Pecans (optional)
What to do:
Heat the coconut milk just to a simmer, stirring often so it will not burn. Once it simmers, stir in Maple Syrup, Vanilla and Brown Rice. Cook over low heat until most of the milk is absorbed. Can be served warm as a dessert, but also great for breakfast. Top with shredded coconut, raisins, cinnamon, walnuts or pecans. If it becomes dry or sticky, pour a little warm unsweetened coconut milk over the top before serving.


Hope this offers you some warmth until spring has officially sprung! 
Do you have any recipes you have swapped out for healthier versions? Please, share with us!
The post Coconut Milk Brown Rice Pudding appeared first on Day2Day Joys.
]]>The post It’s the Most Wonderful Time of the Year! appeared first on Day2Day Joys.
]]>
Written by Kari @ Living Strong Health & Wellness, Contributing Writer
Truly, this is the most wonderful time of the year. Well, I actually could say that any day of the year, because I believe if I wake up alive – then it’s the best day EVER! But seriously – this is my most favorite holiday season of the year.
The decorations, the baking, the gift giving, the memories – I enjoy it all! To top it off, I live in Colorado which brings with it the added glory of beautiful snowfall, bright blue skies and plenty of outdoor activities.
When December rolls around, I usually have three things going on in my house at all times: crafts, baking and keeping warm! Today I want to share with you something from each of these areas that you could possibly tackle this December in your own home! They’ll make great gifts, your house will smell amazing and you’ll never want another latte from Starbucks again!
Tackling Christmastime at Home:
#1 ~ Crafting
Christmas Card Wreaths
 Trying to find new ways every Christmas to display all the beautiful cards we receive isn’t’t always easy. Long before Pinterest made it’s way to our lives, we had to rely on hard copy magazines to find creative ideas.
I found a fun display idea in a Martha Stewart Living magazine years ago – and it’s how I’ve displayed my Christmas cards ever since. They don’t take up a lot of room, you can actually view the cards that people took time to make and send you and they are easy to store since they don’t take up any room! Check out how to make your own Christmas Card Wreath Display here!
Tiered Serving Platter
Since I enjoy entertaining, I also want to be creative when it comes to displaying food! I like depth and dimension instead of just everything flat on a table. About 3 years ago I made these 3-Tiered Serving Platters out of china and wine glasses (along with some clear epoxy) and gentle hands. These allow you to have more food on the table, adds dimension so food is not looked over and it just looks pretty! The total cost for me to make just one of these was around $3.50 – and that includes the epoxy. Not bad! See how easy it is to make your own here!
Pillow Sleeping Mats
 I’m not a big fan of buying toys. Ever. My children get plenty of toys from relatives, so when Christmas rolls around I like to give them gifts you can’t find at the store! This is when you have to be creative because our children in this generation don’t always know what to do with, let’s say, paper dolls, army men, marbles or jacks. They also might not know how to respond to something that doesn’t ‘do anything’.
Am I wrong? Now I’m not talking ALL children, don’t misunderstand what I’m saying, but this is how most of our culture operates. Most toys they are given have a specific purpose and it doesn’t allow our kids to use their imaginations, nor do they allow them to work on focus, memory or right brain/left brain activities. Three years ago I made my kids Pillow Sleeping Mats. They like to lay on the floor when they watch movies and we have hard wood floors – so they always looked uncomfortable, so I wanted to fix that. This was such a simple project, didn’t cost much and they use them to this day. All you need is 5 pillow cases, 5 pillows and a sewing machine. They are easy to clean, fold accordion style to store and make family movie nights more enjoyable! Check out the tutorial here!
Decorative Tiles
These are fun gifts to give to just about anyone! If you have kids, it’s even a greater gift, because it displays their artwork. It’s simple and inexpensive: go to your local Home Depot and pick up some tiles (I used white, but you can use whatever your little heart desires), some colored sharpie markers, felt or clear bumpers and some clear gloss spray. Draw or write on the tiles, allow to dry and coat with clear gloss spray (I did it three times, allowing drying time in between each spray). Once they’re dry, put the bumpers on the bottom. Most people have just used them as decorations, but I know some who have used them. To wash, they need to be hand washed in tepid, soapy water.
#2 ~ Baking
Baked goods at Christmas is one of my favorites. I love to bake. I love to share. So, baking goodies for Christmas to give out to my friends and family is wonderful. I usually bake about 10 different types of treats, package them all pretty and bless people with them.
I’ve learned throughout the years, though, that since there are so many desserts and sweet treats floating around the office and homes this time of year, that you don’t have to go overboard! For every person, package 2 of each treat, put them in a fun container that will keep them fresh for a few days and polish it off with unique wrapping, ribbon or jute with a hand written name tag on it. This way they’ll enjoy every bite and won’t have to throw away all the extras they just couldn’t stomach.
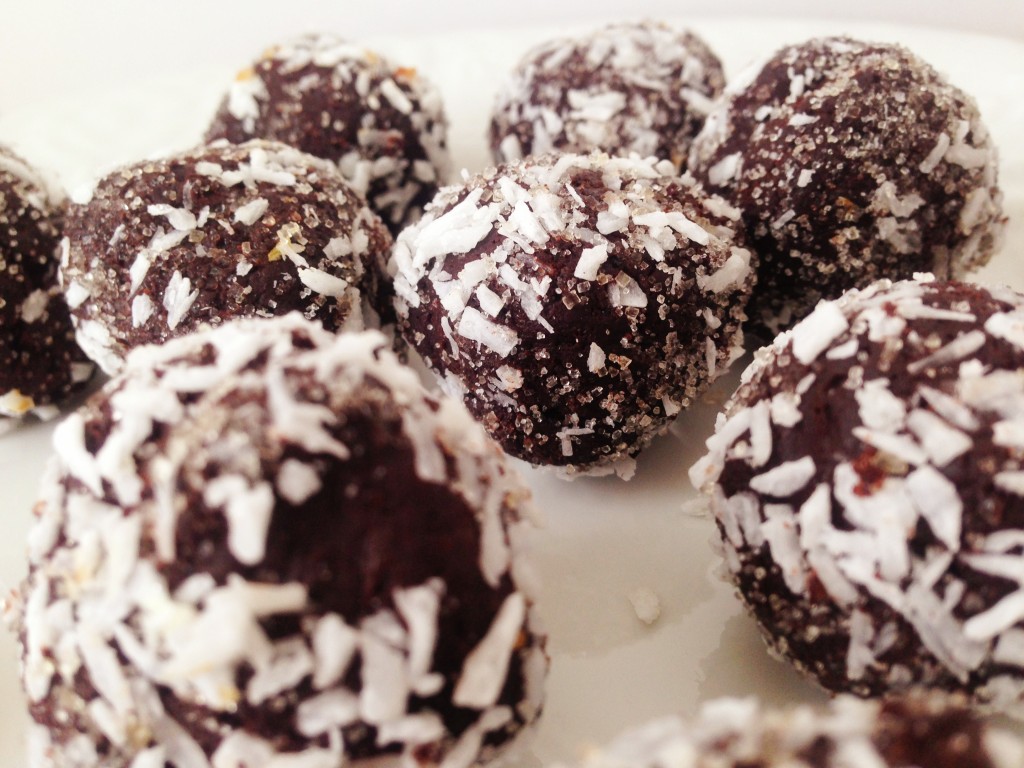
Here are a couple of my favorite recipes that I use. The truffles are dairy-free and grain-free and super healthy. The chocolate chip cookies are THE BEST recipe around, but I did tweak it to use healthier options, so for a special treat, these are great.
Intense Chocolate Truffles
Chocolate Chip Cookies

#3 ~ Hot Drinks
I tend to be cold a lot. If it ever dips below 70F degrees, I’m chilly. Living in Colorado – you can guess how often that is. So on days like today when I woke up to -8F degrees (with windchill of -23F degrees) – I needed something to warm me up. Typically I’m a tea person, but in this jolly season, I like to sip on my infamous Slow Cooker Cinnamon Lattes or From Scratch Hot Cocoa! Both of these are delicious and such special treats while you’re watching Christmas movies with your family, wrapping presents, or enjoying some chill time with your girlfriends while Michael Buble sings Christmas Carols in the background!
Slow Cooker Cinnamon Lattes
Hot Cocoa
How ever you choose to spend your time this Christmas season, choose to be productive, make memories and remember why it is we are celebrating this month. In all the gift giving, dessert baking and decadent hot drinks – choose to be a blessing to those around you. Smile at a stranger, give your kids extra hugs, take someone to lunch, say Merry Christmas and just pour out love wherever you go!
What will you be busy doing this beautiful December?
The post It’s the Most Wonderful Time of the Year! appeared first on Day2Day Joys.
]]>The post Gluten and Why I’m Thankful for It… and a Gluten Free Apple Crisp appeared first on Day2Day Joys.
]]>
Written by KT, Contributing Writer
Weird thing to be thankful for right?
Actually I am thankful for finding out that GLUTEN was responsible for much of my son’s behavior problems.
I still don’t really believe it. But after a trial off and then on and then off gluten, we found his tantrums to DRASTICALLY change.
I mean… he’s 4. Tantrums exist for EVERY four year old – but he was spitting, hitting, biting, kicking, throwing things down the stairs.
We use a variety of discipline methods, but none that could manage this type of behavior.
It was really quite terrifying that it couldn’t be prevented, de-escalated, or controlled.
With a hope and a prayer, we gave up gluten (well… for D anyway… I still eat my regular… semolina flour pasta… I know, I know…). His violence and scary eyes melted away and he became again my sweet 4 year old. His tantrums were fewer and his violence was non-existent. When we returned him to gluten… the violence returned to our home. So out it went. Out of pasta, bread, gravy, cereal, muffins, out.of.everything.
So at this time of Thanksgiving I am so thankful for finding my baby, trapped inside a body that wasn’t true to the sweet boy I know existed.
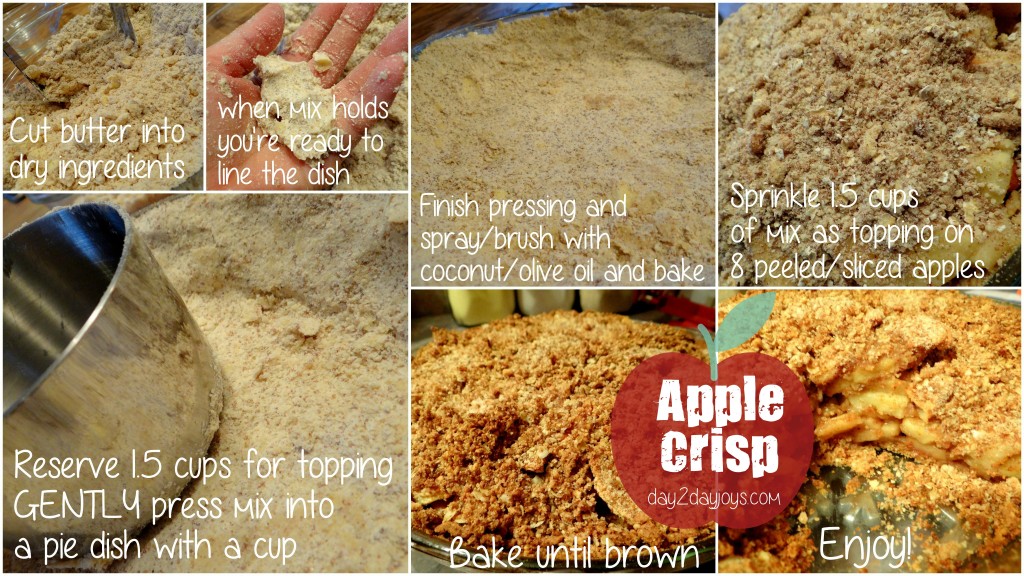
I am also thankful for Gluten Free Apple Crisp… and you can be too 
It has been a struggle for me to truly dive into this whole gluten free bit. I cook mostly by experience and feel, taste and smell, and this gluten free restriction opened up a world of flours I didn’t understand, bread that didn’t rise, and starches that sound like they came straight out of a chemistry class. Anyhow – the things found in this apple crisp are widely available… and I bet you could just sub in regular flour if you’re not interested in giving gluten free a go 
Gluten Free Apple CrispWe use organic, fair trade, and or local ingredients |
|
| First Dry Ingredients:3/4 Cup of Almond Flour
1/2 Cup Coconut Flour 1/2 Cup Quinoa Flour 1/4 Cup Tapioca Starch 1/4 Cup brown sugar 1/4 Cup sugar 1 tsp Apple Pie Spice 1 Stick Butter Second Dry Ingredients: 1/4 Cup of GF Oats 1/4 Cup Brown Sugar 1 tsp Apple Pie Spice 8 Apples, Peeled, Cored, and Cut Third Dry Ingredients: 1/2 tsp Corn Starch 1 tsp Apple Pie Spice Olive Oil or Coconut Oil (if you have in a spray container that’s easier!) |
Mix first dry ingredients in a bowl. Cut in butter.Reserve 1.5 cups of it for topping.
Press the remaining amount into a baking dish using a measuring cup or your fingertips. It is very fragile so be gentle and patient. Spritz with olive oil and then bake at 350 for 5 minutes. Mix second set of dry ingredients with your 1.5 Cups of reserved mix and set aside. Toss cored and cut apples with third set of dry ingredients. Put into “crust”. Carefully sprinkle the remaining topping over the whole thing. Bake for 50+ minutes on 350 or until brown and bubbly. Enjoy with fresh whipped cream and vanilla ice cream! |
What is something you are thankful for that impacts your health?
The post Gluten and Why I’m Thankful for It… and a Gluten Free Apple Crisp appeared first on Day2Day Joys.
]]>
