The post 6 Ways to Less Stress During the Holidays appeared first on Day2Day Joys.
]]>The holiday season often brings along with it unwanted stress.
Christmas parties, holiday shopping, cooking, cleaning, entertaining, children Christmas play practices, extended time with family, limited funds and everything else wrapped around the holidays may cause unwanted stress.
However, following the tips below may help us manage this stress and keep our holidays joyful.
6 Ways to Less Stress During the Holidays:
#1 Plan ahead
Do not procrastinate. Get as many tasks done as early as possible. Write out a to-do list and beside each item on your list – write the date/time that it needs to be done by. Put your list on your fridge, in your calendar or anywhere you will see it and will be reminded to get stuff done.
#2 Recruit help
Are you hosting and cooking the holiday meal for your entire family this year? Do not let anyone, including yourself, make you feel like you have to be superwoman and unless you thoroughly enjoy, want and can peacefully handle that huge responsibility get your family members to help you by bringing a drink, side dish and/or desert to the holiday meal. Pick one or two things that you can shine at and do them well. Let everyone else help by bringing an item to share.
#3 Do not set your expectations too high
Most of us love and dream of the picture perfect home, decor, family and food when planning the holiday, but when hiccups in our plans happen (and they will) it may cause our high expectations to come crashing down on us. Which may cause unneeded stress. Set realistic goals for yourself, your family and the holidays.
#4 Get plenty of rest
Pretty much the entire month of December you’ll find bumper to bumper traffic. Everyone is out shopping for presents and supplies for the upcoming holiday. Do not shop till you drop! Give yourself a time out. Take a break. You need time to rest, re-group and re-energize. Getting plenty of rest will help you maintain your stress at a balanced level.
#5 Stick to a budget you can afford
Make out a budget and stick to it. Don’t let family, neighbors, nor friends make you feel like you must have or spend a certain amount of money to have a good Christmas. Don’t fall into the trap that your kids will not be happy without that $500 item on their wishlist. Although anyone would enjoy to be lavished upon during the holidays, Christmas is not about the gifts. It’s about being with those that you love and spending time together. If you are using credit cards to purchase everything, please remember that come January you will get that hefty bill in the mail. Communicate with your family before hand and try to get everyone on board with a family Christmas budget.
#6 Don’t take yourself too seriously
Lighten up. Laugh. Go with the flow. Be flexible. Give yourself and others grace and love. Remember what the holidays are really about.
Bonus tip: Pray. Put God first in your life. Remember, He has you.
“Peace I leave with you; my peace I give to you. Not as the world gives do I give to you. Let not your hearts be troubled, neither let them be afraid.” John 14:27
Do you have any tips on enjoying the holidays with less stress?
The post 6 Ways to Less Stress During the Holidays appeared first on Day2Day Joys.
]]>The post Sticky Christmas Trees :: An Easy Preschool Holiday Craft appeared first on Day2Day Joys.
]]>I’m not the kind of mom who does elaborate crafts with her kids. Projects that require preparation a day or two in advance are rare for me.
(This has more to do with my personality type than the worth of elaborate crafts!)
That’s not to say that I don’t love doing creative projects with my kids, though. We sew together, paint together, and just generally create together. But our art times are more spur-of-the-moment ideas.
So, I love a good project that uses supplies I have on hand and very little work to get started.
This craft is just that kind of project!

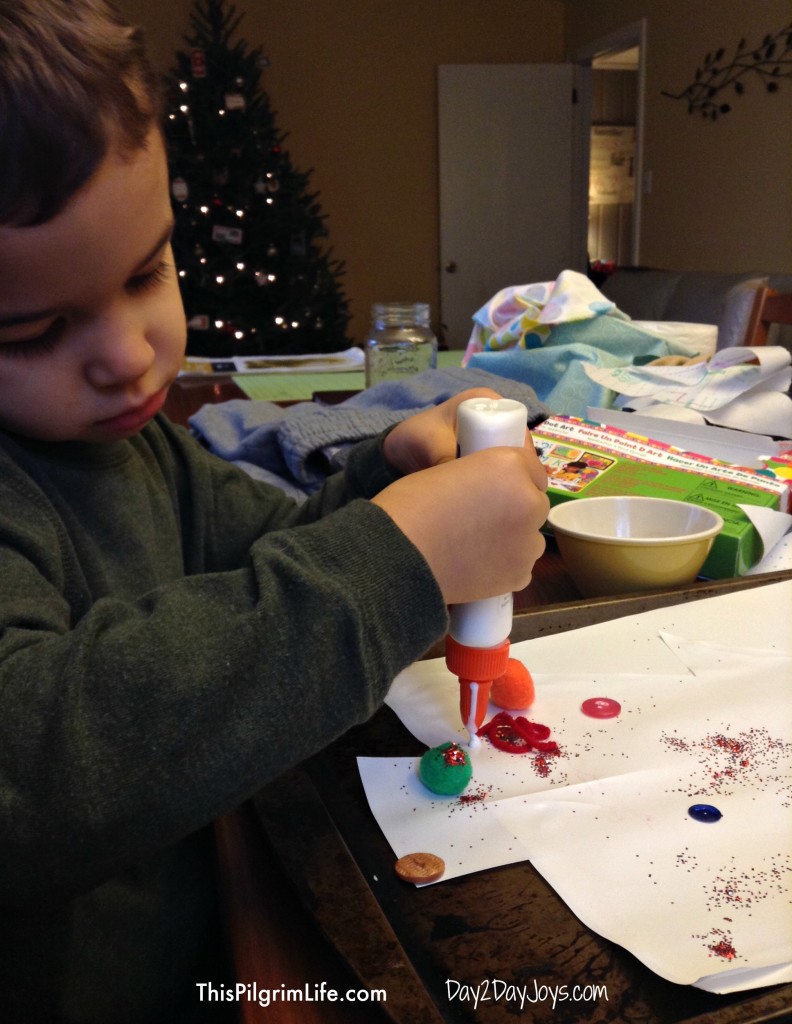
My kids made these “sticky Christmas trees” two years ago, and to look back at these pictures now is crazy! No more baby faces for either of my boys.
Reminiscing aside, this is a great craft for preschoolers, and maybe even toddlers with ambitious mothers. It requires very little craft skills from the child. Simply decorate the tree with various colored materials and it’s done!
How to Make “Sticky Christmas Trees”:
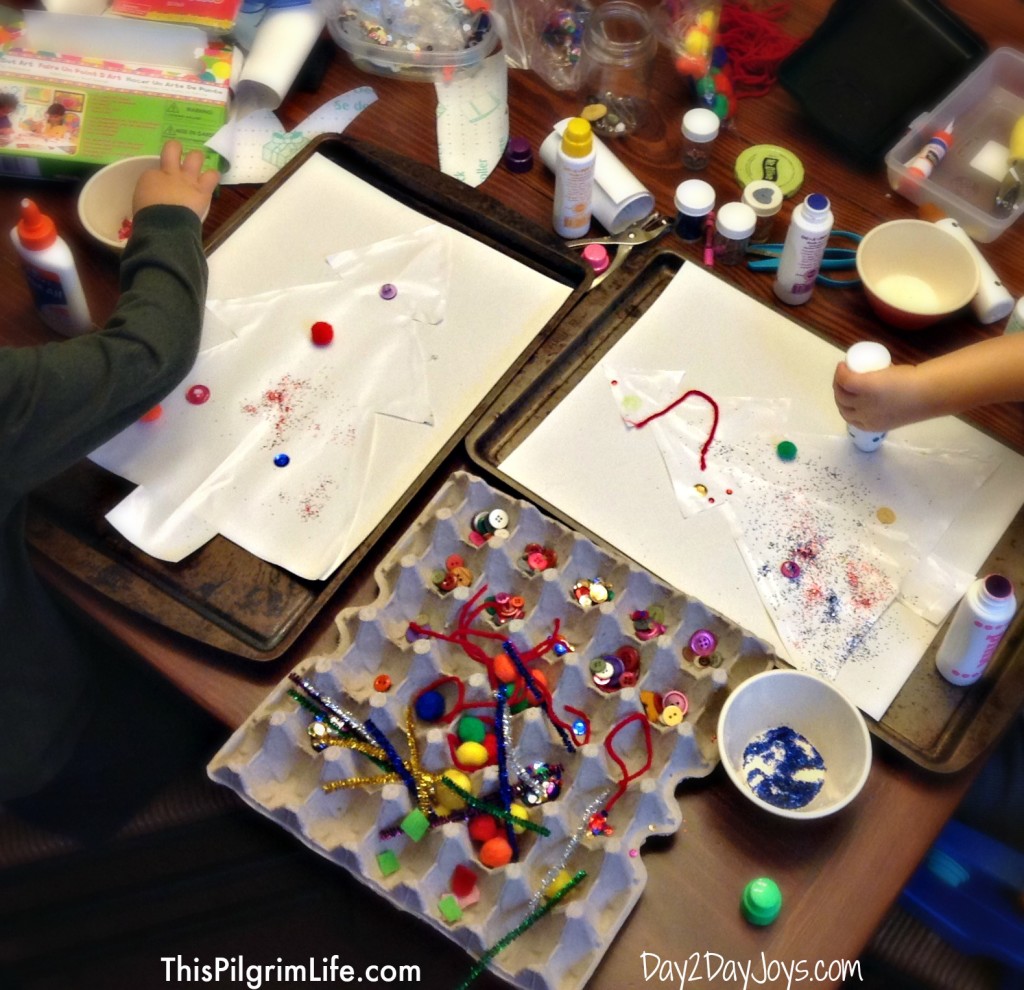
Cut a piece of contact paper in the shape of a Christmas tree and glue it to a piece of construction paper. We used white paper, but I think they would look even better on a colored sheet.
Set out various craft supplies that your child can place on his Christmas tree. Colorful buttons, pom-poms, strips of yarn, sequins and so on work well. Glitter for the brave, or devil-may-care type. Also, an egg carton works really well for making everything accessible and contained.
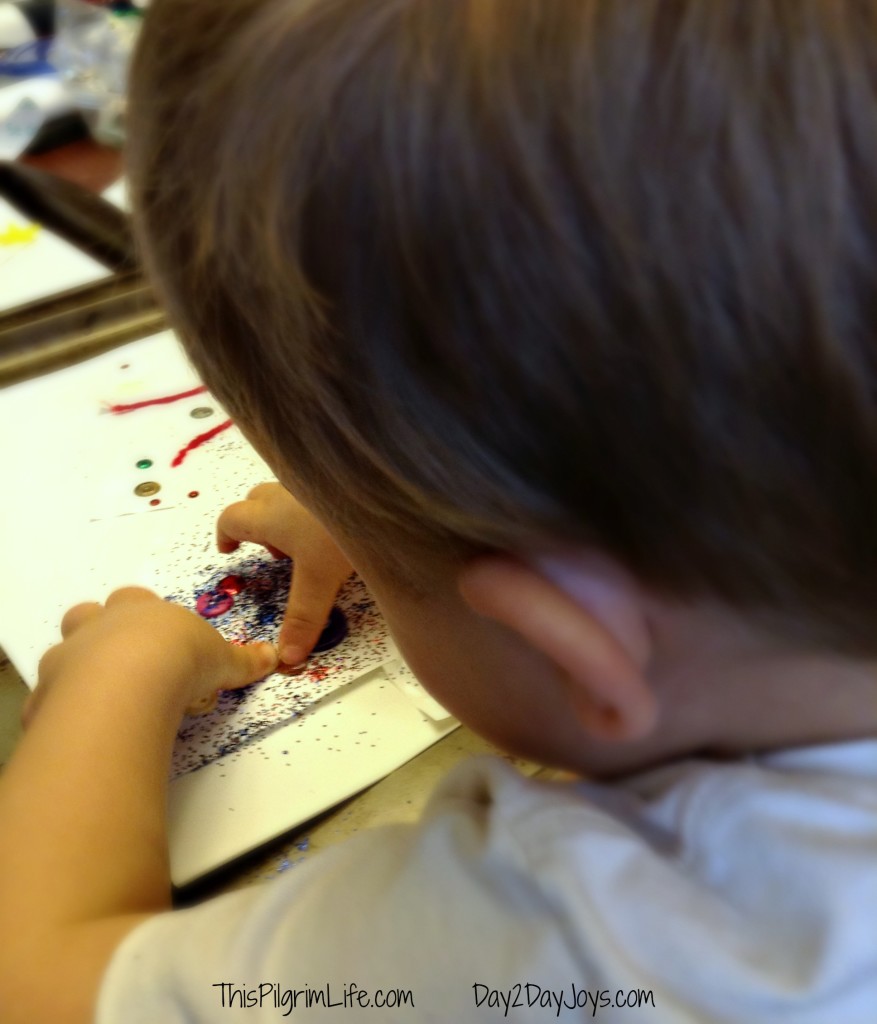
Give your kid(s) time to create and have fun and see what they come up with. Remember, process not product!
Don’t forget to display your child’s beautiful art! If you make these with your kids, I’d love to see them! Tag me (@lisaburns3) on Instagram or show me on Facebook!
Christmas is a week away and I really hope you all have a wonderful, blessed Christmas!
What kinds of crafts do you make with your kids this time of year?
The post Sticky Christmas Trees :: An Easy Preschool Holiday Craft appeared first on Day2Day Joys.
]]>The post Christmas Wreath Card Display appeared first on Day2Day Joys.
]]>
Written by Kari, Contributing Writer
I know there are hundreds of ways to display those beautiful Christmas cards we get each year. I’ve done most of them over the course of my beautiful life. Everything form hanging them from decorative ribbon to placing them in a crystal bowl. A couple years ago I was reading Living Magazine and found a quick and inexpensive way to display cards. I needed a change and this was perfect.
A simple wooden wreath.
Well, more like an embroidery hoop with mini-clothespins, but like I said, a simple wooden wreath. It worked perfect.
What does this have to do with health, which is what I usually write about? Nothing. Not only am I passionate about teaching and educating people on health – I enjoy being crafty too! So, this is just a look at another side of me!
It cost less than $10 for the supplies and didn’t take long at all to make. The glue drying is the most time consuming part of it all. This is when you get to play with your kids, watch Netflix or eat cookies. Or all three. You can choose the size and number of hoops you’ll need depending on how many cards you usually get. I did one large and two medium. They really look beautiful once they fill up and make it so easy for everyone to scan and look at the cards when they are visiting your home.
Now, wouldn’t you say that these simple wooden wreaths make your own Christmas scene look so much better? I thought so! Now go make one for you!

Christmas Wreath Card Display
What You’ll Need:
- a couple needlework/embroidery hoops – I did one large and 2 medium sizes
- a couple packages of mini-clothespins
- craft glue
- ribbon for hanging
What You’ll Need To Do
- I glued the mini clothespins every two inches around the hoop. I alternated the pins – one facing out, one facing in.
- let them dry overnight (simply because I got side tracked and didn’t get back to it the same day).
- Once dry, I attached the ribbon and hung it on display.
Like I said, when they are completely filled, they look really pretty – like a big wheel of cards. It’s nice to be able to see them all and be reminded how blessed we are to know so many wonderful and loving people – which always makes my heart happy.
What is your favorite way to display your Christmas cards?
The post Christmas Wreath Card Display appeared first on Day2Day Joys.
]]>The post Thankfully Giving appeared first on Day2Day Joys.
]]>
Written by KT @ One Organic Mama, Contributing Writer
Each year, our home fills with the kind gifts that those who love my children. I am so grateful for all of the wonderful and loving people in my life who surround them with fun stuff! Instagramed pictures of giant piles of gifts fill my phone and long lists to santa fill my facebook page. However, as the world becomes smaller with the internet, I find it harder and harder to create a list of things my kids or I “need” when people ask.
We want for nothing. When my kids want to sign up for soccer, I can buy the cleats. When they are hungry, I can grow and buy food. When they are cold, I can turn on the heat. We don’t need anything.
I find it hard to spend money on things we don’t need when there are so many wonderful organizations providing for people who do really NEED. Here are some of the details on organizations that need my money more than I do. I am always careful to research how much funding ends up in the hands of those who need it – so I wanted to share that information here. I also share some ideas for getting involved more locally for Christmas. The descriptions and missions are taken from the organizations’ pages.
The Exodus Road
A nonprofit which helps find and free slaves through strategic action and ordinary people. The Exodus Road empowers rescue for current victims of human trafficking, equips nationals to fight slavery in their own communities, and encourages effective collaboration among practitioners.
- 71% of their funding goes toward their mission/programs
- Exodus Road Merchandise
- 100% of their current online campaign goes toward their mission.
- Become an online abolitionist
Fair Trade USA
We seek to empower family farmers and workers around the world, while enriching the lives of those struggling in poverty. We use a market-based approach that empowers farmers to get a fair price for their harvest, helps workers create safe working conditions, provides a decent living wage, and guarantees the right to organize.
- Choose a purchase with a purpose here – there are many organizations listed here –so check out where your money is going!
Refugee Operated US Businesses
Samaritans Purse
A nondenominational evangelical Christian organization providing spiritual and physical aid to hurting people around the world.
- 89% of their funding goes toward their mission/programs
- Donate here
- Volunteer opportunities near and far
World Vision
World vision is a Christian humanitarian organization dedicated to working with children, families, and communities worldwide to reach their full potential by tackling the root causes of poverty and injustice.
- 85% of their funding goes toward their mission/programs
- World Vision Gifts
- Choose where your gift goes when you donate to a specific mission
- Get involved!
Act Locally!
If you would rather do something local here are a few ideas:
- Choose someone random in your moms’ group (or online yard sale group, or church group) that you know could use some help. Send them an anonymous grocery store gift card for their Christmas dinner.
- Offer to babysit for a couple you know sometime in January so they can have a date night.
- Leave money with a cashier at a store for the next customer (or let them choose one who might need it).
- How do you spread kindness or shop with a purpose during the Christmas season?
- Volunteer at a local food bank (either donating or stocking shelves)
- Go caroling (added… bring treats!)
You can find the above information by combing through a charity’s records (most/all of which are available online) – but here are some good resources to use when choosing an organization to donate your money to!
- Worst Charities to donate – you might recognize these names from your caller ID – use extreme caution when donating – especially over the phone prompted by an unsolicited call
- Charity Navigator – not all charities are listed here – but good information for the ones that are!
- Charity Watch – another charity rating service
How do you spread kindness or shop with a purpose during the Christmas season?
The post Thankfully Giving appeared first on Day2Day Joys.
]]>The post 2015 Year in Review {Free Printable} appeared first on Day2Day Joys.
]]>I’ve done several different things, including a Madlib, top 10 things of the year, and more but my favorites these past few years are “Year in Review” letters.
Last year I created this one:
This year I followed the same type of template but added a few things.
I keep our letters in a special Christmas book my mom got us before we had children. I love looking back each year and reading the letters. I have made a 2015 Year in Review template for you to use. You can read how to use this letter for your family below, and then download it.
How to use this printable?
There are a couple of ways to use this printable. You can print it out and write on it or once you download it, go to PicMonkey, upload it and use their free editing tools. You can use each of the spaces to meet your needs and what you want to discuss in each section. Then print it out and share it with your loved ones. Here’s a great tutorial on how to use PicMonkey’s editing tools.
**note: for PicMonkey you need to download the image below.
———>Download the 2015 Year in Review Pdf Here or Image Here<———-
What is your favorite family tradition? Do you write Christmas letters?
The post 2015 Year in Review {Free Printable} appeared first on Day2Day Joys.
]]>The post DIY Crocheted Wreath Ornament/Gift Tag appeared first on Day2Day Joys.
]]>
Written by Karen @To Work With My Hands, Contributing Writer
When I was pregnant with our second son, I had a lot of time on my hands. Our oldest son was in public school at the time, my husband was at work, and I was home alone all day.
When the Christmas season arrived that year, I was in the midst of the second trimester – past the yucky first, and not yet into the bulky last. I finally felt better and was eager to get my hands into something.
It was during those few weeks between Thanksgiving and Christmas break that I came up with these fun little crocheted wreaths. I made more than a few of them, and 22 years later, we still have some hanging around in our Christmas decor boxes.
Now I want to share the simple tutorial with you!
This project requires only 2 basic stitches. If you don’t know how to crochet, check out this site for instructions on how to get started and for the stitches that are used in this project.
For this project you will need:
- 1 crochet hook, size G
- Dark Green Yarn (or color of your choice)
- 17″ length of 1/8″ red satin ribbon (or color of your choice)
- small bell, Christmas ball, or decorative sprig
- scissors
Instructions:
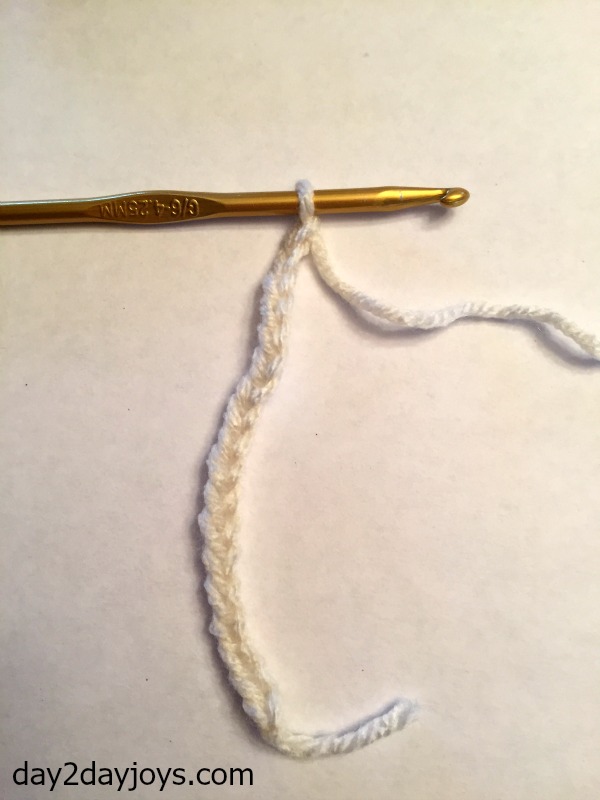
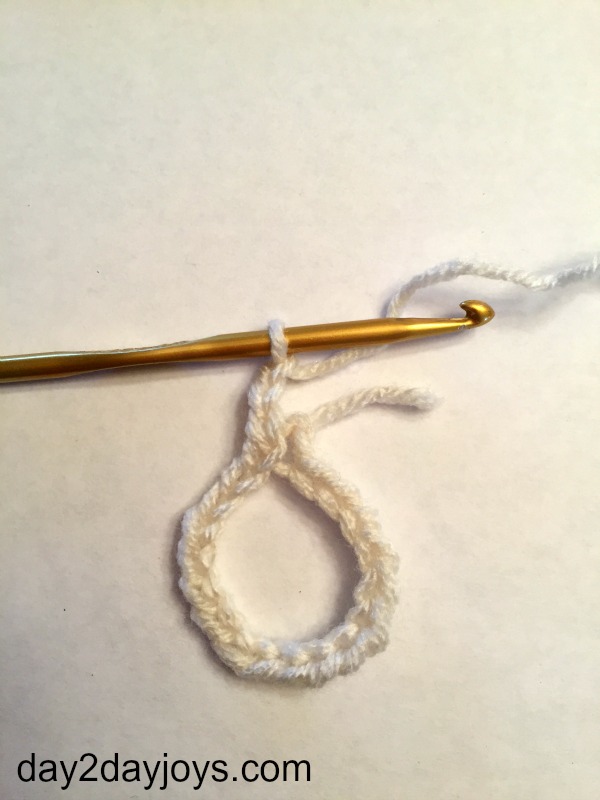
Begin by creating a slip knot and chaining 18.
Slip stitch to the beginning chain to create a loop.
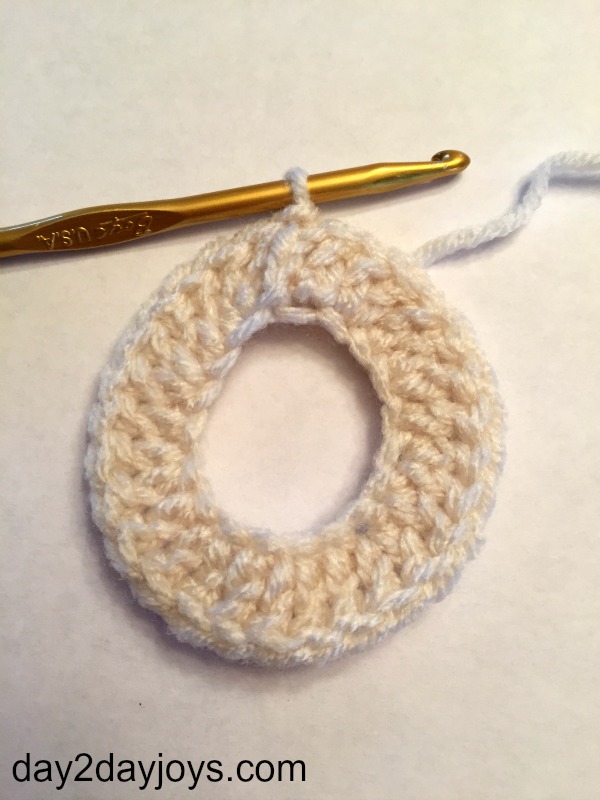
Chain 3.
Make a double stitch in the first chain, and 2 double stitches in the second chain. Repeat, alternating between one and two double stitches in each chain, all the way around, weaving the end piece into the work as you go. Join with a slip stitch to the beginning double stitch: 28 double stitches.
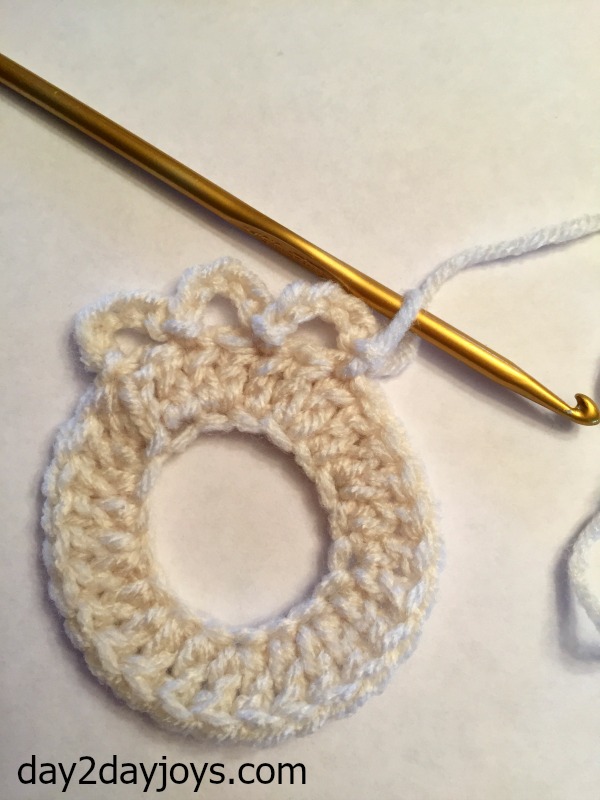
Chain 5.
Skip the next double stitch, and slip stitch in the top of the following double stitch.
Repeat all of the way around: 14 loops.
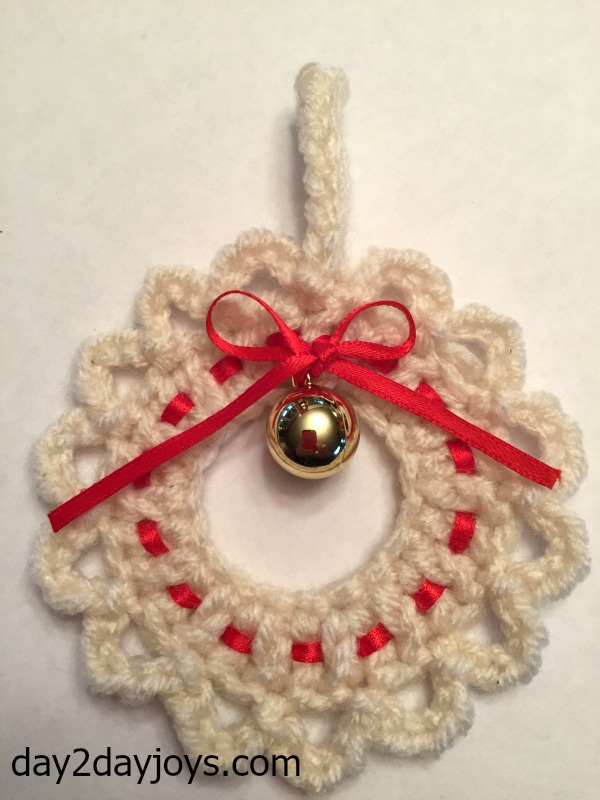
Chain 15.
Turn the wreath over and attach the chain to the base using a slip stitch. Clip the yarn and weave the raw edge into the back of the work.
Using the crochet hook, weave the ribbon through the double stitches, beginning and ending at the top. Tie into a bow and add a small Christmas ball, greenery sprig, or other small decoration, if you like.
These are great for using as tree ornaments, accents to gift tags, or you could do what my kids do and put them on every doorknob in the house! I like the classic dark green for gift tags and decorating, but you might like to make them in varying colors for ornaments as the dark green tends to blend right in with the tree.
I hope you’ll enjoy making these quick and easy crocheted wreaths! They add a warm, personal touch to Christmas gifts and decor.
What’s your favorite Christmas decor to make?
The post DIY Crocheted Wreath Ornament/Gift Tag appeared first on Day2Day Joys.
]]>The post Five Gift Christmas {Plus a Free Printable} appeared first on Day2Day Joys.
]]>
This is a new tradition we are starting this year.
Over the years we have spent too much money and too much time late at night, the night before Christmas Eve or Christmas wrapping numerous gifts. It’s not like all of them were toys; items often included lots of things like clothes, socks, underwear or others but I feel like it was getting in the way of what the season is really all about.
Plus the regular ole items (undies, socks, etc.) our children need anyhow could just be purchased throughtout the year and don’t need to wait until Christmas to be given.
It can get overwhelming buying a lot of gifts. Especially for 4 kids (we are expecting baby #4 at the end of this year or beginning of next year)  Plus they really don’t need a lot since it’s not about the gifts and we have more than enough.
So, I first came across this idea from my friend Erin, The Humbled Homemaker and Stacy, from Stacy Makes Cents. I thought, gosh, only 3 gifts, but the past couple years the concept has grown on my husband and I.
So we decided to take snippets from both of those ladies and create our own. They will get 5 things plus one Santa gift and of course their stockings. Here are some thoughts on Santa and reasons we “include” him.
Five Gift Christmas:
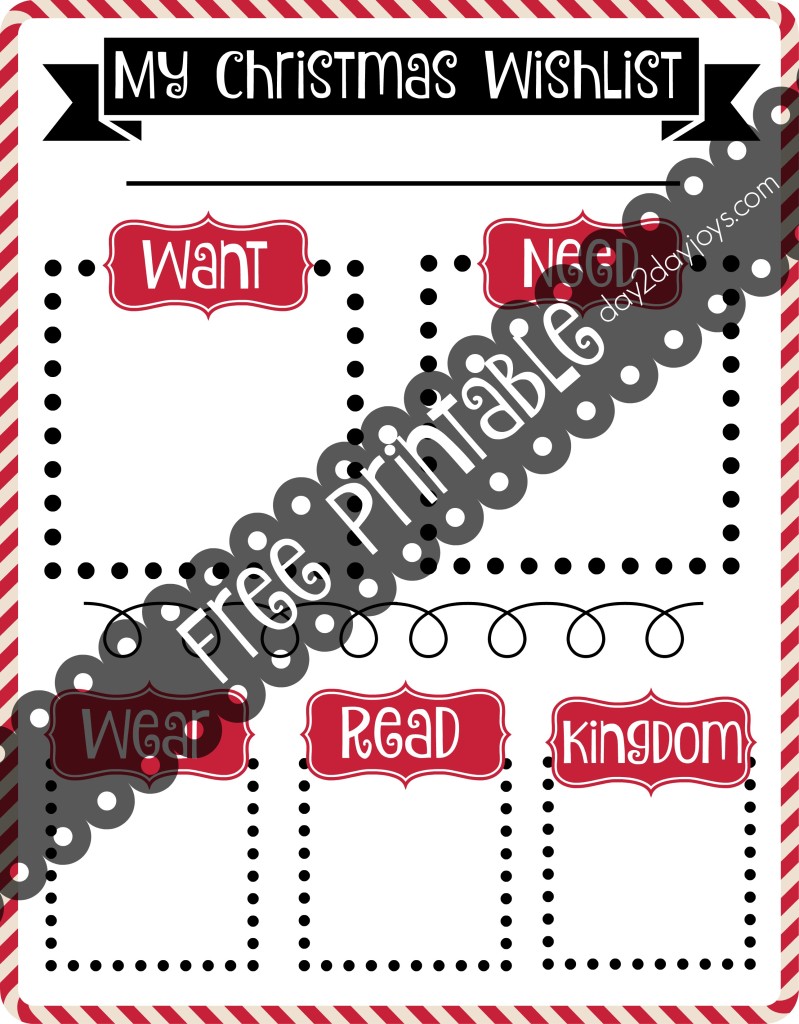
I won’t take a lot of time to explain all of these because they are self explanatory. These are the categories of what we are going to get our kids this year:
- Something they Want
- Something they Need
- Something to Wear
- Something to Read
- Something Kingdom (faith-based)
Examples could be: Lincoln Wants a specific Lego set, London Needs a small dresser for her room. Something to Wear… Julia needs a new coat and something to Read… Lincoln is going to get a chapter book he’s been asking about. Something Kingdom, which we are using instead of spiritual, meaning faith-based. So maybe a cross necklace for Julia or a boy’s devotional book for Lincoln and a Veggie Tales Nativity for London. (We are still working on getting gifts and deciding exactly what we are getting our them.)
To go along with this new tradition, I made a printable my kids can fill out as they think of things that fall under certain categories. Feel free to use this concept with your kids! 
You can get your Christmas Wishlist Printable here.
What new traditions are you starting this year? How many gifts do you get your children?
The post Five Gift Christmas {Plus a Free Printable} appeared first on Day2Day Joys.
]]>The post Coming Soon… 12 Days of Christmas 2015 appeared first on Day2Day Joys.
]]> Guess what?? It’s almost that time of year again for the annual 12 Days of Christmas!
This year is quite busy as we are expecting baby #4 at the end of this year or beginning of next year. I hope your gearing up for all the Christmas music, festivities AND I can’t wait for you to learn about some awesome businesses & products in this year’s12 Days of Christmas and get a chance to WIN the products. Woot!
This year I have some wonderful businesses participating with products including natural cleaners and make-up, stainless steel containers, a baby carrier, a large canvas and much, much more!
Let’s take a sneak peak ->

In no particular order, here are the businesses participating this year:
- Canvas on Demand
- Mamaw’s Many Blessings
- Eco Vessel
- Simple Beauty Minerals
- 12 Day Nativity Book
- Dayspring
- DoTerra Essential Oils
- Swanky Baby Vintage
- Better Batter
- Branch Basics Natural Cleaners
- Moby Wrap
- Re-Cycle
Well, there you have it! Don’t these businesses sound wonderful??
This year a few contributors are helping me with all these reviews but be confident I support and love all of these businesses & products!

Be sure to PIN this landing page and come back each day to enter all the giveaways!
See you on Wednesday, November 25th, the 1st day of the 12 Days of Christmas!
Which business are you looking forward to learning more about?
The post Coming Soon… 12 Days of Christmas 2015 appeared first on Day2Day Joys.
]]>The post Tips For Eating Healthy During The Holidays appeared first on Day2Day Joys.
]]>
Written by Kari @ Kari Newsom Contributing Writer
It’s that time of year again.
As a Health and Nutrition Coach, I always have people ask me for some tips on how to successfully celebrate special occasions without completely going off the deep end when it comes time to eat.
The first and most important thing I always tell people is this:
ENJOY THE CELEBRATION!!!
All to often we try so hard to do ‘the right thing’ about the whole ‘eating during the holiday’ issue, that we actually end up NOT enjoying this time of year.
Don’t do that anymore. Eating healthy and making healthier choices isn’t about being miserable. I promise.
There are a couple pointers I like to give people who don’t want to go crazy, over indulge and completely get off track with their healthy lifestyle.
If you are like the average person, this time of year {or any celebration for that matter} can be a challenging time.
My family typically eats extremely healthy, BUT I don’t freak out and go crazy that I’m not getting my organic and fresh foods. I am always thankful that someone would take the time to prepare a meal for us to enjoy – whether it’s considered ‘healthy’ in my book or not. Since 98% of the time we eat extremely healthy and disciplined at home, I never feel guilty when those occasions arise where we aren’t able to eat that way.
If there are certain foods that you absolutely cannot eat (if you have allergies or have celiac, etc.) then speak with the host for that day and explain your situation and ask if it would be okay if you brought some of your own items so you can still sit down and enjoy the meal with everyone else. Many times you will find that the host may offer to make some dishes according to your needs. If your eating preferences are just that, preferences, then it’s up to you to make smart choices while you are filling your plate.
Here are a few tips that might help you out this Thanksgiving holiday:
1. Eat a Smaller Meal Beforehand
If you are prone to eating TONS of food and filling your plate to overflowing, then going back for seconds and thirds – try eating a small meal before you go to your Thanksgiving celebration. It doesn’t have to be a rich meal, just a small meal that will help fill you up enough where gorging out on food doesn’t look so appealing to you! You’ll still get to enjoy the food on the table, you just won’t be shoveling it all in your mouth like there’s no tomorrow.
2. Water
Drinking a glass of water about 30 minutes before sitting down to eat can make a person feel full, so you won’t end up eating as much.
3. Self-Control
Make a decision to only have one plate of food, which means smaller portions of each item. Not always easy, but your stomach will thank you for it once dessert time rolls around.
4. Mini Size It
If you are a dessert sampler like some {GUILTY], then don’t take full size servings of each dessert. Cut in half, thirds or quarters so you can sample all the wonderful goodies, without consuming the amount of an entire pie or cake by the time you’re done.
5. Control Your Eyes
If your eyes are always bigger than your stomach, then it’s about discipline, discipline, discipline! Just CONTROL yourself when filling your plate!!! Yes, it smells so good and looks amazing and Aunt Susie’s mashed potatoes are the bomb, but you don’t need a mountain of food to enjoy all that goodness.
Studies show that the first couple bites of food are the most intense and satisfying – taste wise. Even with amazing desserts, the more bites you take, the magnitude of it’s greatness starts to taper down a bit after the first few bites.
6. Going Back
Are seconds bad? I don’t think so, as long as your first servings weren’t gi-normous to begin with. Just remember that you don’t need to over do it! When your body tells you to stop eating – then STOP EATING!
7. Enjoy The Company
Make a conscious effort to enjoy the people around you. Aren’t we all gathering on Thanksgiving (or whatever celebration) to spend time with each other? Yes, so enjoy your company, engage in conversation, laugh and CHEW SLOWLY. This is a guarantee that you won’t eat as much when you talk with people and give your food a chance to settle and your brain is told that you’re full (this usually takes about 15-20 minutes to occur.)
8. Chew Chew Chew
Along with chewing slowly, we should all chew each bite 20-30 times before swallowing completely! I know you think I sound crazy, but you will reduce the amount of food you eat by quite a bit. Why? Since you’re taking the time to chew your food purposely, you won’t be gulping down large portions every 5 seconds and by the time you’ve been eating for 15-20 minutes and your body is saying ‘STOP, I’M FULL’ – you won’t have consumed nearly as much food. Also, chewing this many times is the most important part of digestions since it breaks down your food to a point that once it hits your stomach, your stomach won’t need to work so hard to continue the digestion process.
9. Nix Tons of Liquids While Eating
Try not to drink a ton of liquid while you are eating. The reason is because it dilutes your digestive juices in your stomach and then it takes so much longer for your body to digest your food. This can lead to you feeling so full that you feel sick to your stomach. Give your food a chance to do its job once its in your body!
All in all, we need to demonstrate self control and we are more than capable of doing that! Take time to enjoy the food that has been prepared for you and enjoy the people surrounding you. These holidays have a purpose behind them, so focus on those purposes instead of making the food the center and most important aspect of the day.
Most importantly, when it comes to the food you eat, pray over your food and thank God for the nourishment to your bodies and protecting you from any harm. Thank Him for the family and friends that are surrounding you and the many blessings you have in your life. Thank Him for the life you have. If you are reading this, then you are alive! What a wonderful thing. On top of that, you can’t be reading this post without a computer, ipad or smart phone! Be thankful! You are blessed! Now, be a blessing to others!
What simple things do you do during holiday celebrations to avoid over-indulging?
The post Tips For Eating Healthy During The Holidays appeared first on Day2Day Joys.
]]>The post Spiced Pumpkin Pie with Flaky Pastry Crust appeared first on Day2Day Joys.
]]>
Written by Kari @ KariNewsom.com, Contributing Writer
Autumn is officially here! At least in Colorado! We are having beautiful and warm days (high 70’s to low 80’s), but the nights are cool and crisp! Leaves are turning bright yellow, orange and red – and the morning has brought a slight haze these past few days.
Typically I am more of a warm-weather person. I’m all about the sun, flip flops and being outside. That being said, I’m still a Colorado girl at heart. I like to get bundled up in chunky sweaters, wool socks and fur lined shoes. I like jumping in the Jeep with my husband and kids, all bundled up, to drive to the mountains to see the Aspen’s turning. And since we’re Colorado natives, no matter what the weather, you roll the windows down, crank the heat and put those hats on and enjoy the drive!
The other thing I like about autumn is that I start spending more time in the kitchen again, making delicious and yummy smelling foods! A few years ago I wanted to make a pumpkin pie – a pie that I’ve never liked. As in ever. I figured it was because store bought pumpkin pies were not close to one made from scratch, so I wanted to try making one COMPLETELY from scratch to see if I could like a real pumpkin pie!
I have to say, when I took the first bite of this from-scratch creation, I instantly became hooked. This is a tad more involved than other recipes – okay, a lot more involved, so make your special occasions more special by incorporating this into the menu. It is absolutely delicious! If you’re already a pumpkin pie lover – then you MUST try this and add it to your favorite’s list! It’s on ours, which is why we included it in my first cookbook – Real Food. Real Kitchen. So Good!

Spiced Pumpkin Pie with
Flaky Pastry Crust
Yield: 2-3 pies
What you need:
*for the flaky pastry crust
- 3 ¾ cups white spelt flour
- 1 tablespoon cane sugar
- 1 1/2 teaspoon sea salt
- 1/2 teaspoon baking powder, aluminum-free
- 1 ¾ cup cold real butter
- 2/3 cups ice cold filtered water
- 2 tablespoons full-fat plain yogurt
- 1 teaspoon white vinegar
*for the spiced pumpkin pie filling and topping
(this will fill at least 2 pie dishes, depending on the size you make – believe me you’ll be glad you have more than one)
- TOPPING
1/2 cup (1 stick) real butter , at room temperature - 1 cup spelt flour
- 2/3 cup packed brown sugar
- 1 cup chopped pecans
- 1 teaspoon cinnamon
- 1 teaspoon vanilla
- FILLING
1 1/2 cups packed dark brown sugar - 1 teaspoon sea salt
- 2 teaspoon cinnamon
- 4 tablespoons of freshly grated ginger
- 1/2 teaspoon ground clove
- 1/2 teaspoon allspice
- 4 eggs, from pasture-raised chickens
- 2 egg yolks, from pasture-raised chickens
- 2 teaspoon finely grated orange rind
- 29 ounces pure pumpkin, pureed
- 2 (12oz) cans evaporated milk
What You Do:
FOR THE FLAKY PASTRY CRUST:
- In a VERY large bowl, combine the flour, sugar, salt and baking powder and blend well.
- With a pastry blender – or 2 butter knives, cut in the cold butter until you have chunks the size of peas.
- In a measuring glass, mix cold water, yogurt and vinegar together. Add liquid, all at once, to the flour mixture.
- Stir quickly to distribute the liquid BUT DO NOT over mix. The consistency of the dough at this point will be a tad crumbly.
- Allow the dough to rest in the fridge for 2 hours or overnight. When the dough is ready it will break and not stretch.
- Divide into three portions and shape into discs. For the ones you won’t be using right now, wrap in wax paper and store in an freezer safe zip lock bag and place in the freezer for up to one month or in the fridge for up to 3 days. If you do freeze it, thaw it in the fridge overnight – do not leave it out on the counter to thaw out.
- When ready to use, roll out to around 12″ diameter so it will fit right in a 9″ pie dish. Transfer dough to the pie dish and trim the edge so it’s hanging over the edge by 1/2″. Fold over the edge and shape as desired. With a fork, prick the bottom and sides of the crust and place in the freezer for 10 minutes.
- To “blind bake” the crust, place a piece of parchment paper in the pie dish, on top of the crust and fill with dry beans so it’s weighted down. Place pie crust on a cookie sheet and bake for 30 minutes at 350F degrees. After 30 minutes, remove the parchment paper and beans and bake for 5 more minutes. Remove from the oven and cool before placing any filling inside.
For Spiced Pumpkin Pie Filling and Topping:
- Preheat oven to 425F degrees.
- Combine all the TOPPING ingredients in a medium size bowl and set aside.
- Combine all the FILLING ingredients in a large bowl and whisk well. Pour this mixture into the cooled down pie crusts.
- Bake pies for 15 minutes. Reduce the oven temp to 350F degrees and bake for an additional 30 minutes.
- Remove from the oven and sprinkle the topping on both pies. Return to the oven and bake for 15 minutes or until a knife inserted in the center of the pie comes out clean. If you find the edges begin to burn while finishing the bake time, place foil over the edges to during those last 15 minutes of baking.
SUBSTITUTIONS:
- White spelt flour: whole white wheat, whole wheat pastry, unbleached & unenriched white flour
- Cane sugar: coconut sugar, palm sugar
- Full-fat plain yogurt: full-fat sour cream, crème fraiche
- Brown sugar: coconut sugar or cane sugar with 2 tablespoons of molasses added
- Freshly grated ginger: use 1 teaspoon ground ginger if you can’t get fresh ginger
HEALTH MADE EASY:
if using canned pumpkin puree, choose organic | make your own puree using “pie pumpkins”, which is a pretty simple process | since it makes 3 pies, you can either bless someone else with one or freeze them for up to a couple months | the fresh ginger really makes a difference in the taste, I prefer fresh over ground
What is your favorite autumn recipe that makes you smile from ear to ear?
The post Spiced Pumpkin Pie with Flaky Pastry Crust appeared first on Day2Day Joys.
]]>


