The post All Things Pumpkin Ideas appeared first on Day2Day Joys.
]]>There is just something about this time of year that brings out that southern greeting. It’s Fall Y’all and that means pumpkins, pumpkins, pumpkins!
Pumpkin Pie Spice
to get the recipe click here!
*the 2 ideas below originally posted 5 years ago in this post*
Pumpkin Pie Smoothie
This recipe is so very simple! All you need are a few ingredients and a great blender and your set!
What you need:
1/3+ tsp harvest pumpkin spice, depending on your taste
1/2 tsp vanilla extract
1/2 cup frozen pumpkin (cubes from silicone tray)
1/2 cup unsweetened almond milk
1-3 Tbsp honey (or sweetener of your choice)
1/2 scoop vanilla protein powder *optional*
Handful of Ice cubesWhat to Do:
*Add all ingredients into a blender, except protein powder.
*Blend together until desired consistency, add more milk or water as needed.
*Once you have your desired consistency, add in protein powder but only blend until mixed (about 10 seconds or less). If you overdo it, the protein powder will make the smoothie too frothy.
*Enjoy your pumpkin smoothie! Yum!
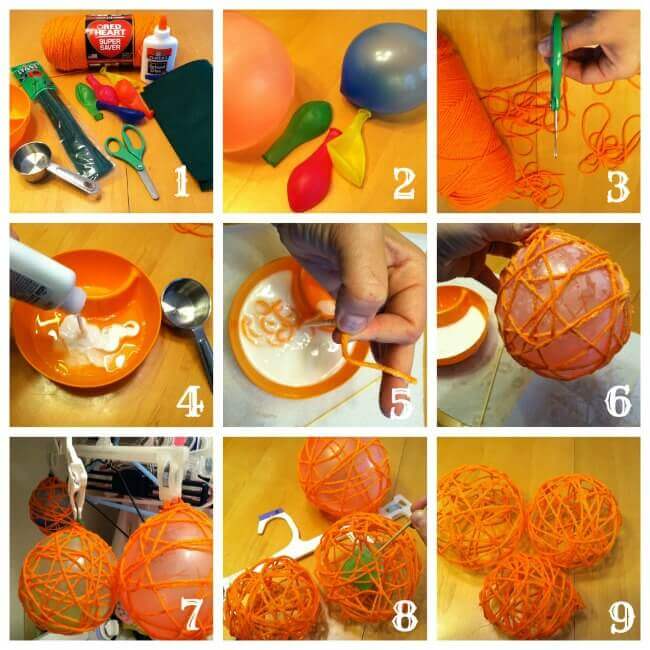
Pumpkin Yarn Craft
What you need:
orange yarn
a couple balloons
multi-purpose glue (like elmer’s or make your own paste with flour and water)
1/4 C water
green pipe cleaners + green felt
scissors
small bowl
plenty of paper towels
What to do:
To make this fun with as little mess as possible (this IS a messy craft), follow these simple steps.
- Gather supplies, decide number of yarn pumpkins you’ll be making
- Blow up your balloons and tie a knot
- Cut yarn in 2-4 feet strips depending on your balloons sizes, set aside (3-5 strips per ballon)
- In a cereal bowl make glue paste using the whole bottle of glue, and 1/4 C water, mix well, set aside
- Dip your yarn into the glue paste, then lightly slide yarn through 2 fingers dripping access glue off
- Wrap yarn around pumpkin, overlapping pieces of yarn to make it sturdy
- Once all yarn is wrapped around balloon, hang dry or set on a jar for 1-2 days
- Once dry, pop balloon and pull thru an opening
- Use the pipe cleaners & felt to make a stem, twirly vines, leaves
Display for all to see, your kids will love their crafty pumpkins!
These 3 ideas are shared in the video below:
And here are more pumpkin ideas found on this blog:
- Spiced Pumpkin Pie
- Gluten-Free Pumpkin Muffins
- Cream Cheese filled Pumpkin Muffins
- Redeeming Halloween
ps. Im curious, if you are a reader here, would you like to see more posts? I have been almost exclusively posting on youtube because this blog lacked interaction and comments but if you all are reading and commenting, I would try more to post here!
-Rachel
The post All Things Pumpkin Ideas appeared first on Day2Day Joys.
]]>The post 7 Easy Healthy Kid-Approved Snack Swaps appeared first on Day2Day Joys.
]]>Breaking old habits is hard and if you didn’t start your kids out eating healthfully, it’s hard to get them to enjoy doing so. To avoid fighting a battle at every meal and snack time, I usually change things out slowly, making swaps: changing an unhealthy food for a new healthier alternative. Here are my favorites.
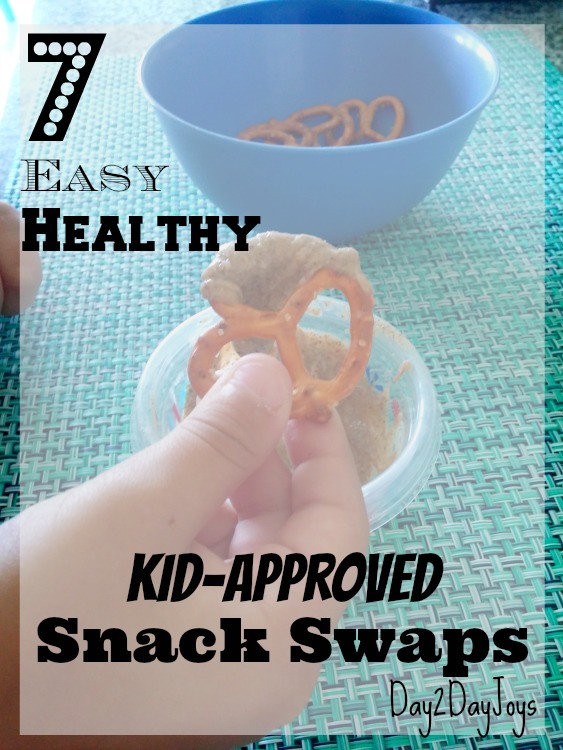
7 Easy, Healthy, Kid-Approved Snack Swaps
100% Organic juice with no additives for regular juice
The main idea here is to get rid of all those additives. If you ever flip over a bottle of juice and read the ingredients, you’ll usually find a ton of added sugars, flavors and dyes. Last time I checked, fruit was pretty sweet on its own and didn’t need all that stuff, so why give it to children? What you want to find is a juice that 100% juice or at least 100% natural with no added sugar. Some people don’t like to purchase juice from concentrate, but if your budget, like mine, limits you to that, it’s okay. Making small changes is better than making no changes. If possible, buy organic, especially when purchasing a juice made from one of the dirty dozen foods, like grapes.
While these juices are a bit pricier, their popularity is causing a lot of grocery chains to offer their own versions that don’t break the bank. My grocery store tends to charge a bit more than a dollar extra for store brand organic juices, which makes it easier not to break the bank. Also, since these juices are so sweet on their own, they’re incredibly easy to dilute with a little water, which can stretch your money a little farther.
Almond Butter for Peanut Butter
The first time I tried almond butter, it was grainy and awful. But I mentioned it to a friend who had made the switch and she said “oh, that brand? That brand is gross. There are way better ones out there.” A few years later, I did try again after reading various reviews of other brands. She was right. There are a number of almond butters that are amazing. So amazing, in fact, I don’t think our family will ever go back to peanut butter.
Our family’s favorite is the MaraNatha brand. There are quite a few choices and though the Creamy No-Stir one isn’t the healthiest of them all, it is our family’s stand out favorite. It’s creamy and sweet and delicious. If you’re a bit hungry or just craving sweets, a small teaspoon of it is completely satisfying.
Almond butter goes great with sliced apples, celery and my 9-year-old’s favorite: pretzels. If your family likes almond butter and you want to try another nut butter, I’ve heard great things about cashew butter and hazelnut butter (not Nutella). These two can be much harder to find though and typically have to be ordered online or purchased at a specialty shop.
Roasted Seaweed instead of Chips
If your kid is a bit daring and willing to try new things, you’ve got to give them some roasted seaweed. These snack packs are found in the chip aisle and also with International foods and come in a variety of flavors. You can get them plain, salted, sweet or spicy and the crispy texture combined with choice of flavor makes a great substitute for chips. It’s roasted, not fried an entire pack is usually only about 60 calories.
“Simple” yogurts instead of regular or kid-branded ones
Have you ever read the label of a kid’s yogurt? There’s a ton of frightening stuff in there: chemicals you can’t pronounce and tons of dyes because kid’s won’t eat it if it’s not a circus color, right? Flip over a “simple” yogurt and you’ll find exactly what should be there: the same fruits listed on the front of the package, milk and maybe some other natural, easy to pronounce stuff. It’s a no-brainer. Not only that, but neither of my kids ever noticed when I made the switch to the simple yogurts: The flavor is still great without all that added junk.
Organic mac n cheese instead of store brand
I’ll admit that Kraft is getting better about this and I hope this is a trend we’ll keep seeing with big companies. While we haven’t tried the new Kraft macs yet, we have been buying organic mac from a couple of other companies for a while and my mac-addicted kiddos claim the organic stuff is way more delicious. The two favorites in my house are Annies and Back to Nature. Both are amazing and both can be purchased at warehouse stores (Annies at Costco and Back to Nature at Sam’s), so the cost of them becomes about the same as buying a name brand, non-organic variety.
Hummus instead of ranch dip
While ranch dip is delicious and you can purchase low-calorie or low-fat varieties, hummus is all natural. Not only that, but hummus is a great source of iron. This is really important if your child doesn’t eat a lot of meat or has an iron deficiency (My own daughter is both). There are some delicious varieties of hummus at the grocery store or for even more health benefits, you can make your own. It’s super simple and comes out delicious (and it’s great at parties). Pair it with pita bread, crackers or veggies. And for more iron-packed goodness, serve it with orange juice: it will increase iron absorption.
Home made chips instead of store bought
I know this one looks a little scary, but it’s not too tough. Store bought chips are usually fried and are covered in who knows what kind of flavorings. For an amazingly delicious and easy to make alternative, you can pick up one of this Top Chips Maker for around $15. Simply slice your potato, sweet potato, squash, etc. and place on the ring. Then cook it in the microwave and you’ve got instant, fresh chips. My pickiest eater loves these more than anything he’s had store bought, and from him, that’s a huge endorsement.
So what are some healthier swaps you make for your kids snacks?
The post 7 Easy Healthy Kid-Approved Snack Swaps appeared first on Day2Day Joys.
]]>The post Meal Planning and Shopping Tips appeared first on Day2Day Joys.
]]>
Written by Karen @ To Work With My Hands, Contributing Writer
Whether you enjoy it or hate it, gathering food and preparing it for our families is something we all have to do.
Sometimes I really enjoy it. At other times…not so much. But, with over 27 years of experience behind me, I’ve learned a few things that have helped make it a natural part of my routine.
It all starts with a plan.
Building The Menu:
Since I shop for groceries every other week, I plan our meals two weeks at a time. Meal planning this way has a few advantages:
- It corresponds with my husband’s pay schedule so I can do all of our shopping, bill paying, and errand running at once.
- When food items are on sale, I can stock up and repeat a menu twice during the menu cycle.
- Shopping every other week instead of weekly really does save on the grocery bill (we tested out the weekly shopping trips once and were stunned at how much more we spent.)
I begin with an Excel spreadsheet with blocks for 21 meals. On each row I list the menu for the first week, type a slash mark, then list the menu for that same day the second week. Often I will just type “x2” beside a meal and we’ll have it both weeks.
Filling in the Menu:
I follow a distinct routine each time I build a new menu. The very first thing I do is transfer meals. Nearly without fail, we will have a meal or two leftover from the previous menu that we never got around to preparing for one reason or another. Because I already have the ingredients on hand, I’m already lowering the next grocery bill.
Next, I shop the pantry, refrigerator, and freezer. If we have leftovers or extras that can be made into new meals, I add those to the menu and note any additional items I’ll need to buy to prepare them.
The next step I take is to shop the sales ads. All of the grocery stores I shop have online ads, which makes it a breeze to browse their sales. I regularly shop 5 different stores for our groceries, snagging the best deals at three of them, and buying the rest that we need at Sam’s Club and Wal-Mart.
I buy nearly all of our produce at one of the stores and the other two offer weekly Buy 1, Get 1 Free sales, which I use to lower our bill for the menu or to stock up on things we use frequently. Armed with sales information, I then use those items to create menu plans.
Finally, if I still have holes in the menu, I go to my old menu folder for ideas from previous weeks that I may have forgotten about.
Making the Shopping Lists:
While checking the sales ads, I jotted down the items I planned to buy. The only remaining lists to make are those for Sam’s Club and Wal-Mart.
As much as I’d like to avoid Wal-Mart, the things that I can’t get elsewhere get purchased there, and we are still a large enough family that shopping at Sam’s Club makes sense.
I keep a master Excel worksheet for each of these stores with a list of the common things we buy.
When I realized we were often buying the same things over and over at Sam’s Club, I created a master sheet. Now, all I have to do is go down the list and decide if we need to purchase each item during the upcoming trip.
I make a list on the side of the items we need, add any additional items, copy and paste it into an email, and send it to my husband or teen son (who almost always does the Sam’s Club shopping for us).
Wal-Mart is my beast! I start with the master list, making note of the basics that we need in each department. After those are typed into my list, I go down the menu, meal by meal, noting any additional items I need to prepare them. These are added to the Wal-Mart list. Sometimes I email it to myself, but often I just print it out because nearly without fail, someone will ask me to pick up _____ while I’m at Wal-Mart and I need to add it to the list.
My Favorite Shopping Habits:
For a couple of years, I tried the coupon game. Eventually, however, I gave it up because it was so time-intensive, and I found that we were actually changing the culture of our eating habits because of them. Now, I will occasionally use them if they are easy, a great deal, and something I would have purchased anyway.
Instead, I prefer to shop for the best deals I can find. During the summer, I visit the farmer’s market and local produce farms to get the freshest produce available and at great prices. For the rest of the year, the practice of pursuing ads and gleaning the best deals has worked much better than trying to pair coupons with my purchases.
Buy 1, Get 1 Free deals are some of the best ways I’ve found to save, and I try to always stock up on things that we use frequently when they are offered in these sales.
My very favorite shopping habit, however, is using shopping apps to save. SavingStar, Ibotta, MobiSave, and Checkout 51 are my favorites. Although they are slightly different, the basic principle with each is to scan the barcodes from purchased items, upload the sales receipt, and get cash back in your account! There are various payout methods for each, but my favorite are those that offer a direct transfer to my PayPal account. Over time it really adds up and is much less time-consuming than dealing with coupons.
Finding unique ways to shop and save is as individual as each family, but with a few basic principles in hand, you’ll be well on your way to a routine that is effective, yet low-impact – even with more than a few mouths to feed.
What are some of your favorite menu planning and shopping tips?
The post Meal Planning and Shopping Tips appeared first on Day2Day Joys.
]]>The post Spiced Pumpkin Pie with Flaky Pastry Crust appeared first on Day2Day Joys.
]]>
Written by Kari @ KariNewsom.com, Contributing Writer
Autumn is officially here! At least in Colorado! We are having beautiful and warm days (high 70’s to low 80’s), but the nights are cool and crisp! Leaves are turning bright yellow, orange and red – and the morning has brought a slight haze these past few days.
Typically I am more of a warm-weather person. I’m all about the sun, flip flops and being outside. That being said, I’m still a Colorado girl at heart. I like to get bundled up in chunky sweaters, wool socks and fur lined shoes. I like jumping in the Jeep with my husband and kids, all bundled up, to drive to the mountains to see the Aspen’s turning. And since we’re Colorado natives, no matter what the weather, you roll the windows down, crank the heat and put those hats on and enjoy the drive!
The other thing I like about autumn is that I start spending more time in the kitchen again, making delicious and yummy smelling foods! A few years ago I wanted to make a pumpkin pie – a pie that I’ve never liked. As in ever. I figured it was because store bought pumpkin pies were not close to one made from scratch, so I wanted to try making one COMPLETELY from scratch to see if I could like a real pumpkin pie!
I have to say, when I took the first bite of this from-scratch creation, I instantly became hooked. This is a tad more involved than other recipes – okay, a lot more involved, so make your special occasions more special by incorporating this into the menu. It is absolutely delicious! If you’re already a pumpkin pie lover – then you MUST try this and add it to your favorite’s list! It’s on ours, which is why we included it in my first cookbook – Real Food. Real Kitchen. So Good!

Spiced Pumpkin Pie with
Flaky Pastry Crust
Yield: 2-3 pies
What you need:
*for the flaky pastry crust
- 3 ¾ cups white spelt flour
- 1 tablespoon cane sugar
- 1 1/2 teaspoon sea salt
- 1/2 teaspoon baking powder, aluminum-free
- 1 ¾ cup cold real butter
- 2/3 cups ice cold filtered water
- 2 tablespoons full-fat plain yogurt
- 1 teaspoon white vinegar
*for the spiced pumpkin pie filling and topping
(this will fill at least 2 pie dishes, depending on the size you make – believe me you’ll be glad you have more than one)
- TOPPING
1/2 cup (1 stick) real butter , at room temperature - 1 cup spelt flour
- 2/3 cup packed brown sugar
- 1 cup chopped pecans
- 1 teaspoon cinnamon
- 1 teaspoon vanilla
- FILLING
1 1/2 cups packed dark brown sugar - 1 teaspoon sea salt
- 2 teaspoon cinnamon
- 4 tablespoons of freshly grated ginger
- 1/2 teaspoon ground clove
- 1/2 teaspoon allspice
- 4 eggs, from pasture-raised chickens
- 2 egg yolks, from pasture-raised chickens
- 2 teaspoon finely grated orange rind
- 29 ounces pure pumpkin, pureed
- 2 (12oz) cans evaporated milk
What You Do:
FOR THE FLAKY PASTRY CRUST:
- In a VERY large bowl, combine the flour, sugar, salt and baking powder and blend well.
- With a pastry blender – or 2 butter knives, cut in the cold butter until you have chunks the size of peas.
- In a measuring glass, mix cold water, yogurt and vinegar together. Add liquid, all at once, to the flour mixture.
- Stir quickly to distribute the liquid BUT DO NOT over mix. The consistency of the dough at this point will be a tad crumbly.
- Allow the dough to rest in the fridge for 2 hours or overnight. When the dough is ready it will break and not stretch.
- Divide into three portions and shape into discs. For the ones you won’t be using right now, wrap in wax paper and store in an freezer safe zip lock bag and place in the freezer for up to one month or in the fridge for up to 3 days. If you do freeze it, thaw it in the fridge overnight – do not leave it out on the counter to thaw out.
- When ready to use, roll out to around 12″ diameter so it will fit right in a 9″ pie dish. Transfer dough to the pie dish and trim the edge so it’s hanging over the edge by 1/2″. Fold over the edge and shape as desired. With a fork, prick the bottom and sides of the crust and place in the freezer for 10 minutes.
- To “blind bake” the crust, place a piece of parchment paper in the pie dish, on top of the crust and fill with dry beans so it’s weighted down. Place pie crust on a cookie sheet and bake for 30 minutes at 350F degrees. After 30 minutes, remove the parchment paper and beans and bake for 5 more minutes. Remove from the oven and cool before placing any filling inside.
For Spiced Pumpkin Pie Filling and Topping:
- Preheat oven to 425F degrees.
- Combine all the TOPPING ingredients in a medium size bowl and set aside.
- Combine all the FILLING ingredients in a large bowl and whisk well. Pour this mixture into the cooled down pie crusts.
- Bake pies for 15 minutes. Reduce the oven temp to 350F degrees and bake for an additional 30 minutes.
- Remove from the oven and sprinkle the topping on both pies. Return to the oven and bake for 15 minutes or until a knife inserted in the center of the pie comes out clean. If you find the edges begin to burn while finishing the bake time, place foil over the edges to during those last 15 minutes of baking.
SUBSTITUTIONS:
- White spelt flour: whole white wheat, whole wheat pastry, unbleached & unenriched white flour
- Cane sugar: coconut sugar, palm sugar
- Full-fat plain yogurt: full-fat sour cream, crème fraiche
- Brown sugar: coconut sugar or cane sugar with 2 tablespoons of molasses added
- Freshly grated ginger: use 1 teaspoon ground ginger if you can’t get fresh ginger
HEALTH MADE EASY:
if using canned pumpkin puree, choose organic | make your own puree using “pie pumpkins”, which is a pretty simple process | since it makes 3 pies, you can either bless someone else with one or freeze them for up to a couple months | the fresh ginger really makes a difference in the taste, I prefer fresh over ground
What is your favorite autumn recipe that makes you smile from ear to ear?
The post Spiced Pumpkin Pie with Flaky Pastry Crust appeared first on Day2Day Joys.
]]>The post Whipped Naked Magnesium Butter appeared first on Day2Day Joys.
]]>
Written by Kari @ Living Strong Wellness, Contributing Writer
It seems these days that good, restful sleep is hard to come by. Not only with adults, but children as well. As this is not an exciting fact, it is a reality and I believe we have a wonderful variety of natural options to help us.
For instance, there are herbal teas, essential oils, supplements and something I want to share with you today – magnesium butter.
Ahhh, this stuff is amazing. Why do I love it so much? Because it provides our body something that is lacking so severely in today’s generation – magnesium.
There are many benefits of healthy magnesium levels. To mention just a few:
- Magnesium helps muscle and nerve function. Serving as calcium’s vital partner, magnesium will allow calcium to do it’s job to build muscle growth.
- Magnesium plays an important role in gut health. Without good levels of magnesium aid in the absorption of copper, potassium, vitamin D and zinc. It also helps regulate blood sugar levels, which will lessen the risk for diabetes.
- Magnesium can help lower blood pressure or keep blood pressure low by allowing your muscles to relax, contract and push blood through the arteries and veins without force.
- Magnesium helps melatonin (the sleep regulating hormone) stay balanced, which allows for more peaceful sleep.
- Magnesium can help balance stress hormones, eliminating stress and tension and allowing for a more relaxed state of being (which in return will help with rest as well).
The list goes on and on, but those five points alone should get people’s attention when it comes to supplementing with safe sources of magnesium. Data from 2012 stated that 48% of the American population, 79% over the age of 55, were deficient in magnesium. This isn’t good, especially when it is such a vital mineral and nutrient for our bodies.
Along with taking a liquid mineral supplement, we use magnesium butter every evening before we go to bed. We just spread a thin layer either behind our knees or on our inner arm (where the skin in thin) and that’s it! I have made this for several family members and friends and they all love it and can tell a huge difference in their quality of sleep (especially the adults…go figure)!
The recipe is simple and last a long time on the shelf! We always use it, so we go through a 4 ounce container in about 3-4 months (three of us use it). Since the recipe doesn’t contain water, it would probably last a good 6-8 months if kept clean (wash hands before using the butter) and can always be extended to 12-18 months or longer if refrigerated!
You can make this recipe ‘naked’, meaning adding no essential oils, or you can add your favorite calming and sleep inducing oils such as lavender, cedarwood, vetiver, ylang ylang or sandalwood! If you are using therapeutic grade essential oils, only use a total of 40 drops of oils combined for this amount, which is one cup.
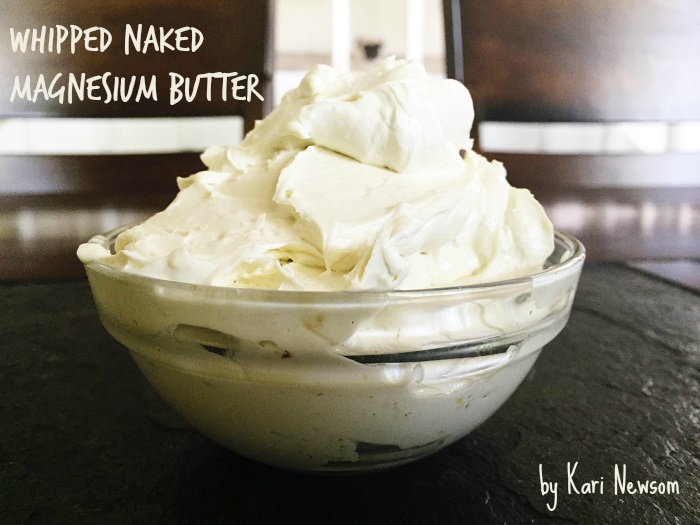
The end result with the color will vary depending on the type of shea butter you use. We use a raw shea butter that has a deep, deep yellow tone and rich scent and amazing benefits that trump refined and bleached shea butters.
Whipped Naked Magnesium Butter
What You’ll Need:
- 3/8 cups virgin coconut oil
- 3/8 cups raw shea butter
- ¼ cup magnesium oil (how to make it yourself)
- ¼ cup almond or jojoba oil
What You’ll Do:
- Melt the virgin coconut oil and raw shea butter over low heat just until it’s all liquid.
- Add the almond or jojoba oil, pour into a medium glass bowl and allow to cool to room temp. You can leave on the counter for an hour or so or you can stick it in the fridge to speed up the process. I like the fridge :o)
- Using a hand mixer or immersion blender, take your room temp oil mix, turn on the blender and slowly add the room temp magnesium oil.
- Mix or blend this until it is creamy. You can’t have any separation, which means, no water droplets anywhere. This can take a few minutes if the oils are room temp. If they are too warm, it will take longer.
- Place the bowl in the fridge for around 30 minutes. You want to see it starting to harden and solidify.
- Once it’s solidifying, remove the bowl and using the mixer or blender with a whisk attachment, whip the mixture until light and fluffy! If you are adding essential oils, do it during this step.
- Store in a glass jar or container and place in a cool, dark place.
I hope you enjoy the wonderful benefits of this magnesium butter that is safe for you and your entire family!
What is your favorite natural solution for calming and peaceful sleep?
The post Whipped Naked Magnesium Butter appeared first on Day2Day Joys.
]]>The post Easy “Sun Dried” Tomatoes appeared first on Day2Day Joys.
]]>
Written by KT @ One Organic Mama, Contributing Writer
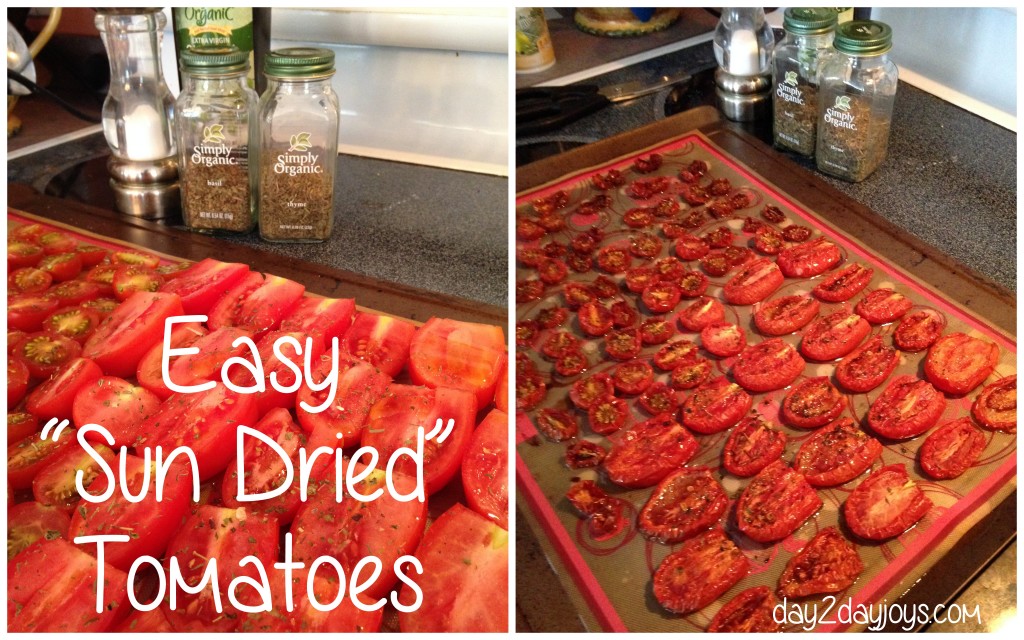
If your garden is anything like mine – you are being inundated by tomatoes… of all varieties… let me explain. Because we compost we always get lots of sprouts of various old seeds from the year before… this year because I was pregnant/just had a baby I wasn’t so great at pulling them… Now my backyard is a total jungle of hundreds of tomatoes.
Each week I make 150+ of them into tomato sauce and freeze it. The remaining tomatoes get either eaten raw or turned into these super simple sun dried tomatoes. Don’t worry – you won’t need any sun for these – actually they would make a great rainy day activity!
Sun Dried Tomatoes
Ingredients:
- Tomatoes – a low moisture variety – we use plum and cherry tomatoes – any amount of them is fine you can cram them onto a cookie sheet!
- Olive oil (you need a bunch of this – you’re using it to cook and then to pack the tomatoes)
- Dried Thyme
- Dried Basil
- Salt
Directions:
Pre-heat your oven to 250 degrees. Line a cookie sheet with either parchment paper or a silicone mat. Jam as many tomato halves on there as you can! They won’t need the space because they are going to shrink. Douse them with a considerable amount of olive oil (you’re going to dump the excess into a jar for the tomatoes when you’re finished and it will be all yummy flavored – so be generous). Sprinkle the tomatoes liberally with salt, basil, and thyme. Put your tomatoes in the oven for 2-8 hours! Taste the tomatoes along the way and also give them a feel. You don’t want them to get crunchy on the edges. You want them to be soft, but with most of the water gone from them. When they are finished – dump the whole tray, oil included, into a jar and then top with additional olive oil. Refrigerate! The oil will harden in the fridge, but no matter, just take it from the fridge a couple of minutes before you need it and they will be ready to eat! We love to throw them into the food processor with some fresh basil and then served with Parmesan cheese over warm pasta… mmmmmmm.
How do you use up your excess garden produce?
The post Easy “Sun Dried” Tomatoes appeared first on Day2Day Joys.
]]>The post Easy Cauliflower Crust Pizza {for a Large 16 inch Pizza} appeared first on Day2Day Joys.
]]>
One thing I love is pizza, I mean who doesn’t???
There’s something nostalgic about it, you bite into a cheesy piece of deliciousness and your tastebuds erupt with excitement and fun memories.
We have pizza night on Friday nights, a lot, not always but I’d say at least 1-2 times per month. You can make pizza healthier, for one, done’t get delivery, make your own. For the crust, you can use whole wheat (if it’s sprouted, even better) use sourdough, use a gluten free flour or even a healthier grain like quinoa or a veggie like cauliflower.
This recipe has no flour or grains, the crust is made from cauliflower. AND It’s so good!
Cauliflower Crust Pizza
What you need:
- 4 C grated cauliflower (about 1 head of cauliflower)
- 2 eggs
- 2 C shredded mozzerella cheese
- 4 T Parmesan
- 1 t salt
- *your favorite toppings: sauce, cheese, pepperonis, olives, etc.
What to do:
- Turn oven on to 425 degrees
- Line pan with parchment paper, set aside
- Grade cauliflower (be careful because this is messy)
- Steam/cook cauliflower until tender
- Next, drain access water and pat dry
- Combine all ingredients (except toppings), mix well. I used my KitchenAid mixer
- Pour mixture onto a 16 inch pizza pan
- Pat down until you make a 16 inch circle
- Bake for 10-20 minutes, until golden
- Remove from heat, add toppings
- Place back into oven until cheese is golden
- Take out and Enjoy!
Do you have pizza night? What healthier versions have you tried?
The post Easy Cauliflower Crust Pizza {for a Large 16 inch Pizza} appeared first on Day2Day Joys.
]]>The post All Shook Up: Fun Homemade Whipped Cream appeared first on Day2Day Joys.
]]>
Written by KT @ One Organic Mama, Contributing Writer
I’ll be honest, I’m not a huge fan of sugaring up the kids with whipped cream and candy – BUT – this was fun, they had to work for their whipped cream  AND it was super easy.
When I was in my last few weeks of pregnancy, a few months ago and getting outside with the kids for physical activity has been a challenge! It is easy to send them outside – but they like when they have a task or when I am out there with them  this was a super fun task – and they got to enjoy their hard work!!!
Mason Jar Whipped Cream
- 1 mason jar with a lid
- 2-3 TBS of (organic) whipping cream
- TINY sprinkle of (organic, raw) sugar *or stevia
- TINY drop of vanilla extract
- LOTS AND LOTS OF SHAKING.
I sent the boys to the yard to run and shake their jars… expending any energy that could possibly be gained with the sugar in the whipped cream. They had a blast!! It might take some adult shaking – but all the kids got their jars pretty close  and ready to be put on some FRESH strawberries that are just coming into season!
It made a great addition to our movie night on Friday!! Because their little hands are warm, and because they are going to have to shake it longer than an adult would (or a mixer would) – chill the cream and jars well (I put both in the freezer).
What’s the best thing you’ve made in a mason jar?
The post All Shook Up: Fun Homemade Whipped Cream appeared first on Day2Day Joys.
]]>The post Tropical Delight Smoothie appeared first on Day2Day Joys.
]]>
Tropical Delight Smoothie
What you need:
1 banana, sliced (either fresh or frozen)
1/2 cup pineapple, fresh or frozen
1/2 cup ice (this is optional and typically used when the fruit you are using isn’t frozen, if you are using frozen fruit, it usually is plenty cold and you won’t need the ice)
What to do:
What is your family’s favorite smoothie?
The post Tropical Delight Smoothie appeared first on Day2Day Joys.
]]>The post 5 Summer Fruits to Get Into Your Freezer NOW appeared first on Day2Day Joys.
]]>
Written by Karen @ To Work With My Hands, Contributing Writer
One of the many reasons to love summertime is the wide array of fresh fruits that are available.
Enjoying them fresh is so wonderful, but the season seems to be too short, so the next best thing is to get them preserved for enjoying throughout the year. My very favorite way to preserve summer fruits is freezing.
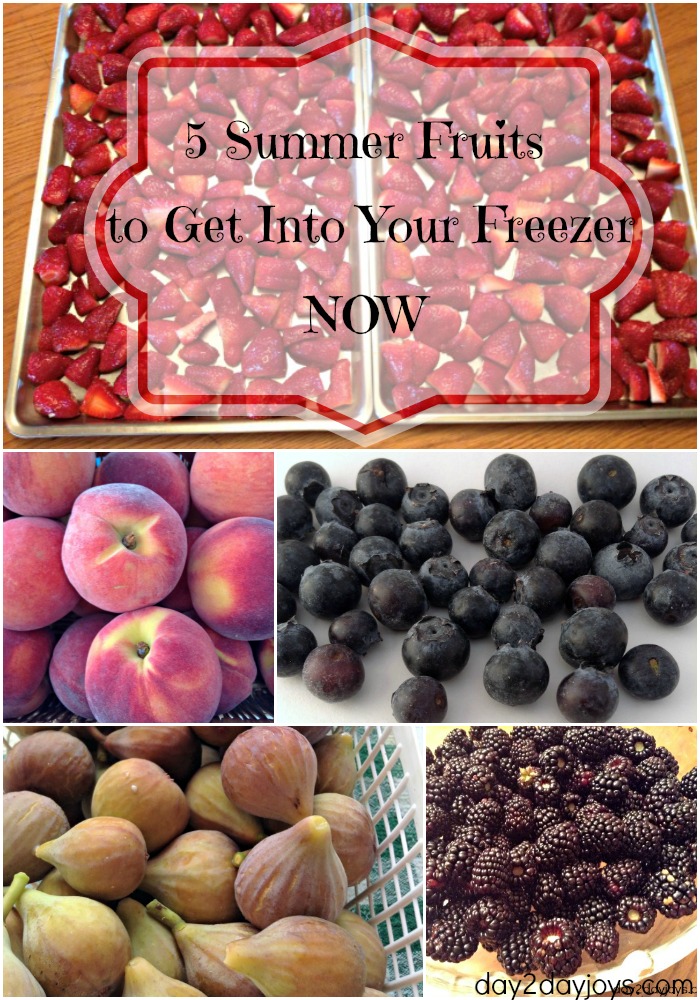
Here’s 5 yummy summer fruits that freeze easily and well, and some delicious ways to enjoy them:
1. Strawberries
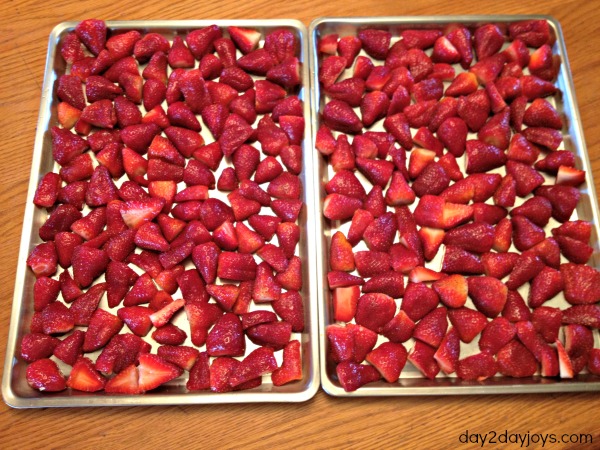
To freeze strawberries, just rinse and gently pat dry. Cut off the leaves and slice berries into rounds or quarters – whatever works best for your recipes.
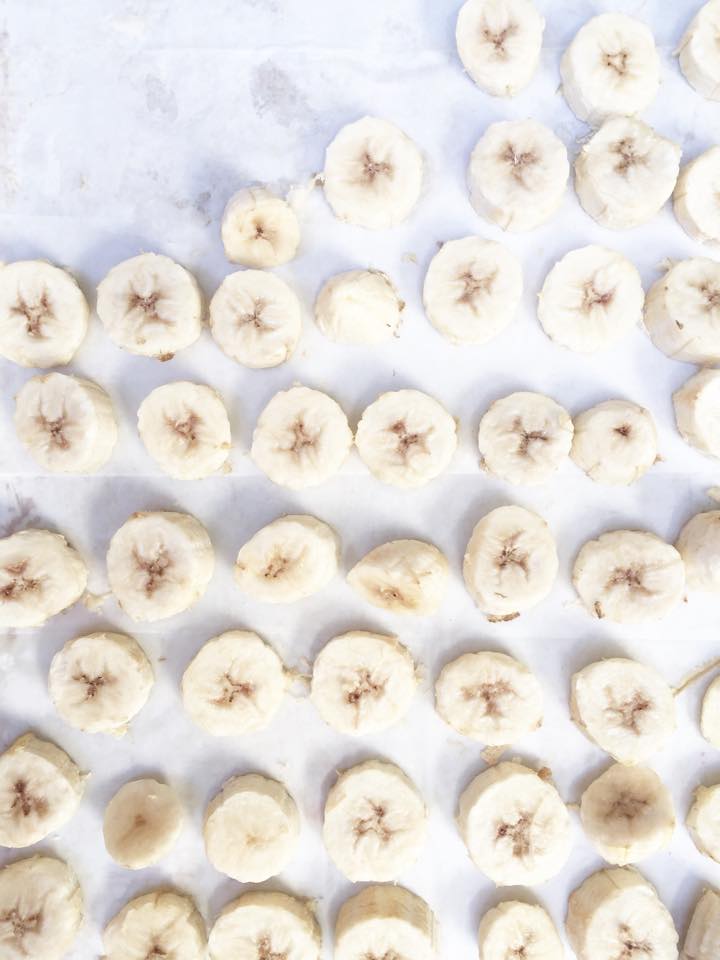
Lay pieces onto baking sheets, making sure they don’t overlap, and put into the freezer. Allow the pieces to freeze for a few hours – enough to be solidly frozen. Transfer to a freezer bag and label. Put back into the freezer and you’re done!
Frozen strawberries are a favorite for smoothies. There’s no need to thaw – just put a handful into the blender with the rest of your ingredients and blend. One of my favorites is kefir, strawberries, bananas, and a bit of apple juice concentrate – Delicious!
Strawberry jam is my family’s favorite homemade jam flavor. By using Pomona’s Pectin, I can easily control the amount of sugar, or other sweetener, that I use without compromising the quality or setting performance.
2. Peaches
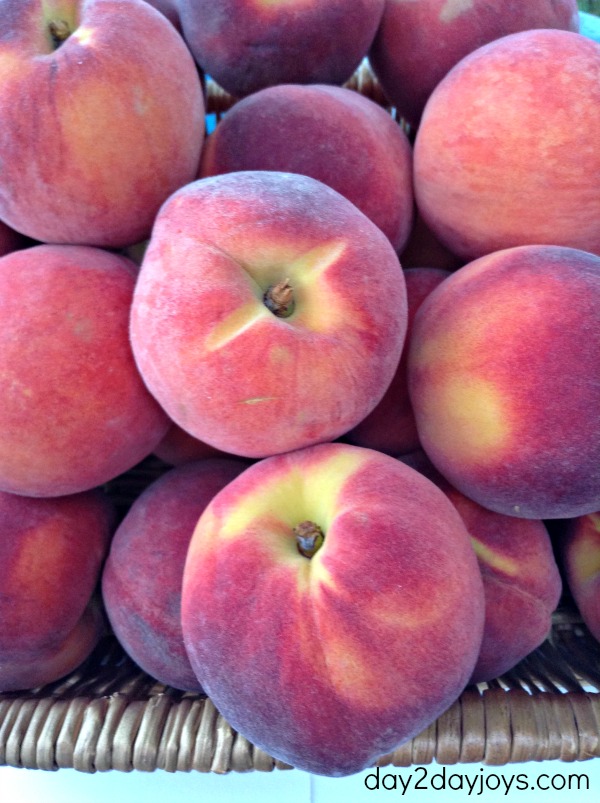
Peaches freeze best when peeled and cut into chunks. There’s a quick and simple way to perfectly remove the skin from peaches without wasting a single bit of the fruit: Drop a few peaches at a time into a pot of boiling water. After 15 seconds, remove with a slotted spoon and plunge into ice water.
When the peaches are cool enough to handle, the skin will slip right off. If your peaches aren’t extremely ripe, it may take a little longer. Just add more boiling water time, or you can always repeat the process if needed.
Once the skin is off, remove the pit and chop your peaches into chunks or slices. Put pieces on a baking tray and finish the same as strawberries.
*Note: If you have a choice, always choose freestone, rather than clingstone, peaches. It will make the job much easier, and you won’t lose any of the fruit that clings to the pit.
Peaches are great in smoothies too. We also love them warmed with some natural sweetener and served over fresh homemade pancakes or waffles with freshly whipped cream. For a refreshing summer treat, make this yummy homemade peach sorbet.
3. Blueberries
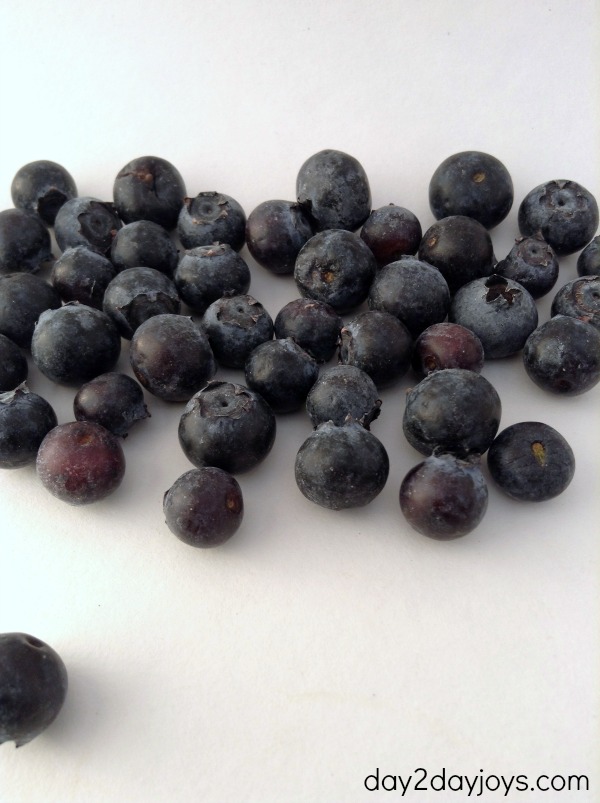
There’s varying opinions on how to best freezer blueberries. After checking with a local grower, I confirmed that they are best frozen without rinsing. Rinsing blueberries before freezing will greatly compromise quality.
Simply place them into freezer bags, label, and freeze! Since they’re whole and dry, you don’t even have to freeze them on baking sheets first. Can it get any easier than this?
Do plan to rinse them just before using. I keep a small colander handy for blueberries, and it’s a snap to rinse them just before using.
This year I made a delicious blueberry sauce to top our pancakes, yogurt, ice cream, cheesecake, and even to add to smoothie recipes. It was also yummy mixed into plain cream cheese as a topping for bagels or toast.
And before you freeze them all, do mix in some fresh blueberries into yogurt and granola.
4. Figs
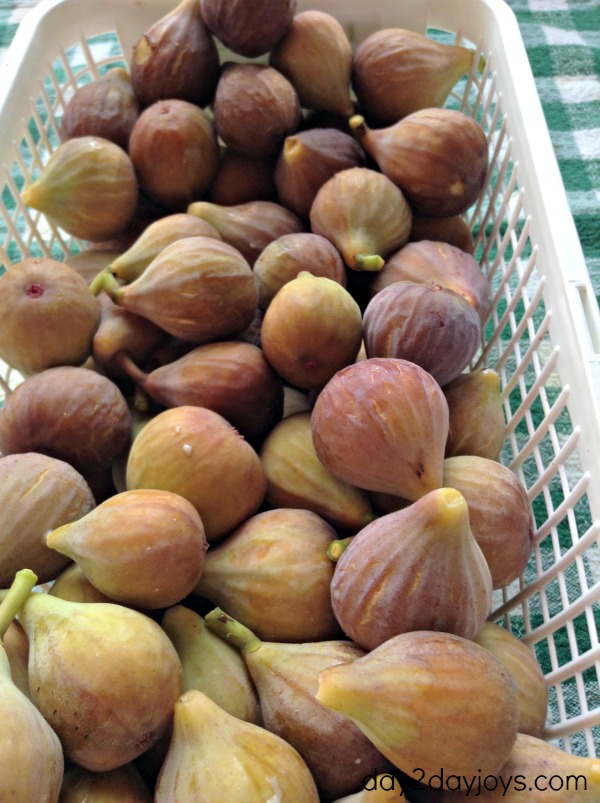
Figs are so wonderful fresh, but they have such an incredibly short season. In the past I’ve canned and dried them, but a couple of years ago I decided to try freezing them. It worked perfectly.
Just rinse, gently dry, remove stems and cut in half. Spread in a single layer on baking sheet and freeze until very firm. Transfer to a freezer bags, label, and freeze.
I’ve tossed frozen figs into smoothies for a delicious new flavor. They blend well with bananas. You can also stew them over low heat with a natural sweetener and use as a pie filling.
5. Blackberries
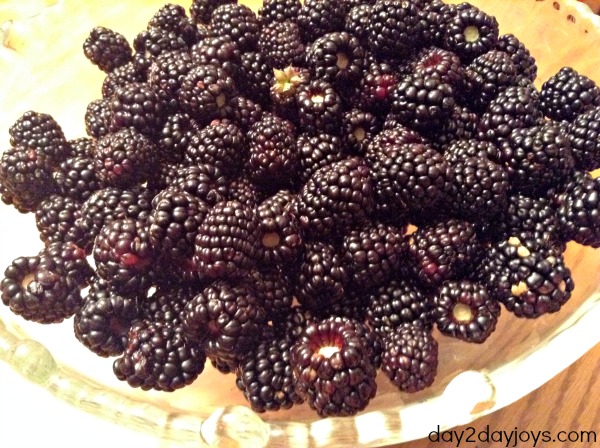
We’ve been blessed over the past four years to live in a house that has thousands of wild blackberries growing along the field fencerows behind us each spring.
Freezing has always been my preferred method for preserving them. Rinse and gently pat try. Spread in a single layer on a baking sheet and freeze until solid. Transfer to a freezer bag, label, and freeze.
One of my favorite smoothie flavors includes blackberries. They also make a wonderful homemade salad dressing recipe, and who could forget the iconic blackberry cobbler?
Be sure to get a few fresh summer fruits and berries into your freezer now, and enjoy the fresh and delicious flavor all year long.
What other fruits would you add to this list? Do you have any other delicious ways to enjoy them?
The post 5 Summer Fruits to Get Into Your Freezer NOW appeared first on Day2Day Joys.
]]>


