The post Tips For Eating Healthy During The Holidays appeared first on Day2Day Joys.
]]>
Written by Kari @ Kari Newsom Contributing Writer
It’s that time of year again.
As a Health and Nutrition Coach, I always have people ask me for some tips on how to successfully celebrate special occasions without completely going off the deep end when it comes time to eat.
The first and most important thing I always tell people is this:
ENJOY THE CELEBRATION!!!
All to often we try so hard to do ‘the right thing’ about the whole ‘eating during the holiday’ issue, that we actually end up NOT enjoying this time of year.
Don’t do that anymore. Eating healthy and making healthier choices isn’t about being miserable. I promise.
There are a couple pointers I like to give people who don’t want to go crazy, over indulge and completely get off track with their healthy lifestyle.
If you are like the average person, this time of year {or any celebration for that matter} can be a challenging time.
My family typically eats extremely healthy, BUT I don’t freak out and go crazy that I’m not getting my organic and fresh foods. I am always thankful that someone would take the time to prepare a meal for us to enjoy – whether it’s considered ‘healthy’ in my book or not. Since 98% of the time we eat extremely healthy and disciplined at home, I never feel guilty when those occasions arise where we aren’t able to eat that way.
If there are certain foods that you absolutely cannot eat (if you have allergies or have celiac, etc.) then speak with the host for that day and explain your situation and ask if it would be okay if you brought some of your own items so you can still sit down and enjoy the meal with everyone else. Many times you will find that the host may offer to make some dishes according to your needs. If your eating preferences are just that, preferences, then it’s up to you to make smart choices while you are filling your plate.
Here are a few tips that might help you out this Thanksgiving holiday:
1. Eat a Smaller Meal Beforehand
If you are prone to eating TONS of food and filling your plate to overflowing, then going back for seconds and thirds – try eating a small meal before you go to your Thanksgiving celebration. It doesn’t have to be a rich meal, just a small meal that will help fill you up enough where gorging out on food doesn’t look so appealing to you! You’ll still get to enjoy the food on the table, you just won’t be shoveling it all in your mouth like there’s no tomorrow.
2. Water
Drinking a glass of water about 30 minutes before sitting down to eat can make a person feel full, so you won’t end up eating as much.
3. Self-Control
Make a decision to only have one plate of food, which means smaller portions of each item. Not always easy, but your stomach will thank you for it once dessert time rolls around.
4. Mini Size It
If you are a dessert sampler like some {GUILTY], then don’t take full size servings of each dessert. Cut in half, thirds or quarters so you can sample all the wonderful goodies, without consuming the amount of an entire pie or cake by the time you’re done.
5. Control Your Eyes
If your eyes are always bigger than your stomach, then it’s about discipline, discipline, discipline! Just CONTROL yourself when filling your plate!!! Yes, it smells so good and looks amazing and Aunt Susie’s mashed potatoes are the bomb, but you don’t need a mountain of food to enjoy all that goodness.
Studies show that the first couple bites of food are the most intense and satisfying – taste wise. Even with amazing desserts, the more bites you take, the magnitude of it’s greatness starts to taper down a bit after the first few bites.
6. Going Back
Are seconds bad? I don’t think so, as long as your first servings weren’t gi-normous to begin with. Just remember that you don’t need to over do it! When your body tells you to stop eating – then STOP EATING!
7. Enjoy The Company
Make a conscious effort to enjoy the people around you. Aren’t we all gathering on Thanksgiving (or whatever celebration) to spend time with each other? Yes, so enjoy your company, engage in conversation, laugh and CHEW SLOWLY. This is a guarantee that you won’t eat as much when you talk with people and give your food a chance to settle and your brain is told that you’re full (this usually takes about 15-20 minutes to occur.)
8. Chew Chew Chew
Along with chewing slowly, we should all chew each bite 20-30 times before swallowing completely! I know you think I sound crazy, but you will reduce the amount of food you eat by quite a bit. Why? Since you’re taking the time to chew your food purposely, you won’t be gulping down large portions every 5 seconds and by the time you’ve been eating for 15-20 minutes and your body is saying ‘STOP, I’M FULL’ – you won’t have consumed nearly as much food. Also, chewing this many times is the most important part of digestions since it breaks down your food to a point that once it hits your stomach, your stomach won’t need to work so hard to continue the digestion process.
9. Nix Tons of Liquids While Eating
Try not to drink a ton of liquid while you are eating. The reason is because it dilutes your digestive juices in your stomach and then it takes so much longer for your body to digest your food. This can lead to you feeling so full that you feel sick to your stomach. Give your food a chance to do its job once its in your body!
All in all, we need to demonstrate self control and we are more than capable of doing that! Take time to enjoy the food that has been prepared for you and enjoy the people surrounding you. These holidays have a purpose behind them, so focus on those purposes instead of making the food the center and most important aspect of the day.
Most importantly, when it comes to the food you eat, pray over your food and thank God for the nourishment to your bodies and protecting you from any harm. Thank Him for the family and friends that are surrounding you and the many blessings you have in your life. Thank Him for the life you have. If you are reading this, then you are alive! What a wonderful thing. On top of that, you can’t be reading this post without a computer, ipad or smart phone! Be thankful! You are blessed! Now, be a blessing to others!
What simple things do you do during holiday celebrations to avoid over-indulging?
The post Tips For Eating Healthy During The Holidays appeared first on Day2Day Joys.
]]>The post Spiced Pumpkin Pie with Flaky Pastry Crust appeared first on Day2Day Joys.
]]>
Written by Kari @ KariNewsom.com, Contributing Writer
Autumn is officially here! At least in Colorado! We are having beautiful and warm days (high 70’s to low 80’s), but the nights are cool and crisp! Leaves are turning bright yellow, orange and red – and the morning has brought a slight haze these past few days.
Typically I am more of a warm-weather person. I’m all about the sun, flip flops and being outside. That being said, I’m still a Colorado girl at heart. I like to get bundled up in chunky sweaters, wool socks and fur lined shoes. I like jumping in the Jeep with my husband and kids, all bundled up, to drive to the mountains to see the Aspen’s turning. And since we’re Colorado natives, no matter what the weather, you roll the windows down, crank the heat and put those hats on and enjoy the drive!
The other thing I like about autumn is that I start spending more time in the kitchen again, making delicious and yummy smelling foods! A few years ago I wanted to make a pumpkin pie – a pie that I’ve never liked. As in ever. I figured it was because store bought pumpkin pies were not close to one made from scratch, so I wanted to try making one COMPLETELY from scratch to see if I could like a real pumpkin pie!
I have to say, when I took the first bite of this from-scratch creation, I instantly became hooked. This is a tad more involved than other recipes – okay, a lot more involved, so make your special occasions more special by incorporating this into the menu. It is absolutely delicious! If you’re already a pumpkin pie lover – then you MUST try this and add it to your favorite’s list! It’s on ours, which is why we included it in my first cookbook – Real Food. Real Kitchen. So Good!

Spiced Pumpkin Pie with
Flaky Pastry Crust
Yield: 2-3 pies
What you need:
*for the flaky pastry crust
- 3 ¾ cups white spelt flour
- 1 tablespoon cane sugar
- 1 1/2 teaspoon sea salt
- 1/2 teaspoon baking powder, aluminum-free
- 1 ¾ cup cold real butter
- 2/3 cups ice cold filtered water
- 2 tablespoons full-fat plain yogurt
- 1 teaspoon white vinegar
*for the spiced pumpkin pie filling and topping
(this will fill at least 2 pie dishes, depending on the size you make – believe me you’ll be glad you have more than one)
- TOPPING
1/2 cup (1 stick) real butter , at room temperature - 1 cup spelt flour
- 2/3 cup packed brown sugar
- 1 cup chopped pecans
- 1 teaspoon cinnamon
- 1 teaspoon vanilla
- FILLING
1 1/2 cups packed dark brown sugar - 1 teaspoon sea salt
- 2 teaspoon cinnamon
- 4 tablespoons of freshly grated ginger
- 1/2 teaspoon ground clove
- 1/2 teaspoon allspice
- 4 eggs, from pasture-raised chickens
- 2 egg yolks, from pasture-raised chickens
- 2 teaspoon finely grated orange rind
- 29 ounces pure pumpkin, pureed
- 2 (12oz) cans evaporated milk
What You Do:
FOR THE FLAKY PASTRY CRUST:
- In a VERY large bowl, combine the flour, sugar, salt and baking powder and blend well.
- With a pastry blender – or 2 butter knives, cut in the cold butter until you have chunks the size of peas.
- In a measuring glass, mix cold water, yogurt and vinegar together. Add liquid, all at once, to the flour mixture.
- Stir quickly to distribute the liquid BUT DO NOT over mix. The consistency of the dough at this point will be a tad crumbly.
- Allow the dough to rest in the fridge for 2 hours or overnight. When the dough is ready it will break and not stretch.
- Divide into three portions and shape into discs. For the ones you won’t be using right now, wrap in wax paper and store in an freezer safe zip lock bag and place in the freezer for up to one month or in the fridge for up to 3 days. If you do freeze it, thaw it in the fridge overnight – do not leave it out on the counter to thaw out.
- When ready to use, roll out to around 12″ diameter so it will fit right in a 9″ pie dish. Transfer dough to the pie dish and trim the edge so it’s hanging over the edge by 1/2″. Fold over the edge and shape as desired. With a fork, prick the bottom and sides of the crust and place in the freezer for 10 minutes.
- To “blind bake” the crust, place a piece of parchment paper in the pie dish, on top of the crust and fill with dry beans so it’s weighted down. Place pie crust on a cookie sheet and bake for 30 minutes at 350F degrees. After 30 minutes, remove the parchment paper and beans and bake for 5 more minutes. Remove from the oven and cool before placing any filling inside.
For Spiced Pumpkin Pie Filling and Topping:
- Preheat oven to 425F degrees.
- Combine all the TOPPING ingredients in a medium size bowl and set aside.
- Combine all the FILLING ingredients in a large bowl and whisk well. Pour this mixture into the cooled down pie crusts.
- Bake pies for 15 minutes. Reduce the oven temp to 350F degrees and bake for an additional 30 minutes.
- Remove from the oven and sprinkle the topping on both pies. Return to the oven and bake for 15 minutes or until a knife inserted in the center of the pie comes out clean. If you find the edges begin to burn while finishing the bake time, place foil over the edges to during those last 15 minutes of baking.
SUBSTITUTIONS:
- White spelt flour: whole white wheat, whole wheat pastry, unbleached & unenriched white flour
- Cane sugar: coconut sugar, palm sugar
- Full-fat plain yogurt: full-fat sour cream, crème fraiche
- Brown sugar: coconut sugar or cane sugar with 2 tablespoons of molasses added
- Freshly grated ginger: use 1 teaspoon ground ginger if you can’t get fresh ginger
HEALTH MADE EASY:
if using canned pumpkin puree, choose organic | make your own puree using “pie pumpkins”, which is a pretty simple process | since it makes 3 pies, you can either bless someone else with one or freeze them for up to a couple months | the fresh ginger really makes a difference in the taste, I prefer fresh over ground
What is your favorite autumn recipe that makes you smile from ear to ear?
The post Spiced Pumpkin Pie with Flaky Pastry Crust appeared first on Day2Day Joys.
]]>The post Tropical Delight Smoothie appeared first on Day2Day Joys.
]]>
Tropical Delight Smoothie
What you need:
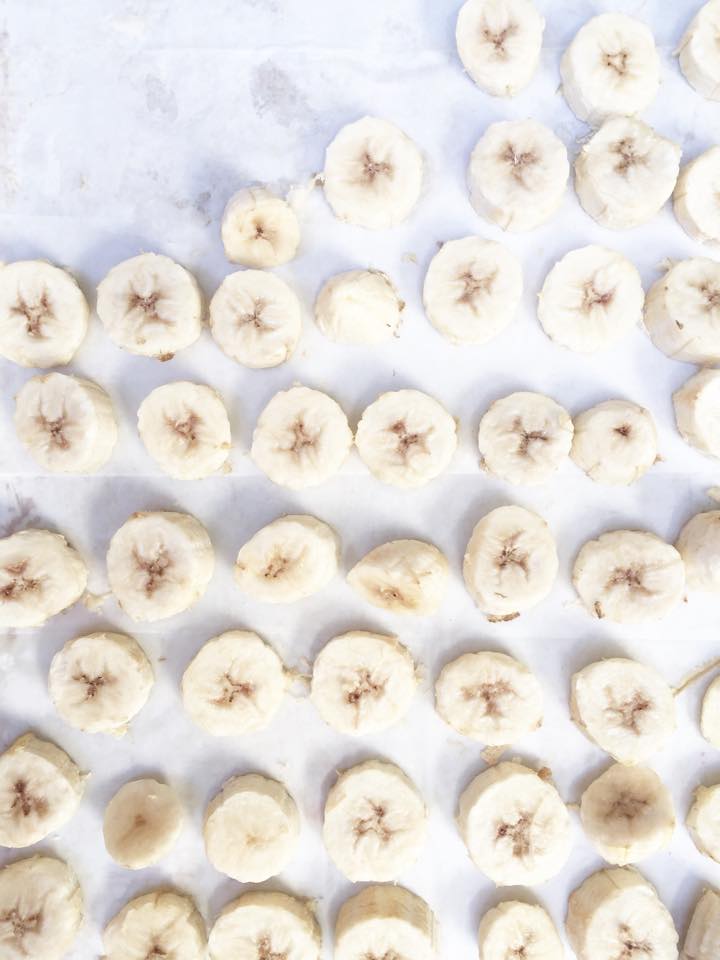
1 banana, sliced (either fresh or frozen)
1/2 cup pineapple, fresh or frozen
1/2 cup ice (this is optional and typically used when the fruit you are using isn’t frozen, if you are using frozen fruit, it usually is plenty cold and you won’t need the ice)
What to do:
What is your family’s favorite smoothie?
The post Tropical Delight Smoothie appeared first on Day2Day Joys.
]]>The post Quick and Easy Homemade Brown Sugar appeared first on Day2Day Joys.
]]>It’s true that too much sugar isn’t good for you, but I’m not likely to completely give up on the occasional sweet treat.
Instead, we focus on limiting sugar in our day to day diets and choosing healthier alternatives to processed desserts.
Making our own treats is healthier and it saves us money to boot. I’ve also found that I can simplify my grocery shopping and save more money by learning to make own of the basics for many treats at home.
Costco (one of my favorite stores!) sells organic sugar in ten pounds bags (a lot, I know, but it lasts a long time and freezes well) which I then use for regular sugar, powdered sugar, and brown sugar when I need it.
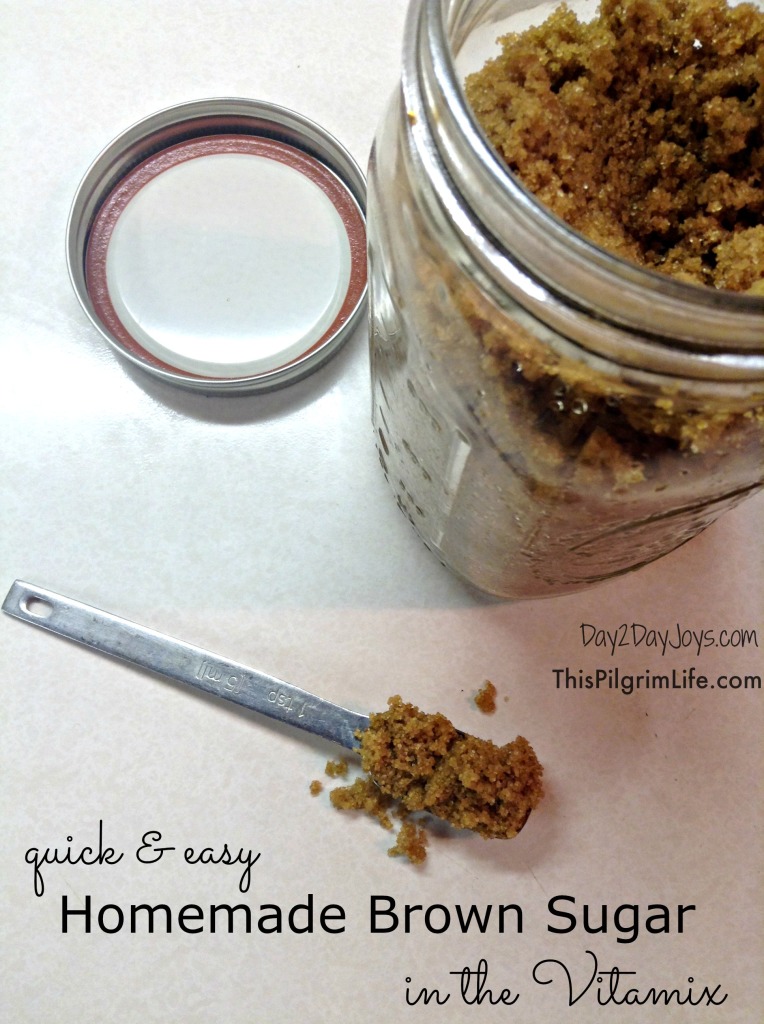
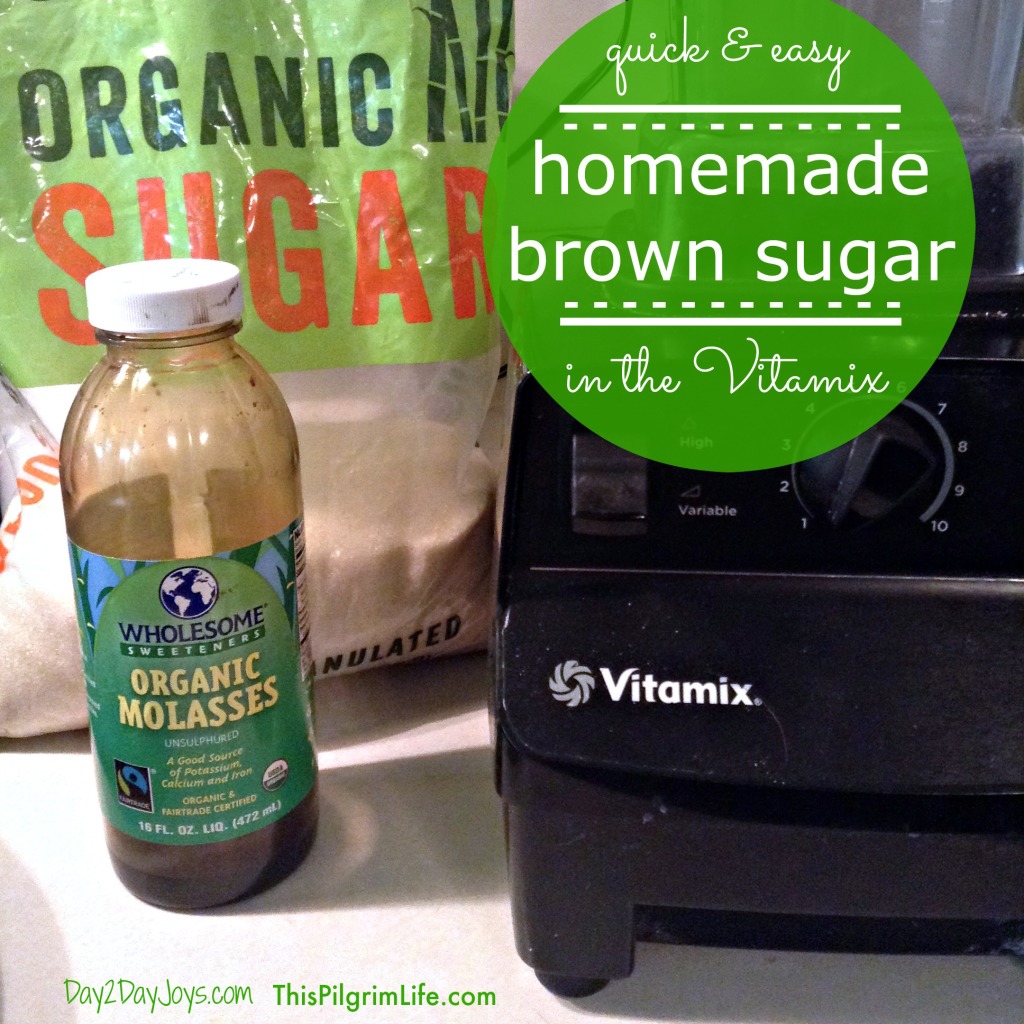
Making brown sugar takes about 5 minutes. It really is a super simple process. I’ve made it before in my stand mixer and that works well, but I’ve found I get a better consistency in my Vitamix— and I don’t have to pull out my mixer.
*Note from Rachel: you can also use this same method using xylitol for a sugar free version
Making Brown Sugar in the Vitamix
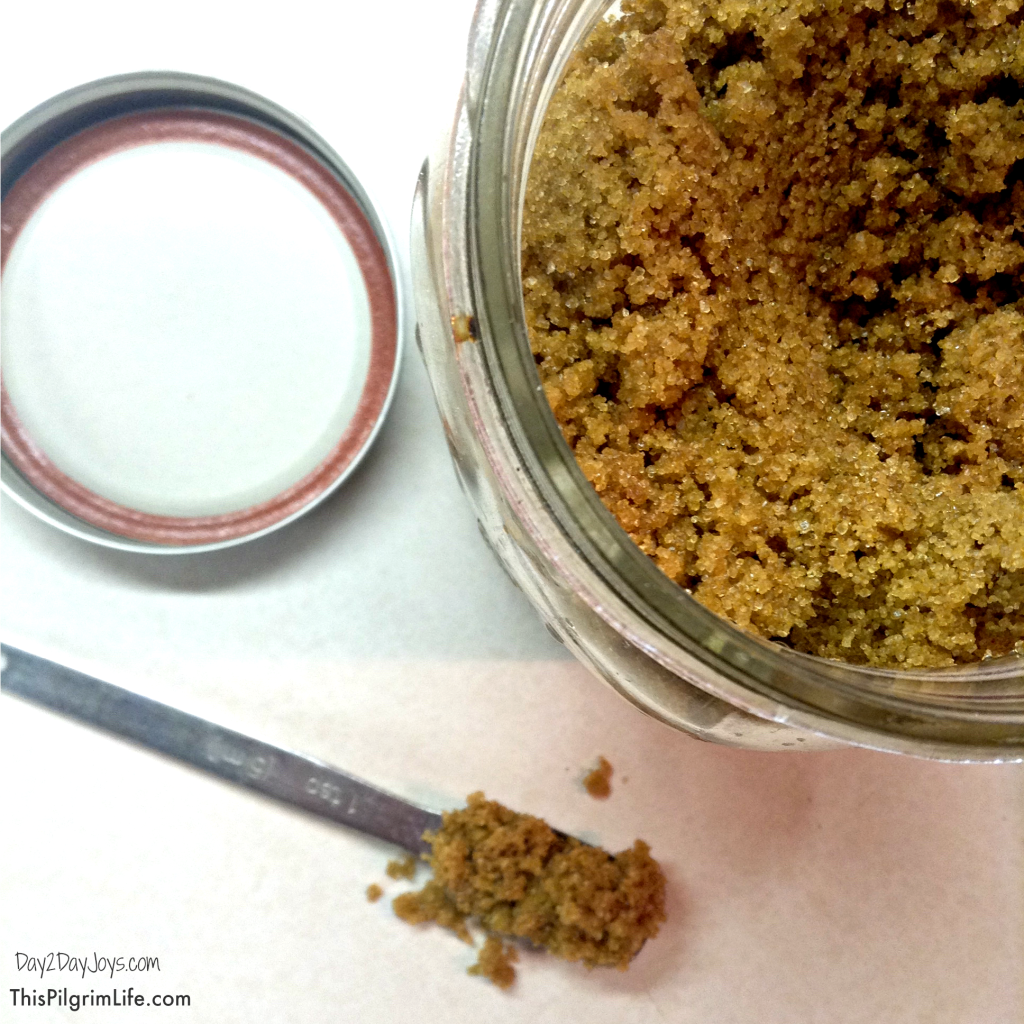
Add 2 cups of granulated sugar into the Vitamix container. Turn the mixer to a 5-7 speed (about medium-high) or until the sugar starts to move. Slowly drizzle 3 tablespoons* molasses through the opening in the lid. Mix until the sugar takes on a uniform brown color.
IMPORTANT: Use the tamper to make sure the sugar is being evenly distributed throughout the container. Turn off the Vitamix and use a long spatula once during mixing to redistribute the sugar at the bottom of the container.
*You can adjust the amount of molasses you use to make a lighter or darker brown sugar.
One of the best things about learning to make ingredients and staples at home is no longer needing to run to the store for everything when you realize you’ve run out.
Plus, things just usually taste better when they’re homemade!
What is one kitchen staple that you’ve learned to make at home?
The post Quick and Easy Homemade Brown Sugar appeared first on Day2Day Joys.
]]>The post Protein Packed Nut Butter Bites appeared first on Day2Day Joys.
]]>
Written by Contributing Writer, Kari at Living Strong, Health & Wellness
Snack time!
Personally, I’m not a big “snacker”. I can go meal to meal without needing any extra food to keep me going. Although, having a family, I need to have a plan on hand for our meals and snacks and then I need to make sure they are ready and available to eat!
My kids, on the other hand, seem to need a snack every 30 minutes. I can understand why since they are on the go, non-stop, active kids. This can present a problem when you are wanting to feed your family healthy foods that nourish the body. Unfortunately, the quick and convenient, grab and go processed options you find on the grocery store shelves don’t make the cut for me. It’s hard enough to make sure they have nourishing and healthy lunches everyday – then to add in snacks to mix, that means more creative ideas are needed!
I know it would be easier to go this route, but I’ve spent too many years building a strong foundation of health in my family, this is one area I don’t want to skimp on. This means I need to be creative in the kitchen when it comes to snacks.
I have a long list of snacks that we rely on, but one of our favorites are these Nut Butter Bites! The kids love helping with them as well – which I think makes them even more enjoyable. Kids love helping and being a part of creating the food they eat.
These amazingly healthy bites are a great snack for my active kids and only a couple are needed for them to feel satisfied. Packed with protein from the nut butter, a healthy source of energy from raw honey, good and healthy fat from the coconut and extremely low in sodium – you can ‘t go wrong with these delicious treats! They are more like a dessert than a snack. That’s always a plus!
To top off these already great nut butter bites, roll them in sucanat (unrefined cane sugar), shredded coconut, cocoa powder or mini chocolate chips (we like Enjoy Life! allergen-free brand). Hands down, these are healthier than any overly processed and refined ‘snack’ you can get off a shelf.
Sure, there’s a few minutes of time involved, but isn’t your family worth it? Of course they are!
Along with many other healthy snacks, appetizers, beverages, main dishes and desserts, this recipe can be found in my cookbook, Real Food. Real Kitchen. So Good! I hope you and your family enjoy these as much as we do!
- ½ cup organic natural peanut butter (no added ingredients, just peanuts) or nut butter of choice
- ½ cup organic raw honey
- ½ – 1 cup organic unsweetened coconut, finely shredded
- ⅓ cup organic mini dark chocolate chips, soy-free (we like Enjoy Life! brand, allergen-free)
- sucanat (unrefined sugar) for rolling the bites (other options: you can roll them in coconut, chocolate chips or cocoa powder)
- In a medium size bowl, mix the peanut butter and honey until combined thoroughly.
- Add the chocolate chips. You can add more or less according to your taste (I always add the larger amount).
- Add the coconut in ¼ cup amounts until the consistency reaches a thick, yet semi-sticky state.
- You don’t want it so sticky that you can’t roll it, but you don’t want it so dry that it wont hold together. Find the happy medium.
- Once you are able to roll them and they still have some stickiness to them, roll into balls and then roll in the sucanat.
- Place on wax or parchment paper on a baking sheet or plate.
- Refrigerate for a while so they can harden up a bit, transfer to a glass jar and keep in the fridge.
What is your favorite healthy snack?
The post Protein Packed Nut Butter Bites appeared first on Day2Day Joys.
]]>The post What It’s Like to Afford Fresh Organic Produce and How You Can Do It Too appeared first on Day2Day Joys.
]]>**Please meet Reelika, a new contributor… she would love to hear from you! -Rachel
You are a great mommy. You want the best for your kids and family. It is the hope of many families to be able to provide organic veggies, fruits and berries to their family and especially to the kids. Unfortunately the downside of organic produce is the cost. But what if I told you there are ways that you can still provide the best organic produce to your kiddos without breaking your budget?
As a mom to an allergic toddler and having been diagnosed with hypothyroidism myself, I have done lots of research about the benefits of organic food. I am not a health care advisor, but I can share what has worked for our family and how you can do it too.

Organic produce has been very beneficial for our family. Since my toddler is allergic to many things, I provide him with several organic veggies, fruits and berries. He loves this delicious organic produce and is not a picky eater anymore. He used to be very hyperactive, but since switching to organic food, we don’t seem to have much of a problem with it anymore.
We cut back on other things, but invest into our health, so it keeps us away from pharmacies, doctor’s office and hospitals. Being healthy means also being more productive and happy at preschool, home and work.
Top 3 Tips on How to Afford Organic Produce
Tip # 1 – Organic Produce as an Investment
Don’t look at the price tag of the organic produce as a number; instead, see it as an investment. Compare it to the costs of medications, health care and doctor’s visits.
Chances are you have heard that non-organic food can contain pesticides and cancer-causing hormones or even GMOs. Research shows that pesticides can cause not only cancer, but also allergies, skin and neurological issues, ADHD, birth defects and much more.
Children are especially sensitive to pesticides due to their development and growth. You can either pay the farmer or the pharmaceutical business.
It is time to invest into your and your family’s health. The truth is, many people don’t think about it until they have some kind of health problem. I have to admit, I am completely guilty as I was one of them.
I never felt the need for organic food, until I was diagnosed with hypothyroidism during pregnancy. Since then I have invested into my health instead of the medications I had to use. In fact, medications were more expensive than my investment in organic produce, and I am so much healthier now.

Tip # 2 – Prioritizing Organic Produce
Take a look at what other monthly expenses you have – a new iPhone, expensive jewelry, eating out several times per week, new fancy toys, etc. If you can afford any of them, you can also afford organic produce. Find ways to cut back on monthly payments and use the money instead for quality organic produce.
I am always looking for ways to cut back on our monthly expenses. Saving water and lowering heating costs increases our grocery budget. A monthly budget gives you a crystal-clear overview of your highest expenses so you can make your own choices of where to cut back.
Tip # 3 – Making the Right Choices
It can save you big bucks if you are making the right choices. Be aware of when and which organic produce to buy.
Here is what to keep in mind while choosing fresh organic produce:
- If you bought expensive organic veggies yesterday, then find less expensive produce to buy next time you do groceries. It keeps your budget in balance.
- Meal plan and create a grocery shopping list. Buy the amount of veggies you are planning to eat so you won’t be wasteful.
- Be creative with organic veggies that are close to expiring. You can use them for smoothies, baking, or soup.
- Buy what is on sale or close to its expiry date. It can save huge bucks when the expiration date is close by. Just make sure you use it as soon as possible.
- Buy local. Any organic local veggie is always cheaper than an imported one.
- Prefer seasonal. Prioritize what is in season as it tends to be cheaper, and you can also freeze these for the non-seasonal time.
- Don’t buy pre-washed and packaged food, as these cost much more.
- Prefer healthy veggies and berries for snacks. Leaving chocolate, cookies and chips out of your grocery list saves you money for organic veggies, fruit and berries.
- Frozen organic veggies are great choices as well. Buy them in bulk and while on sale.
- Grow your own organic herbs that you can use for meals. You don’t need a yard to grow your own green leafs. All you need is a small space in kitchen or on a balcony to have your own organic herb section. I also have mini-tomatoes growing in my kitchen.
- Wash the produce just before using it so it will last longer.
- Citrus produce can last at least a week longer when stored in the fridge.
- Don’t forget coupons! Find the best deals and use them.
- Negotiate if possible. When buying directly from a farmer, use your negotiation skills. Offer to buy in bulk and don’t be afraid to ask for a discount. Most likely the farmer will be more than happy to offer you a discounted price when selling more. You can freeze the extra for later and will have saved big bucks.

Fresh organic veggies, fruits and berries are always going to be expensive, but investing into our family’s health and cutting back on our monthly expenses has made a difference for our well-being. Making the right choices keeps us on budget and provides a quality lifestyle. You can do it too!
Did I miss anything? How do you make organic produce affordable for your family?
The post What It’s Like to Afford Fresh Organic Produce and How You Can Do It Too appeared first on Day2Day Joys.
]]>The post Chicken Tortilla Soup With A Kick appeared first on Day2Day Joys.
]]>
Written by Kari @ Living Strong, Health & Wellness, Contributing Writer
It is October and it’s officially cooling down enough to try this great recipe, which is perfect for any chilly weather you might experience over these next few months!
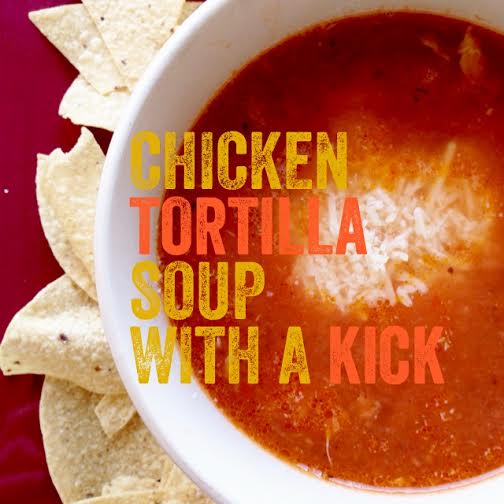
This belly warming soup is simple, quick and so delicious! All you need is a blender and a stock pot (or slow-cooker) and you’re set to make the most amazing tortilla soup you have ever had! You can keep this a mild meal or add some extra peppers to give it that kick that keeps you coming back for more!
This is not only a favorite in our house, but in houses all over these wonderful states! I’ve shared this recipe over the years and then it was included in my cookbook – and it gets rave reviews every time! I have never found a restaurant that has a soup that compares to this! You definitely need to try it! I’ve taken the text from the cookbook to include allergen-free information as well as more tips to make it even healthier!
Chicken Tortilla Soup With A Kick:
What you need:
- 1 whole fryer chicken
- 8 cups chicken broth (can make while cooking the chicken)
- 16 ounces of diced tomatoes
- 1 medium yellow or white onion, cut in half
- 2 cloves garlic – ½ cup fresh cilantro
- 1 teaspoon raw honey
- 3 chipotle peppers soaked in adobe sauce
- optional, 2 avocados
- optional, ½ cup full-fat yogurt, plain
- optional, tortilla chips
- optional, shredded cheese
What you do:
- To prepare the stock and the chicken, plan to start preparing the meal in the morning.
- Cook the whole fryer by placing in a slow cooker, covering completely with water, adding seasonings and spices (salt, garlic powder, parsley, pepper) and cook on low for 8 hours.
- After 8 hours, remove the whole fryer from the slow-cooker using slotted spoons. Place in a bowl and allow to cool for about 5-10 minutes. Begin removing the chicken from the bones and place on a plate. Pull the meat with two forks. This is your shredded chicken.
- Strain out the liquid in the slow-cooker into a bowl (if you’ll cook the soup in the slow-cooker) or stock pot (if cooking soup on the stove) to remove any large pieces of meat or bone that fell off the chicken (it gets super tender). If you used a bowl, once it’s strained, replace liquid back in slow-cooker.
- Separate about 1 ½ to 2 pounds of shredded chicken and add to the broth.
- In a blender, puree the tomatoes, onion, garlic, cilantro and honey until smooth.
- Pour this mixture in with the broth and chicken. Stir to combine.
- Add the chipotle peppers if you are wanting that kick to your soup. If not, omit.
- Continue cooking in the slow-cooker for about an hour and a half or on the stove-top over medium for 45 minutes.
- To serve, prepare the bowls by putting some avocado and yogurt in the bottom of the bowl. Crunch tortilla chips and place on top. Next, ladle the soup over the prepared bowls and top with shredded cheese. Wow, get ready!
Yield: Approximately 14 cups
I’m special because (if using “optional” ingredients, the allergy-free info below may change):
dairy-free, egg-free, gluten-free, grain-free, soy-free
Substitutions:
*Full-fat yogurt: full-fat sour cream
Health Made Easy:
if you’re short on time, you can purchase your broth, but make sure it’s organic and low-sodium | homemade broth will supply your body with so many nutrients that you’ll never get out of store bought brands, so choose homemade if possible | don’t have time to cook a whole fryer, purchase chicken thighs, bake and shred | use fire-roasted tomatoes or seasoned diced tomatoes | you don’t need to put all the optional extras in the bowl first, but boy does it sure taste good that way | store leftovers in glass mason jars in the fridge | if you use the chipotle peppers the soup will get spicier over a couple days | choose non-gmo tortilla chips
Enjoy! Enjoy! Enjoy!
What is your favorite soup to keep you warm during the autumn and winter seasons?
The post Chicken Tortilla Soup With A Kick appeared first on Day2Day Joys.
]]>The post Reinventing the Cold Lunch appeared first on Day2Day Joys.
]]>
Written by Kari, Contributing Writer
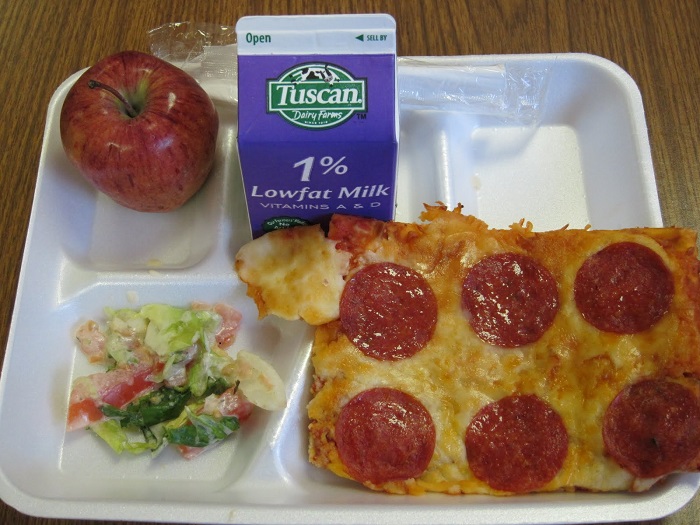
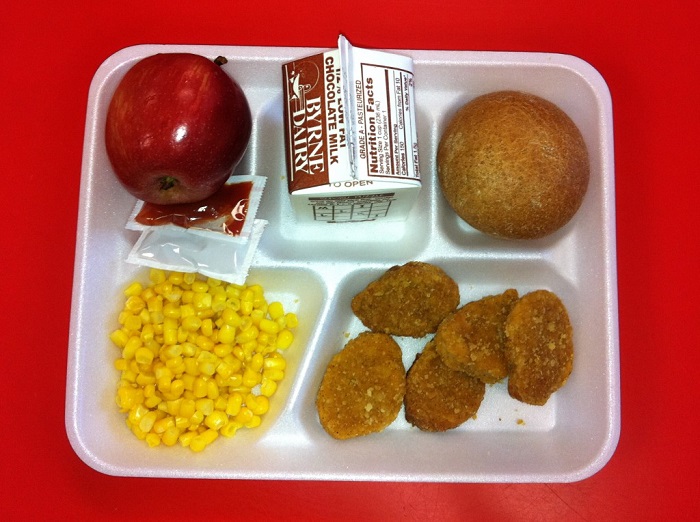
With school starting soon and routines getting back in order, if your child attends school, packing a lunch is a part of that routine. I’m not sure about where you live, but the choices for ‘hot lunch’ are not acceptable at my daughter’s school, so everyday is a ‘cold lunch’ day. I understand the convenience of your child eating hot lunch at school, but the overall consequences are nothing short of disastrous.
And no, I’m not exaggerating.
Understanding where food comes from, how it’s made and what ingredients or chemicals are in the food, it’s not too hard of a decision to make your child’s lunch if you are proactive in your child’s health.
A year or so ago they even made a decision to make school food “healthier” by getting rid of all milk choices over skim and 1% milk. How is this healthier? I like to inform other parents, who are health conscious like me, that having your kids drinking this low-fat and fat-free milk does nothing but deprive them of necessary fats and spikes their insulin levels every time they drink it. Not a habit you want your body doing constantly.
And now that they are wanting to add aspartame to the flavored milk – that makes it even worse. I won’t even go into the fact that the milk comes from conventional cows that have been pumped full of antibiotics and hormones. But serving our kids this kind of milk isn’t helping the obesity issue nor the type 2 diabetes epidemic among our kids.
So…how as parents do we keep our children well-fed during school? How can we make it simple, yet not boring? How can our kids enjoy eating cold lunch while most kids around them are eating hot lunch?
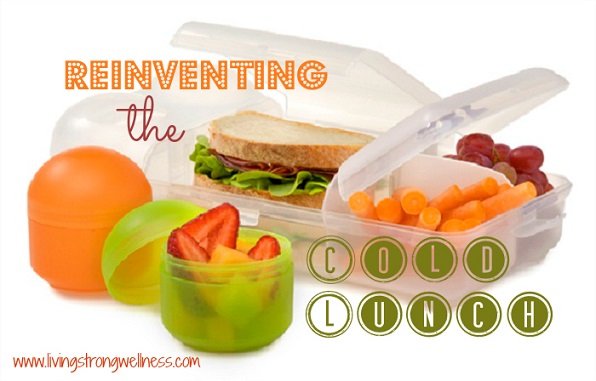
Well, I’m in my 5th year of making my children lunches for school and I have a pretty good handle on what works for my kids on a day to day basis. Not all of my suggestions may work for you, your schedule or your child’s tastes, but it’s a good starting point and can spark ideas in you that you can successfully implement in your house to make sure your kids have a healthy lunch box too!
Some items I like to have on hand to make packing easier are:
- thermoses for hot meals
- various size Pyrex bowls with lids that little hands can take off easily, but are strong enough to not cause leaking
- reusable snack bags (I have cloth/canvas ones, but sometimes I still use regular old Ziploc bags)
- insulated lunch bag
- ice packs (I always stick these inside Ziploc bags in case they break or leak – and this has happened several times)
- reusable utensils and stainless steel water bottles
*If you don’t want to send your kids to school with glass (some ages this may not be realistic), then find plastic containers that are BPA-free.
A few rules about the contents:
1. Always have protein in the lunch.
This is good for stabilizing blood sugar levels and helps keep tummies feeling full longer. Good choices are cultured milk (like Kefir or Amasai), fish, beef, chicken, turkey, bison, raw cheese, eggs, raw leafy greens, beans, legumes.
2. Include healthy fats everyday.
Those healthy fats are so important for our kids. They assist with cell repair, hormone function, brain health and more. They will also keep your kids feeling full longer. Examples of healthy full-fat foods: avocados, full-fat plain yogurt, whole milk cottage cheese, whole milk, cheese, nuts, grass-fed butter, eggs, coconut oil, etc.
3. Good, energy giving carbs!
Those kids need energy so they aren’t falling asleep during their long days. Good carbs are fruits, beans, legumes, whole-grain grains (sprouted or soaked are best), blueberries, raspberries, chia seeds, flaxseed, almonds, honey, quinoa, etc.
4. Clean water.
Make sure they have good, clean water to drink while they’re at school. Most schools allow your child to have a water bottle at their desk – or at least access to their water bottles while they are in class. Having water as the beverage option is perfect in lunches, especially since lunch is either before or after recess – they’ll need to stay hydrated.
Here are a few ideas from my house:
Leftovers.
This is always the easiest and most convenient. I cook healthy dinners, so they gets healthy lunches.
Soups.
During the colder months, the crockpot is my friend. Sending warming and beneficial soups (like chicken noodle or vegetable soup) is a fun change for kids.
PBBH.
For those days when my kids just want a sandwich, they get a homemade spread of peanut butter, butter and raw honey on real sourdough bread, with some Enjoy Life! mini chocolate chips sprinkled on top. They love it!
Healthy ‘sides’.
Think summer sun pickles, slices of raw cheese, chips and homemade salsa, homemade banana bread, roasted chickpeas, etc.
Probiotics.
My children get full-fat yogurt at least 3 times a week in their lunch. I add some raw honey, a tad bit of grade B maple syrup and chia seeds. Not only is this filling, but gives their immune system a good boost and will give them satiety and lasting energy.
Outside the box.
Have you tried cheese quesadillas? These take about 5 minutes to make in a skillet with tortillas, cheese and coconut oil. Fold in half, slice and put in a thermos so they stay warm. Pasta with meat sauce is always a winner. Noodles and butter with parmesan cheese. Sliced hard boiled eggs, raw cheese and crispy sourdough bites. Burritos and enchiladas are quick and easy and filling! We also do French toast, pancakes and waffles quite often. If we make any on the weekend, we make a bunch extra and freeze them, pop them in the oven while the kids are getting ready, prepare with grass-fed butter, grade B maple syrup, cut up in pieces and put into a thermos. It’s always a hit. You can also try homemade crispy chicken nuggets (grain-free, dairy-free, egg-free is an option) with a side of ranch dip made with yogurt and seasoning.
The possibilities are endless, especially if you do leftovers a lot. Just make sure you have some extra when you prepare meals and you’ll have a variety of lunch options for your child. Figure out what your child will and will not eat. How much time do they have for lunch?
If you put too much food in, it will most likely all come back home. If you find certain items they just won’t touch – exchange it for something else. I realized over four years that school lunches are a battle I choose not to fight. I can concentrate on certain items at home for breakfast and dinner or snacks rather than fighting everyday when they’re not getting consumed at lunchtime.
Try to stay away from controversial foods. By this I mean if your child drinks Kombucha – have them drink it at home instead of at lunch. Yes it’s healthy. No it’s not harmful. But we shouldn’t be those parents trying to ‘make a statement’ with items that may be controversial in the sight of the school leaders. Kombucha does contain small traces of alcohol – so leave it at home and pack water, milk (or dairy alternative) or spa water for a flavored water alternative. My daughter thoroughly enjoys her Black Cherry Chia Raw Kombucha – but she never takes it to school. Most of those above lunch ideas can be found in my cookbook, Real Food. Real Kitchen. So Good!
If you find your child feels left out when her classmates are eating pizza and cheeseburgers – then maybe you can plan a couple meals during the month where the leftovers she takes will be what her classmates will have for hot lunch, like pizza, just healthier versions. I’ve done this for my daughter and she was really appreciative that I did that for her.
Packing your child’s lunch doesn’t have to be a burden for you, nor does eating it have to be boring for them! My daughter gets more comments on her lunches and all the kids wish their mommy and daddy would make their lunch like hers! That’s a sign that kids are open for something new and creative when it comes time for lunch at school.
How do you make your child’s cold lunch fun and healthy?
The post Reinventing the Cold Lunch appeared first on Day2Day Joys.
]]>The post Jazz Up Your Summer BBQ Menu With Real Food Recipes appeared first on Day2Day Joys.
]]>
Written by Kari @ Living Strong, Health and Wellness, Contributing Writer
With summer in full swing and the Fourth of July right around the corner, we all know that this means a lot of picnics, bbq’s and get togethers are on the calendar. This also means that this will involve a lot of, you guessed it, food!
Is it possible to eat healthy during all these summer festivities? Yes, yes and yes! Eating healthy doesn’t mean that these celebrations have to be boring! In fact, I believe that you can have even better tasting food when you choose real foods prepared properly and with love! Nothing off the grocery store shelf can hold a candle to the greatness of real food!
A couple months ago I released my first cookbook that addresses the reality and simplicity of delicious and healthy food! On my journey to live a healthier lifestyle, I was finding that eating healthy usually meant bland, boring and just plain not good! My family felt the same! I knew that real food could taste amazing, be nourishing and keep you satisfied, so I went to work creating, experimenting and indulging.
Below are two wonderful recipes that can be found in my cookbook that you can incorporate into your summer celebrations! Kari’s Restaurant Style Salsa – to go with those big bowls of tortilla chips and Easy Peasy Peanut Butter Drops for a protein packed sweet treat. I know you will enjoy these real food treats and feel good knowing that you are feeding your family foods that will not harm them.
What You’ll Need:
- 1 can (28 ounce) whole tomatoes, with juice (I use Muir Glen Organic Fire Roasted Tomatoes
)
- 1 can (28 ounce) diced tomatoes with green chilies
- 1/4 cup yellow onion, chopped
- 2 to 3 cloves of garlic
- 1 teaspoon, unrefined sugar (cane, sucanat, coconut) or honey
- 1/2 teaspoon sea salt
- 1/2 teaspoon ground cumin
- 1 cup fresh cilantro
- 2 to 3 tablespoons lime juice (from the actual lime is best, if they aren’t in season, use lime juice)
- 2 small cans diced chilies (hot if you like the zing, otherwise use mild)
- 1 tablespoon diced jalapenos (add these very last to make the salsa more hot) (optional)
- 1/2 to 1 smoked chili pepper (optional – these add zing too)
What You’ll Do:
- Pour one can of the tomatoes in the blender, add the onion, garlic, sugar, sea salt and cumin.
- Blend until smooth.
- Pour this into a large mixing bowl.
- Now, pour the other can of tomatoes in the blender and add the cilantro, lime juice, diced chilies and jalapenos.
- Blend until smooth.
- Add this into the bowl with the other half of the salsa.
- Mix well with a bamboo spoon until combined thoroughly.
- Now it’s taste testing time. Grab some chips and and test it out. Does it need more heat? Add the smoked chili pepper. A little more cumin? Lime juice? This is your time to get creative and create a taste that you and your whole family will love.
- If you need to add more ingredients, scoop a couple cups of salsa back into the blender, add the extra ingredients, blend and pour back into the bowl. Mix again and test again.
- Store in glass jars – this typically makes 2 quarts of salsa.
- Refrigerate. Over the course of a couple days, the flavors will have time to mesh together and you’ll get a wonderful, amazing and fresh salsa!
Easy Peasy Peanut Butter Drops
(Packed with Protein and Energy)
What You’ll Need:
- 1/2 cup natural peanut butter (or another nut butter of choice)
- 1/2 cup raw honey
- 1/2-1 cup unsweetened, finely shredded coconut
- 1/4 –1/3 cup mini dark chocolate chips
- Sucanat (unrefined sugar) for rolling the drops
What You’ll Do:
- In a medium size bowl, mix the peanut butter and honey until combined thoroughly.
- Add the chocolate chips. You can add more or less according to your taste (I always add the larger amount).
- Add the coconut in 1/4 cup amounts until the consistency reaches a thick, yet semi-sticky state.
- You don’t want it so sticky that you can’t roll it, but you don’t want it so dry that it wont hold together. Find the happy medium.
- Once you are able to roll them and they still have some stickiness to them, roll into balls and then roll in the sucanat.
- Place on wax or parchment paper on a baking sheet or plate.
- Refrigerate for a while so they can harden up a bit, transfer to a glass jar and keep in the fridge.
I hope you have a wonderful and amazing summer, making time to enjoy family, friends and delicious food. Take time to cherish these moments and be thankful for the many blessings that God has poured out upon our lives!
**note from Rachel: Make sure you check out Kari’s new cookbook Real Food. Real Kitchen. So Good.: Health Made Easy. It’s actually on sale on amazon right now!

What is your favorite summer dish that brings a smile to your face and everyone who tries it?
The post Jazz Up Your Summer BBQ Menu With Real Food Recipes appeared first on Day2Day Joys.
]]>The post Real Food on a Real Budget appeared first on Day2Day Joys.
]]>
Written by Kristen @ Smithspirations, Contributing Writer
With it being January, you may very well be trying to cut out the processed foods in your diet and take a more whole foods approach to eating. I don’t think anyone denies that eating well is a great way to boost health, but often finances get in the way of making positive changes. Does eating real, whole, healthy foods have to break the bank?
I’m convinced that it doesn’t!
Our family lives on a moderate income. My husband is a public school teacher, and while his salary is far from glamorous, it pays the bills. We have a little bit of supplemental income from a few sources, like my home business, but with our growing family of five children, we have to watch our budget in all areas.
By God’s grace, I’ve found various ways to keep our plates healthy while still keeping our budget in check.
This post contains affiliate links. Purchases made through these links come at no additional cost to you but can bless our family with a small commission. Thank you!
Buy In Bulk
Many foods are suitable for buying in bulk and then storing, drying, canning, or freezing for later.
Berries can be frozen, greens and herbs can be dehydrated, and tomatoes and other fruits can be canned. While the initial cost is a little intimidating, buying a quarter, half, or whole animal for freezer meat is much less expensive per pound, and you can also get more bones for making and freezing broth!
Now that we have a grain mill, I buy our grains for flour in large 25 or 50 pound bags and usually get them for 50 cents to a little over a dollar a pound, depending on the type.
Shop Your Backyard
Gardening can be intimidating, but as long as you approach it with some grace, it can be a wonderful way to cut back on your grocery bill! You’d also be surprised by how many backyard “weeds” are actually very nutritious foods! My children can often be found munching on purslane, sorrel, and chickweed from our yard when we are outside, and I sneak them into salads and cooking, too.
Eat What’s Local
Sometimes it’s easy to get caught up in the latest super foods that have to be purchased from expensive specialty stores. But real food can also be really common food that is easy to find. Check local farmers’ markets during the growing seasons and focus on what is abundant and inexpensive. In the winter time, turn your attention to frugal foods like winter squash, carrots, and the humble potato.
Roll Up Your Sleeves
Packaged and convenience food is always more expensive. A bag of frozen french fries costs more than a bag of potatoes. Doing more of the prep work yourself is a fantastic way to save money even if it does require a little more effort. Enlist your children if they are old enough and share the labor while making fun memories together!
Shop Online
Sometimes one of the best ways to save money is to shop online. Foods that don’t spoil easily, like pastas, rice, and beans can be found online at great discounts! Amazon has a huge grocery selection. For example, I get my organic coffee from Amazon with Subscribe & Save. It ships for free, and I get a discount on the price. Win!
Vitacost is another site I like to check when I’m shopping for foods or household items. (If you’re a first-time customer, you can get $10 off with this link!)
Stretch Meat With Beans and Lentils
Meat is definitely one of the priciest items in our grocery budget, but I believe it is really important to our health! I often make meat stretch a little farther by adding cooked beans or lentils to ground beef and using a whole pound of dried beans with a 3 pound roast to make a bulk batch of taco filling.
Now it’s your turn! What are your best tips to help save money while eating real, healthy food?
The post Real Food on a Real Budget appeared first on Day2Day Joys.
]]>


