The post Christmas Wreath Card Display appeared first on Day2Day Joys.
]]>
Written by Kari, Contributing Writer
I know there are hundreds of ways to display those beautiful Christmas cards we get each year. I’ve done most of them over the course of my beautiful life. Everything form hanging them from decorative ribbon to placing them in a crystal bowl. A couple years ago I was reading Living Magazine and found a quick and inexpensive way to display cards. I needed a change and this was perfect.
A simple wooden wreath.
Well, more like an embroidery hoop with mini-clothespins, but like I said, a simple wooden wreath. It worked perfect.
What does this have to do with health, which is what I usually write about? Nothing. Not only am I passionate about teaching and educating people on health – I enjoy being crafty too! So, this is just a look at another side of me!
It cost less than $10 for the supplies and didn’t take long at all to make. The glue drying is the most time consuming part of it all. This is when you get to play with your kids, watch Netflix or eat cookies. Or all three. You can choose the size and number of hoops you’ll need depending on how many cards you usually get. I did one large and two medium. They really look beautiful once they fill up and make it so easy for everyone to scan and look at the cards when they are visiting your home.
Now, wouldn’t you say that these simple wooden wreaths make your own Christmas scene look so much better? I thought so! Now go make one for you!

Christmas Wreath Card Display
What You’ll Need:
- a couple needlework/embroidery hoops – I did one large and 2 medium sizes
- a couple packages of mini-clothespins
- craft glue
- ribbon for hanging
What You’ll Need To Do
- I glued the mini clothespins every two inches around the hoop. I alternated the pins – one facing out, one facing in.
- let them dry overnight (simply because I got side tracked and didn’t get back to it the same day).
- Once dry, I attached the ribbon and hung it on display.
Like I said, when they are completely filled, they look really pretty – like a big wheel of cards. It’s nice to be able to see them all and be reminded how blessed we are to know so many wonderful and loving people – which always makes my heart happy.
What is your favorite way to display your Christmas cards?
The post Christmas Wreath Card Display appeared first on Day2Day Joys.
]]>The post Homemade Apple Cider appeared first on Day2Day Joys.
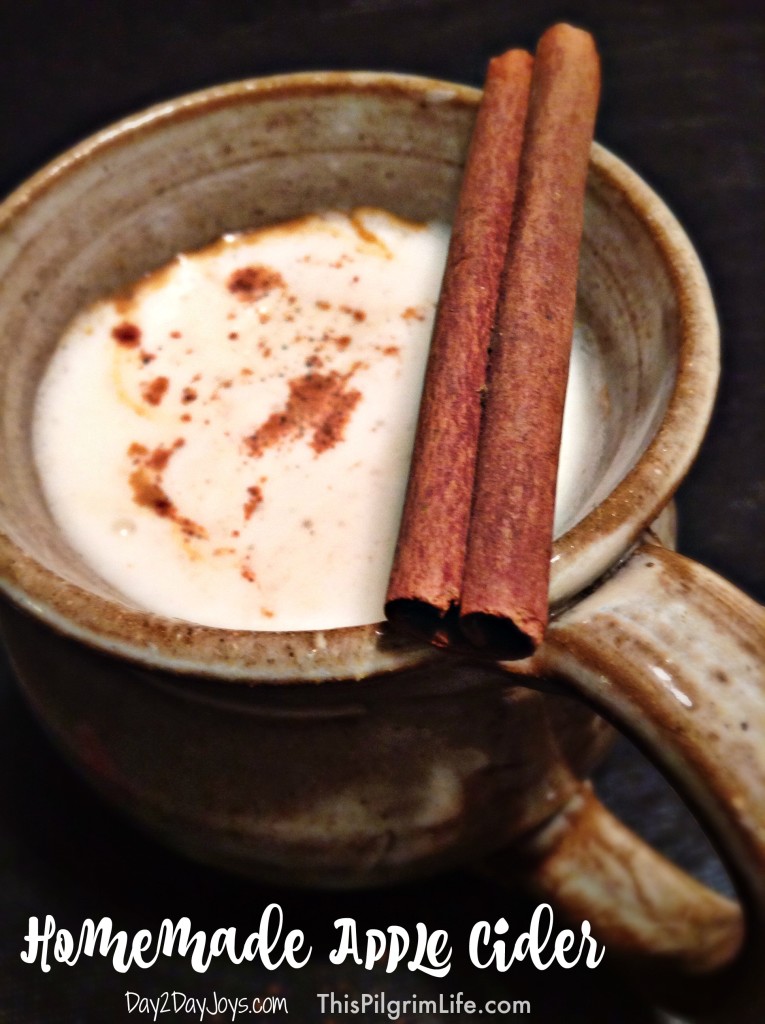
]]>Every fall we do the traditional things like go pick pumpkins, ooh and ahh over the leaves, read books about Johnny Appleseed, and (one of my personal favorites) make homemade apple cider.
Sure, it’s easy enough to simply purchase the glass jugs of cider from the grocery store. And we do that too.
But making cider at home is both easy and fun.
Last week one of my closest friends and her four children joined us for a day, no plans in particular other than catching up and enjoying each other’s company.
We all spent the day playing LEGOS, picnicking in the backyard, introducing friends to our mud kitchen, and gathering around the kitchen island to make apple cider. Oh, and talking all day the way you can only do with a kindred spirit.
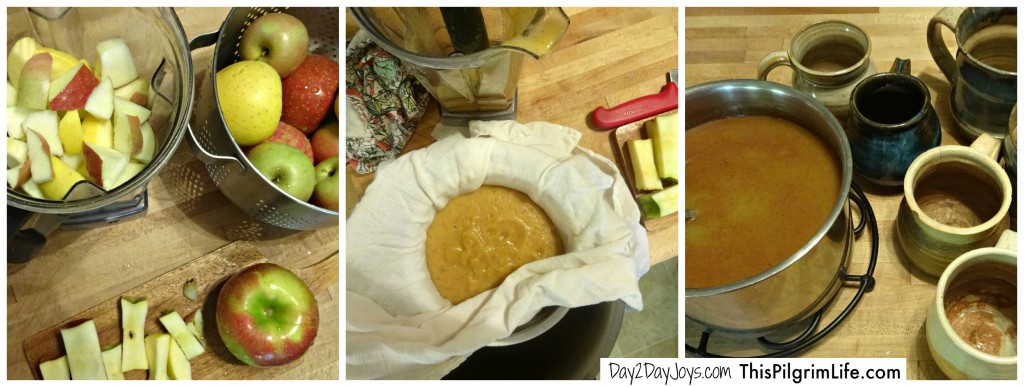
The kids, ages 8 to 3, all pitched in to make the cider. They washed the apples, cut them into small chunks, and put them in the Vitamix. I added a small amount of water and then blended the apples on high for a minute. After straining the blended mixture to separate the juice from the pulp, the cider was done.
We put it to the kids whether they wanted to enjoy the apple cider chilled or warmed. They unanimously agreed– warm with whipped cream.
Traditions are one of my favorite things about the changing of the seasons. With each new season, there are new memories to be made and old memories to recall together. Even better when the traditions taste great and can be shared with friends!
Homemade Apple Cider in 5 Easy Steps
- Wash the apples. Cut into 1-inch chunks and add to high-powered blender. Add about 1/2 cup of water to help blend.
- Blend the apples on high for about 1 minute, or until all the apples are smooth.
- Set a metal strainer over a large bowl. Drape a tea towel over the strainer and pour in the blended apples. Squeeze and twist the tea towel to separate the juice from the pulp. Save the pulp for “applesauce” to use in muffins or oatmeal.
- Enjoy the apple cider warm with spices (cinnamon, nutmeg, etc) and fresh whipped cream. Or drink it chilled.
- Keep extra cider in the refrigerator up to a week.
This month, I am writing all about kids in the kitchen on my blog. Helping to inspire and equip you to create habits of health and hospitality in your kids. You can find all the series posts here.
What food traditions do you have in your family?
The post Homemade Apple Cider appeared first on Day2Day Joys.
]]>The post Whipped Naked Magnesium Butter appeared first on Day2Day Joys.
]]>
Written by Kari @ Living Strong Wellness, Contributing Writer
It seems these days that good, restful sleep is hard to come by. Not only with adults, but children as well. As this is not an exciting fact, it is a reality and I believe we have a wonderful variety of natural options to help us.
For instance, there are herbal teas, essential oils, supplements and something I want to share with you today – magnesium butter.
Ahhh, this stuff is amazing. Why do I love it so much? Because it provides our body something that is lacking so severely in today’s generation – magnesium.
There are many benefits of healthy magnesium levels. To mention just a few:
- Magnesium helps muscle and nerve function. Serving as calcium’s vital partner, magnesium will allow calcium to do it’s job to build muscle growth.
- Magnesium plays an important role in gut health. Without good levels of magnesium aid in the absorption of copper, potassium, vitamin D and zinc. It also helps regulate blood sugar levels, which will lessen the risk for diabetes.
- Magnesium can help lower blood pressure or keep blood pressure low by allowing your muscles to relax, contract and push blood through the arteries and veins without force.
- Magnesium helps melatonin (the sleep regulating hormone) stay balanced, which allows for more peaceful sleep.
- Magnesium can help balance stress hormones, eliminating stress and tension and allowing for a more relaxed state of being (which in return will help with rest as well).
The list goes on and on, but those five points alone should get people’s attention when it comes to supplementing with safe sources of magnesium. Data from 2012 stated that 48% of the American population, 79% over the age of 55, were deficient in magnesium. This isn’t good, especially when it is such a vital mineral and nutrient for our bodies.
Along with taking a liquid mineral supplement, we use magnesium butter every evening before we go to bed. We just spread a thin layer either behind our knees or on our inner arm (where the skin in thin) and that’s it! I have made this for several family members and friends and they all love it and can tell a huge difference in their quality of sleep (especially the adults…go figure)!
The recipe is simple and last a long time on the shelf! We always use it, so we go through a 4 ounce container in about 3-4 months (three of us use it). Since the recipe doesn’t contain water, it would probably last a good 6-8 months if kept clean (wash hands before using the butter) and can always be extended to 12-18 months or longer if refrigerated!
You can make this recipe ‘naked’, meaning adding no essential oils, or you can add your favorite calming and sleep inducing oils such as lavender, cedarwood, vetiver, ylang ylang or sandalwood! If you are using therapeutic grade essential oils, only use a total of 40 drops of oils combined for this amount, which is one cup.
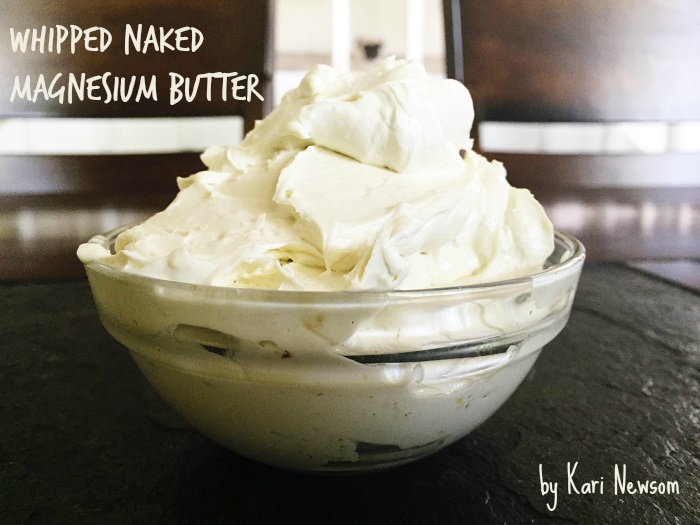
The end result with the color will vary depending on the type of shea butter you use. We use a raw shea butter that has a deep, deep yellow tone and rich scent and amazing benefits that trump refined and bleached shea butters.
Whipped Naked Magnesium Butter
What You’ll Need:
- 3/8 cups virgin coconut oil
- 3/8 cups raw shea butter
- ¼ cup magnesium oil (how to make it yourself)
- ¼ cup almond or jojoba oil
What You’ll Do:
- Melt the virgin coconut oil and raw shea butter over low heat just until it’s all liquid.
- Add the almond or jojoba oil, pour into a medium glass bowl and allow to cool to room temp. You can leave on the counter for an hour or so or you can stick it in the fridge to speed up the process. I like the fridge :o)
- Using a hand mixer or immersion blender, take your room temp oil mix, turn on the blender and slowly add the room temp magnesium oil.
- Mix or blend this until it is creamy. You can’t have any separation, which means, no water droplets anywhere. This can take a few minutes if the oils are room temp. If they are too warm, it will take longer.
- Place the bowl in the fridge for around 30 minutes. You want to see it starting to harden and solidify.
- Once it’s solidifying, remove the bowl and using the mixer or blender with a whisk attachment, whip the mixture until light and fluffy! If you are adding essential oils, do it during this step.
- Store in a glass jar or container and place in a cool, dark place.
I hope you enjoy the wonderful benefits of this magnesium butter that is safe for you and your entire family!
What is your favorite natural solution for calming and peaceful sleep?
The post Whipped Naked Magnesium Butter appeared first on Day2Day Joys.
]]>The post Tropical Delight Smoothie appeared first on Day2Day Joys.
]]>
Tropical Delight Smoothie
What you need:
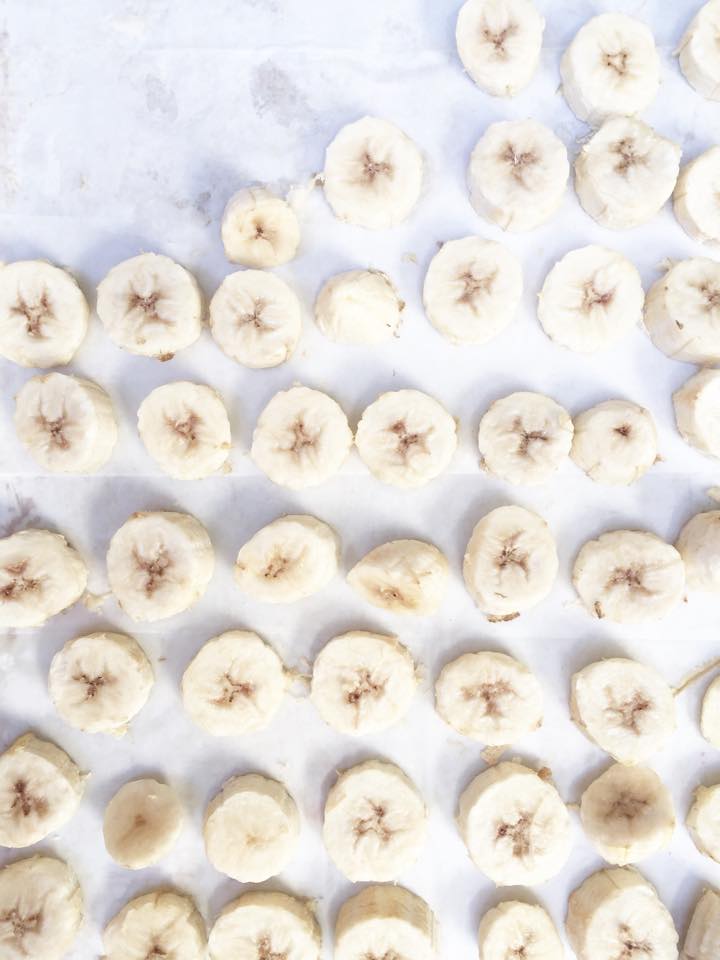
1 banana, sliced (either fresh or frozen)
1/2 cup pineapple, fresh or frozen
1/2 cup ice (this is optional and typically used when the fruit you are using isn’t frozen, if you are using frozen fruit, it usually is plenty cold and you won’t need the ice)
What to do:
What is your family’s favorite smoothie?
The post Tropical Delight Smoothie appeared first on Day2Day Joys.
]]>The post Quick and Easy Homemade Brown Sugar appeared first on Day2Day Joys.
]]>It’s true that too much sugar isn’t good for you, but I’m not likely to completely give up on the occasional sweet treat.
Instead, we focus on limiting sugar in our day to day diets and choosing healthier alternatives to processed desserts.
Making our own treats is healthier and it saves us money to boot. I’ve also found that I can simplify my grocery shopping and save more money by learning to make own of the basics for many treats at home.
Costco (one of my favorite stores!) sells organic sugar in ten pounds bags (a lot, I know, but it lasts a long time and freezes well) which I then use for regular sugar, powdered sugar, and brown sugar when I need it.
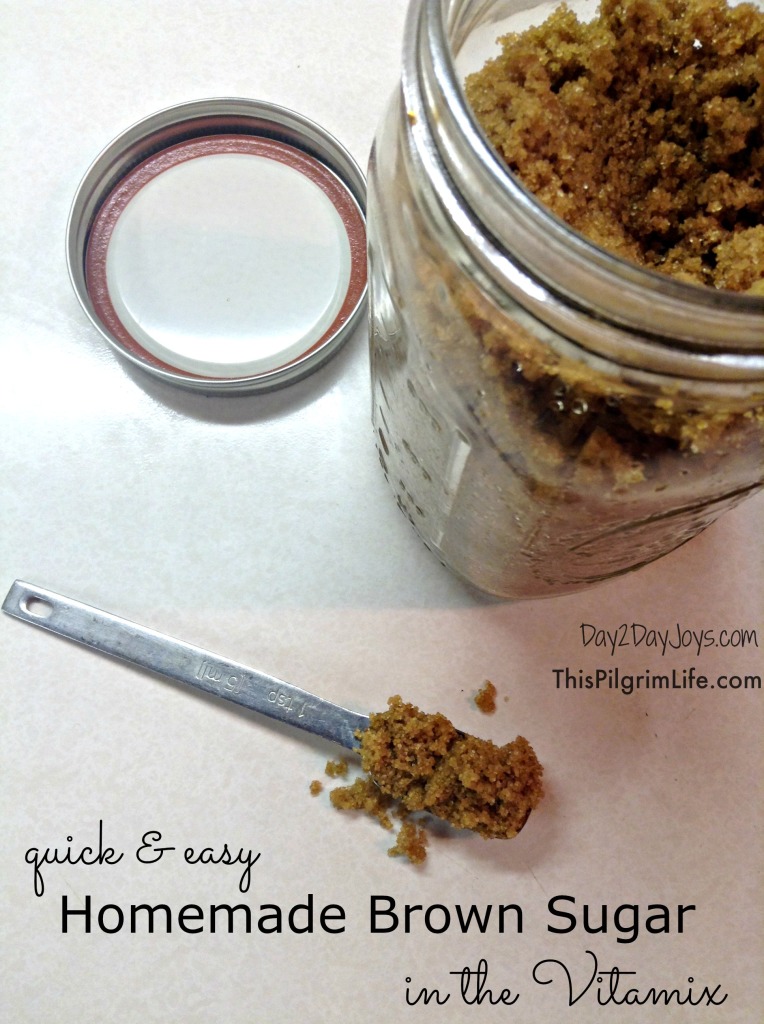
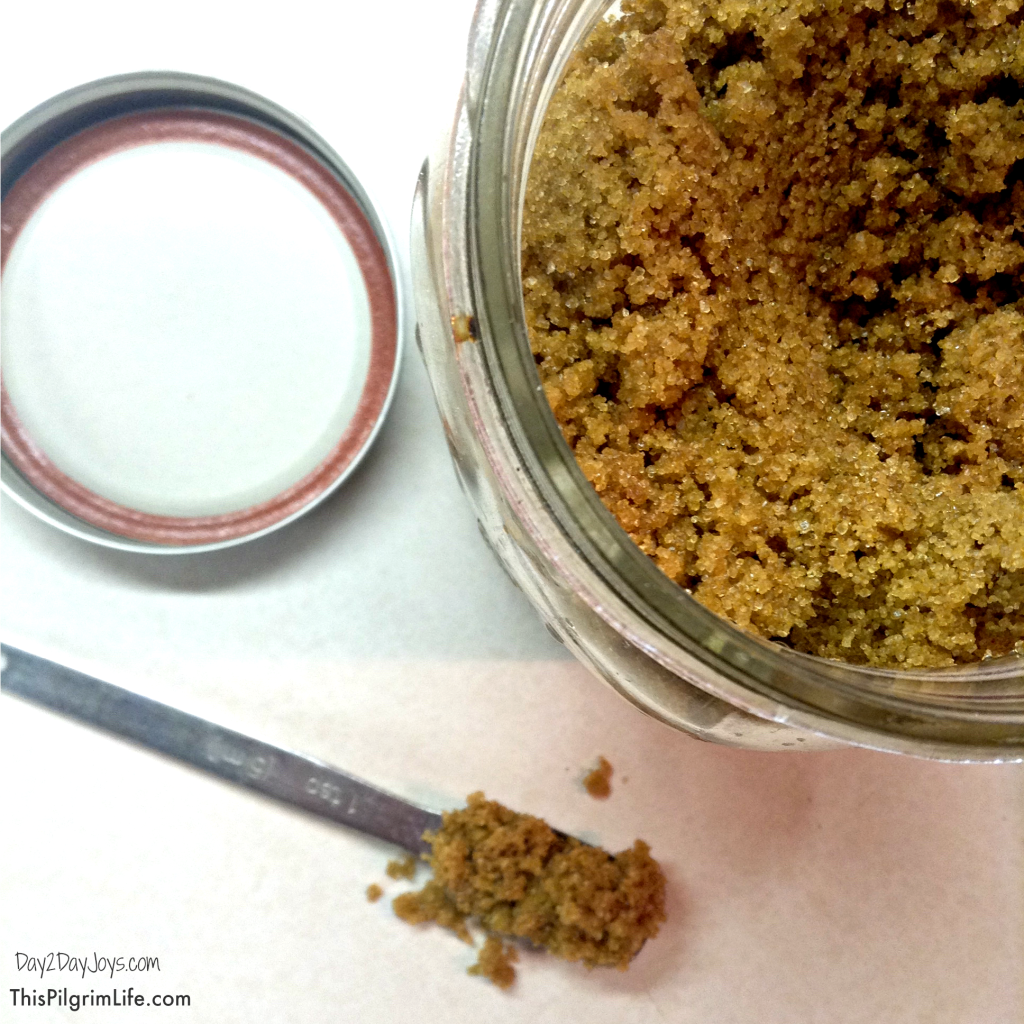
Making brown sugar takes about 5 minutes. It really is a super simple process. I’ve made it before in my stand mixer and that works well, but I’ve found I get a better consistency in my Vitamix— and I don’t have to pull out my mixer.
*Note from Rachel: you can also use this same method using xylitol for a sugar free version
Making Brown Sugar in the Vitamix
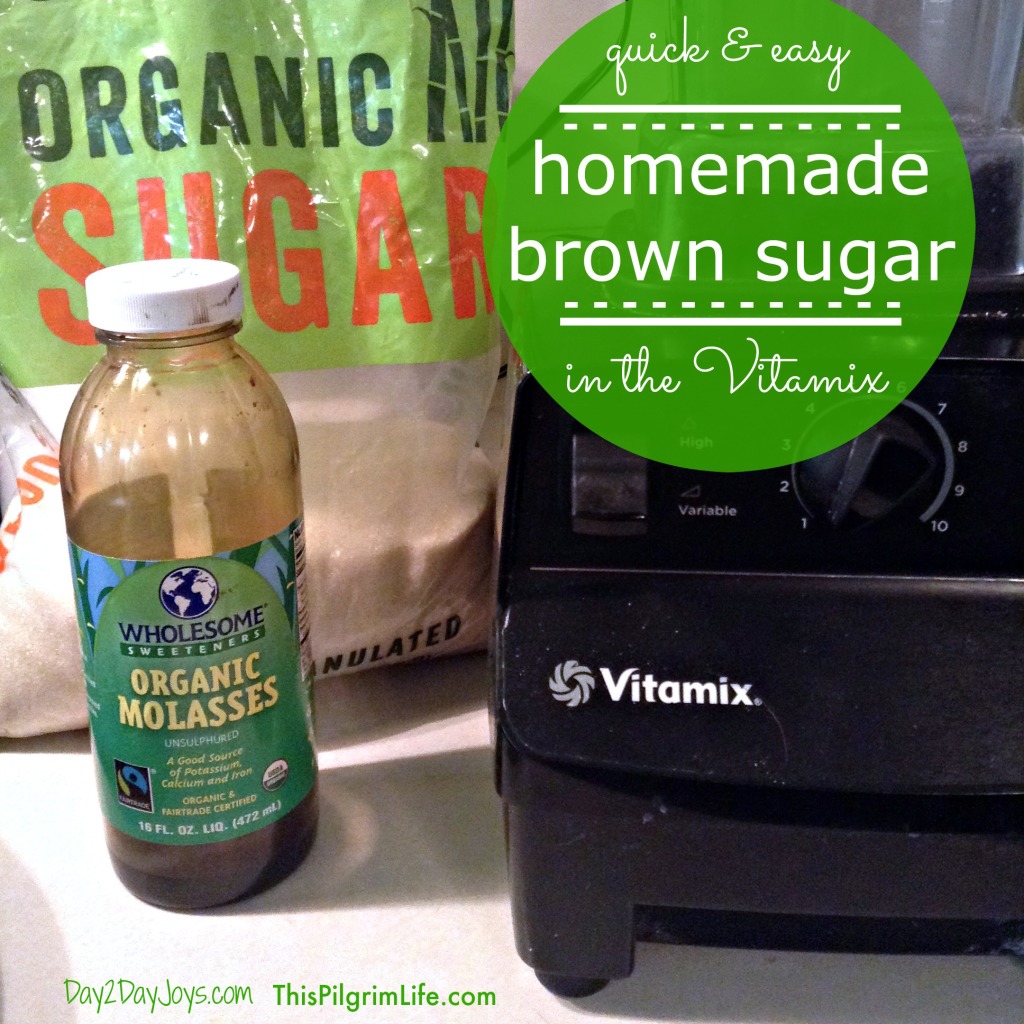
Add 2 cups of granulated sugar into the Vitamix container. Turn the mixer to a 5-7 speed (about medium-high) or until the sugar starts to move. Slowly drizzle 3 tablespoons* molasses through the opening in the lid. Mix until the sugar takes on a uniform brown color.
IMPORTANT: Use the tamper to make sure the sugar is being evenly distributed throughout the container. Turn off the Vitamix and use a long spatula once during mixing to redistribute the sugar at the bottom of the container.
*You can adjust the amount of molasses you use to make a lighter or darker brown sugar.
One of the best things about learning to make ingredients and staples at home is no longer needing to run to the store for everything when you realize you’ve run out.
Plus, things just usually taste better when they’re homemade!
What is one kitchen staple that you’ve learned to make at home?
The post Quick and Easy Homemade Brown Sugar appeared first on Day2Day Joys.
]]>The post Protein Packed Nut Butter Bites appeared first on Day2Day Joys.
]]>
Written by Contributing Writer, Kari at Living Strong, Health & Wellness
Snack time!
Personally, I’m not a big “snacker”. I can go meal to meal without needing any extra food to keep me going. Although, having a family, I need to have a plan on hand for our meals and snacks and then I need to make sure they are ready and available to eat!
My kids, on the other hand, seem to need a snack every 30 minutes. I can understand why since they are on the go, non-stop, active kids. This can present a problem when you are wanting to feed your family healthy foods that nourish the body. Unfortunately, the quick and convenient, grab and go processed options you find on the grocery store shelves don’t make the cut for me. It’s hard enough to make sure they have nourishing and healthy lunches everyday – then to add in snacks to mix, that means more creative ideas are needed!
I know it would be easier to go this route, but I’ve spent too many years building a strong foundation of health in my family, this is one area I don’t want to skimp on. This means I need to be creative in the kitchen when it comes to snacks.
I have a long list of snacks that we rely on, but one of our favorites are these Nut Butter Bites! The kids love helping with them as well – which I think makes them even more enjoyable. Kids love helping and being a part of creating the food they eat.
These amazingly healthy bites are a great snack for my active kids and only a couple are needed for them to feel satisfied. Packed with protein from the nut butter, a healthy source of energy from raw honey, good and healthy fat from the coconut and extremely low in sodium – you can ‘t go wrong with these delicious treats! They are more like a dessert than a snack. That’s always a plus!
To top off these already great nut butter bites, roll them in sucanat (unrefined cane sugar), shredded coconut, cocoa powder or mini chocolate chips (we like Enjoy Life! allergen-free brand). Hands down, these are healthier than any overly processed and refined ‘snack’ you can get off a shelf.
Sure, there’s a few minutes of time involved, but isn’t your family worth it? Of course they are!
Along with many other healthy snacks, appetizers, beverages, main dishes and desserts, this recipe can be found in my cookbook, Real Food. Real Kitchen. So Good! I hope you and your family enjoy these as much as we do!
- ½ cup organic natural peanut butter (no added ingredients, just peanuts) or nut butter of choice
- ½ cup organic raw honey
- ½ – 1 cup organic unsweetened coconut, finely shredded
- ⅓ cup organic mini dark chocolate chips, soy-free (we like Enjoy Life! brand, allergen-free)
- sucanat (unrefined sugar) for rolling the bites (other options: you can roll them in coconut, chocolate chips or cocoa powder)
- In a medium size bowl, mix the peanut butter and honey until combined thoroughly.
- Add the chocolate chips. You can add more or less according to your taste (I always add the larger amount).
- Add the coconut in ¼ cup amounts until the consistency reaches a thick, yet semi-sticky state.
- You don’t want it so sticky that you can’t roll it, but you don’t want it so dry that it wont hold together. Find the happy medium.
- Once you are able to roll them and they still have some stickiness to them, roll into balls and then roll in the sucanat.
- Place on wax or parchment paper on a baking sheet or plate.
- Refrigerate for a while so they can harden up a bit, transfer to a glass jar and keep in the fridge.
What is your favorite healthy snack?
The post Protein Packed Nut Butter Bites appeared first on Day2Day Joys.
]]>The post Raisin, Date, & Walnut Muffins appeared first on Day2Day Joys.
]]>The New Year is almost here!
For many, that means resolutions and goals and hopefully a large dose of healthy optimism.
My head is full of plans and ideas, mostly centered on getting us back to a normal routine and menu plan after a couple of months full of festivities and party foods.
How about you? Thinking of your own resolutions?
Maybe you’re resolved to eat healthier, whole foods? Or less sugar? Resolved to start your day right with a nutritious breakfast?
After all the cookies I have eaten this month, all of those resolutions will be reappearing on my list. For my family, eating a great breakfast is of utmost importance. We usually start our day with eggs, yogurt, smoothies, or freshly baked muffins. (Some days, we start with all of these!)
These raisin, date and walnut muffins were inspired by my husband’s favorite oatmeal combination. They are simply sweetened with a small amount of maple syrup as well as the natural sweetness of the raisins and dates. For additional nutrition, you can use whole wheat flour.
Bake up a batch to bring in the New Year and start the year on a healthy and delicious note!
Happy New Year’s!


- 2 C flour
- 1 C old fashioned oats
- 1 Tbsp baking powder
- 1 tsp cinnamon
- 1/2 tsp salt
- 1/2 tsp baking soda
- 1 C milk
- 1/4 C maple syrup
- 1 egg, lightly beaten
- 1/2 C coconut oil, melted
- 1/2 C chopped walnuts
- 1/2 C raisins
- 1/2 C chopped dates
- Preheat the oven to 375 degrees.
- In a medium-size mixing bowl, combine the dry ingredients (flour through baking soda). Whisk together to combine. In a large measuring cup or small mixing bowl, stir together the milk, maple syrup, egg, and coconut oil. Pour the wet ingredients into the dry ingredients and stir until just combined and no streaks of flour remain. Add in walnuts, raisins, and dates and stir.
- Grease a muffin pan and evenly distribute the batter into the twelve wells. (Optional) Sprinkle the tops of the muffins with brown sugar.
- Bake in preheated oven for approximately 15-20 minutes or until the tops are browned and spring back when lightly pressed.
- Let the muffins cool in the pan for 5 minutes before trying to remove them. Transfer to a wire rack to continue to cool. (Or, better yet, throw on some butter and eat them warm!)
What is one of your resolutions for 2015?
The post Raisin, Date, & Walnut Muffins appeared first on Day2Day Joys.
]]>The post Felt Fall Banner appeared first on Day2Day Joys.
]]> Written by Lisa @ This Pilgrim Life, *NEW* Contributing Writer
Every year we decorate the mantle for Fall. And every year the routine is basically the same.
Pull off current decor. Pull out boxed Fall decor.
Turn on Christmas music (I know, I know. But this year I have a good reason).
Try to find an arrangement of things we already have on hand or have acquired cheaply that suits our simple, clean style.
Send pictures to my best friend for a second opinion. Because she is a decorating guru. And I am not.
For the past couple of years, I have been able to count on more help than just from my best friend. My children are joining in on the action.
Like most things, they are eager to do whatever.Mommy.is.doing. We cook together. We sew together. And now we decorate together.
Sometimes this means finding random pinecones on surfaces that are in their reach. Sometimes it means reminders not to let their dinosaurs eat all the fake fruit. Almost all the time it means candles. They are big on the candles.
And I say, just go with it. Embrace their participation as a part of the family tradition. Let it be a special time. Prioritize memories over Pinterest-worthy mantles. (Not knocking Pinterest! I know it is a crucial source of inspiration for the decorating-challenged like me). Give them license to be creative and the opportunity to enjoy the work of their hands.
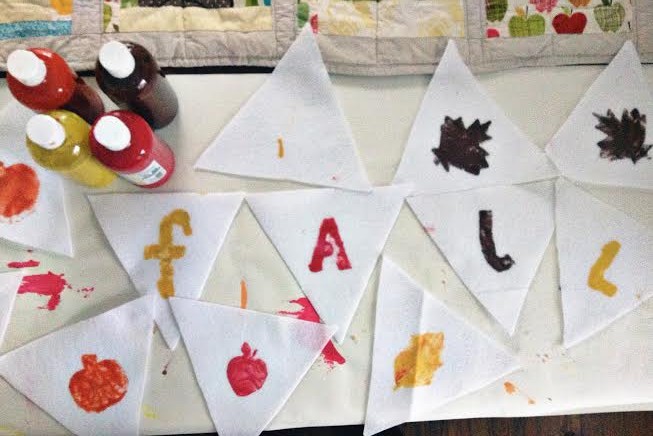
This year, try letting your kids join you in making this simple Fall banner. (If you’re really brave, you can invite friends over for a felt painting extravaganza).
Chances are good that you already have some of these materials stashed away in a cupboard or closet. And those you are missing can certainly be acquired cheaply. Plus, the stamps are quick and easy to make. They may be a new favorite here. (I’m thinking Christmas cards…)
How to make your own fall banner:
Materials Needed:
- 1/2 yard felt
- craft paint
- styrofoam plates
- corks
- paint brushes
Instructions:
1. Cut the felt triangles. Cut out a triangle from cardstock to use at your guide. [Cut a square 8″ x 8″. Draw a line from each top corner to the center bottom and cut.] Use this to cut as many felt triangles as you can. (Trust me, having some extras is a good thing).
2. Make the stamps/stencils. Draw the letters and/or shapes in the center of each styrofoam plate. Carefully use an exacto knife to cut each shape out. Go slowly so the styrofoam does not tear or snag. Now you have one stencil (the plate) and one soon-to-be stamp (the cutout).
Hot glue a cork to the center of each cutout and let dry.
Voila! Stamps.
3. Set the table, (the craft table). Cover the table with paper or a plastic tablecloth. (I use rolls of craft paper from IKEA for this. Easy and inexpensive). Pour paint onto uncut styrofoam plates to use for dipping the stamps. Pour paint into another container to use to dip brushes in for the stencils, (we used an empty plastic egg carton). Set out the stamps, stencils and triangles.
Even if you are only doing this with one or two children, having the supplies ready from the start is a major time and stress saver! Don’t skip this step.
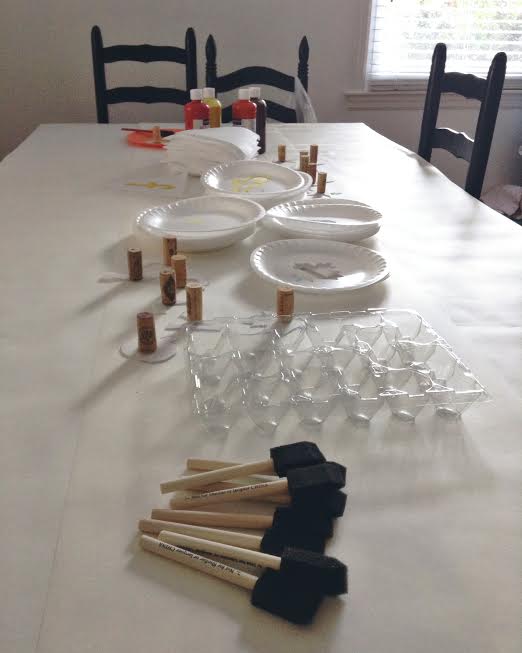
I neglected to pour the paint before the kids gathered. I wished I had remembered because waiting is soooo hard.
4. Paint the triangles. Gather around the table and get to work! (And if you’re like me, take a deep breath and remember that part of the beauty is the kid-ness of it all. Or just make plans to go back and add a few of your own pieces to the banner. No shame either way).
After each triangle is stamped or stenciled, let it dry in a safe spot.
5. Make the banner. Take the dry painted triangles and lay them out in the order you want them. Cut two small slits in the top corners of each triangle for feeding the twine through. Feed the twine through the pieces and you’re done! (Tip: I waited to cut the twine until I hung the banner on my mantle so I could determine just how long I needed it and how spaced out I wanted the triangles).
6. Hang your banner!
Happy Fall! I hope your season is filled with crackling fires, pumpkin flavored everything, and extra-special memories!
The post Felt Fall Banner appeared first on Day2Day Joys.
]]>The post Chicken Tortilla Soup With A Kick appeared first on Day2Day Joys.
]]>
Written by Kari @ Living Strong, Health & Wellness, Contributing Writer
It is October and it’s officially cooling down enough to try this great recipe, which is perfect for any chilly weather you might experience over these next few months!
This belly warming soup is simple, quick and so delicious! All you need is a blender and a stock pot (or slow-cooker) and you’re set to make the most amazing tortilla soup you have ever had! You can keep this a mild meal or add some extra peppers to give it that kick that keeps you coming back for more!
This is not only a favorite in our house, but in houses all over these wonderful states! I’ve shared this recipe over the years and then it was included in my cookbook – and it gets rave reviews every time! I have never found a restaurant that has a soup that compares to this! You definitely need to try it! I’ve taken the text from the cookbook to include allergen-free information as well as more tips to make it even healthier!
Chicken Tortilla Soup With A Kick:
What you need:
- 1 whole fryer chicken
- 8 cups chicken broth (can make while cooking the chicken)
- 16 ounces of diced tomatoes
- 1 medium yellow or white onion, cut in half
- 2 cloves garlic – ½ cup fresh cilantro
- 1 teaspoon raw honey
- 3 chipotle peppers soaked in adobe sauce
- optional, 2 avocados
- optional, ½ cup full-fat yogurt, plain
- optional, tortilla chips
- optional, shredded cheese
What you do:
- To prepare the stock and the chicken, plan to start preparing the meal in the morning.
- Cook the whole fryer by placing in a slow cooker, covering completely with water, adding seasonings and spices (salt, garlic powder, parsley, pepper) and cook on low for 8 hours.
- After 8 hours, remove the whole fryer from the slow-cooker using slotted spoons. Place in a bowl and allow to cool for about 5-10 minutes. Begin removing the chicken from the bones and place on a plate. Pull the meat with two forks. This is your shredded chicken.
- Strain out the liquid in the slow-cooker into a bowl (if you’ll cook the soup in the slow-cooker) or stock pot (if cooking soup on the stove) to remove any large pieces of meat or bone that fell off the chicken (it gets super tender). If you used a bowl, once it’s strained, replace liquid back in slow-cooker.
- Separate about 1 ½ to 2 pounds of shredded chicken and add to the broth.
- In a blender, puree the tomatoes, onion, garlic, cilantro and honey until smooth.
- Pour this mixture in with the broth and chicken. Stir to combine.
- Add the chipotle peppers if you are wanting that kick to your soup. If not, omit.
- Continue cooking in the slow-cooker for about an hour and a half or on the stove-top over medium for 45 minutes.
- To serve, prepare the bowls by putting some avocado and yogurt in the bottom of the bowl. Crunch tortilla chips and place on top. Next, ladle the soup over the prepared bowls and top with shredded cheese. Wow, get ready!
Yield: Approximately 14 cups
I’m special because (if using “optional” ingredients, the allergy-free info below may change):
dairy-free, egg-free, gluten-free, grain-free, soy-free
Substitutions:
*Full-fat yogurt: full-fat sour cream
Health Made Easy:
if you’re short on time, you can purchase your broth, but make sure it’s organic and low-sodium | homemade broth will supply your body with so many nutrients that you’ll never get out of store bought brands, so choose homemade if possible | don’t have time to cook a whole fryer, purchase chicken thighs, bake and shred | use fire-roasted tomatoes or seasoned diced tomatoes | you don’t need to put all the optional extras in the bowl first, but boy does it sure taste good that way | store leftovers in glass mason jars in the fridge | if you use the chipotle peppers the soup will get spicier over a couple days | choose non-gmo tortilla chips
Enjoy! Enjoy! Enjoy!
What is your favorite soup to keep you warm during the autumn and winter seasons?
The post Chicken Tortilla Soup With A Kick appeared first on Day2Day Joys.
]]>The post Immune Strengthening Herbal Tea Blend appeared first on Day2Day Joys.
]]>
Written by Contributing Writer, Kari @ Living Strong Wellness
Now that summer break is winding down and kids are heading back to school – we need to start becoming more proactive with our children’s health.
Don’t get me wrong, we should be proactive year round, but during the summer we’re outside more getting fresh air, we’re getting loaded with Vitamin D, getting more sleep and getting more exercise. With school back in session, our children are sitting in air conditioned schools, windows closed, anti-bacterial soap flowing down the halls, little outside time, little exercise and lots of germs.
Germs…
That one word freaks a lot of people out. This is why anti-bacterial soap is a multi-million dollar business. Think about it, though…if it really worked, why are schools filled with scores of sick kids and teachers all the time? I’m not an advocate of this ‘miracle’ germ cure. Not only does it kill bad bacteria – but it kills good bacteria as well, making you and your children more susceptible to germs, viruses and infections.
I’m also not a fan of the toxic ingredient, Triclosan, in the majority of these anti-bacterial soaps. Good ole hand soap and water works just fine. In fact, my son and daughter opt out of using anti-bacterial soap at school. They have been informed the past 4 years that they are to only use soap and water. They literally stand at the door as kids come in from recess and squirt that dangerous and hormone disrupting junk on the students hands. Not good.
It’s not bad hygiene that’s an issue (although it may contribute to some children’s constant sickness). It’s the internal health of the person. This is what will determine if sickness occurs or not.
Plain and simple: we need to boost the immune systems of our children and ourselves as we get back into the school routine.
We will all be surrounded by more germs, viruses and infections and our bodies will need the extra boost to keep the immune system strong and ready to fight any foreign invaders that enter the body!
There are many ways we can aid our immune system in remaining strong throughout the year, especially the school year and winter season. I don’t know about you, but I would much rather be proactive, daily taking care of my body and my child’s body to keep sickness from taking root, than having to do all I can to bring health back where sickness came in and took over.
This recipe is easy, quick and yields approximately 12 full strength servings (adults) and 24 half strength/diluted servings (children). I am fortunate to be able to purchase all these herbs in bulk at our local Vitamin Cottage/Natural Grocers. If you are not able to purchase these locally, you can purchase them online at places such as Bulk Herb Store and Mountain Rose Herbs! If you aren’t into making teas yourself and don’t want to order bulk herbs – you can also order the herbal tea blend from my Etsy shop – Glowing Mama. Each bag contains 12 adult servings or 24 youth servings. Each serving is 1 tablespoon of the herbal tea blend to 8 ounces of water.
It’s a great addition to your daily routine to help keep the immune system strong and functioning at optimum levels! This blend can be served hot or iced. It is always best to get organically grown herbs when buying in bulk, but if it’s not possible, get what is available to you. When ordering from Mountain Rose Herbs, you will be getting high quality, organic dried herbs that you can use safely and without worry of toxins. The other option is to grow what you can as well! That’s always an added plus and you know exactly how it is grown from seed to completion.
Kari’s Immune Strengthening Herbal Tea Blend
Here’s What You’ll Need:
- 3 tablespoons dried Elderberries
- 3 tablespoons dried Rosehips
- 3 tablespoons dried Peppermint (use in adult blends) or 3 tablespoons dried Catnip (for children blends)
- 4 teaspoons dried Lavender
- 2 teaspoons dried Sage
- 2 teaspoons dried Hibiscus
- 1 teaspoon dried cut Ginger
- 1/2 teaspoon dried Thyme
Here’s What You’ll Do:
- Thoroughly combine all herbs in a large jar or large bowl.
- Store in a sealed container (glass is best), but a sealed bag or other container will work.
- Keep in a dark, cool place – such as the pantry.
- To use, in a glass jar steep 1 tablespoon of herbal blend in 8 ounces of boiling, filtered water. For a tea, steep for anywhere from 3-8 minutes. For a stronger more potent beverage, you can make an infusion by steeping for around 20-30 minutes. You can place loose herbs in a muslin tea bag, tea ball or leave them loose in the jar.
- When steeping is done, remove bag, ball or strain the herbs using a find mesh strainer.
- Add RAW honey to sweeten and enjoy! ***
*** Adults can drink this directly after steeping. If making for children 12 and under, fill cup half way with tea/infusion, then add RAW honey, then add water to fill the rest of the cup.
What do you add to your daily routine to help keep your immune system strong and thriving?
The post Immune Strengthening Herbal Tea Blend appeared first on Day2Day Joys.
]]>


