The post The Succesful Transition from Summer to School appeared first on Day2Day Joys.
]]>
Written by Kari, Contributing Writer
Getting ready for the new school year means many things in our home. Our sleep schedule has to change, our chores change, we supplement differently and we have to ease back into a daily routine.
So, here’s how we make the transition:
How do you transition your kids back into the school season?
The post The Succesful Transition from Summer to School appeared first on Day2Day Joys.
]]>The post Tropical Delight Smoothie appeared first on Day2Day Joys.
]]>
Tropical Delight Smoothie
What you need:
1 banana, sliced (either fresh or frozen)
1/2 cup pineapple, fresh or frozen
1/2 cup ice (this is optional and typically used when the fruit you are using isn’t frozen, if you are using frozen fruit, it usually is plenty cold and you won’t need the ice)
What to do:
What is your family’s favorite smoothie?
The post Tropical Delight Smoothie appeared first on Day2Day Joys.
]]>The post 20 Home Remedies for Outdoor Fun appeared first on Day2Day Joys.
]]>Rather than spraying or lathering on chemicals that could be harmful to our bodies, especially after so much repeated use over the summer, here are twenty DIY remedies that can be easily made at home. Even if you are an essential oil newbie like myself, you can still find almost all the relief you need this summer from these simple remedies.
If making your own remedies is new to you or still seems overwhelming, pick two to three remedies that you will use most often to start with and go from there. Even substituting just one chemical-free remedy will get you closer to a healthier summer.

Natural Home Remedies to Keep You Safe this Summer:
Sun Protection & Burn Relief
- DIY After Sun Spray ll Firefly Fields Living
- Homemade Sunscreen ll Keeper of the Home
- Whipped Coconut Cooling Lotion ll Hip 2 Save
- Magnesium Body Butter ll Wellness Mama
- DIY Sunscreen Sticks ll MadeOn
Bug & Tick Repellants
- Natural Bug Repellants with Essential Oils ll Herbal Academy of New England
- Homemade Rosemary Lemon Bug Repellant ll My Baking Addiction
- DIY Natural Tick Repellant ll Kornerstone Farms
- Homemade Basil Mosquito Repellant ll Mommypotamus
- Natural Tick Repellant ll Primally Inspired
Itch Relief
- Homemade Itch Relief Spray ll The Frugal Farm Wife
- Homemade Calamine Lotion ll Nourishing Joy
- Poison Ivy Paste ll Earth Remedy
- Homemade Bug Bite Relief Stick ll The Prairie Homestead
- Lavender for Relief ll DIY Natural
Aches & Pain Relief
- Homemade Natural Neosporin ll Mrs. Happy Homemaker
- DIY Warming Rub for Sore Muscles ll Pop Sugar
- Pain Relief Rub ll The Paleo Mama
- Magnesium Oil Lotion ll Creative Christian Mama
- Pain Relieving Bath Salts ll The Good Thieves
Don’t forget to pin this list for future reference and check out these other posts on outdoor summer fun!
- The {Real} Magic Kingdom Series ll This Pilgrim Life
- Day Hiking with Kids ll Day 2 Day Joys
- 4 Outdoor Learning Activities with Kids ll Day 2 Day Joys
- The Risks and Benefits of Sun Exposure ll Keeper of the Home
The post 20 Home Remedies for Outdoor Fun appeared first on Day2Day Joys.
]]>The post 4 Outdoor Learning Activities for Kids appeared first on Day2Day Joys.
]]>
Written by Lydia @ Frugal, debt free life, *NEW* Contributing Writer
I feel like Summer is the ultimate time for frugal fun. There are so many activities and events you can participate in as a family.
And what is MORE frugal than your own backyard? I am big believer in free play. Free play is pretty much my best friend. However, I do want summer to be a time of learning and enrichment for my little ones, as well.
Today I thought I would share some ways you can make outdoor time learning time. The best part is you probably have all the stuff you need.
4 Outdoor Activities for Kids:
Go on a digital scavenger hunt
- Camera or camera phone
- Printer (optional)
There are a few ways you can do it. But I like to snap photos using my iPod of things through out the yard. A pinecone, a rock, a frog, some blueberries from the bushes in our backyard, a butterfly.
Then I give my boys the iPod and they hunt for the things in the yard. Or you can print out the photos out and put them in an album and do it that way.
Alphabet hopscotch
Grab up that sidewalk chalk and head to the driveway or front porch and write the ABCs. Then have your child hop the appropriate letter. Have them say their ABCs while they hope but stop at the assigned letter.
You can do the same thing with numbers or if your child is older, sight words.
Letter fishing
- Kiddie pool/Totes container
- Large Spoon
- Magnet letters
- Cookie sheet
Do you have a TON of magnet letter? We do. Throws those suckers into your kiddie pool or a Totes container.
Have your child fish out a letter and put it on the cookie sheet. Ask your child to find specific letters.
If your child is a little older you can use this to create certain words like ish words or at words.
For example you could put “at” on the cookie sheet and have your child fish our C for cat or TH for that.
Color hunt
- Sidewalk chalk
Color a square on the driveway or front porch and ask your child to find items in your yard that match that color. Green leaves, purple flowers, etc.
These activities not only provide educational time, they also keep kids occupied on those long summer days.
What activities do you like to do outside that create a love for learning?
The post 4 Outdoor Learning Activities for Kids appeared first on Day2Day Joys.
]]>The post Jammin Strawberry Jam appeared first on Day2Day Joys.
]]>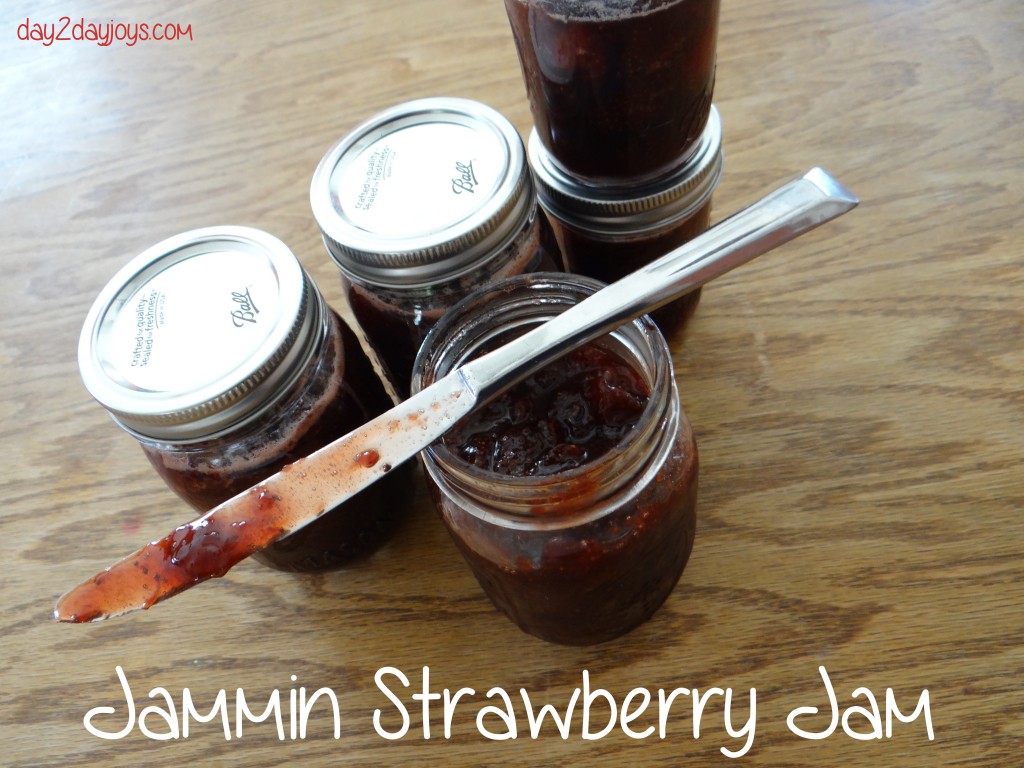
Are you guys getting overwhelmed with fresh, ripe, delicious, sugary, fruit? My goodness, spring and summer are just the best eating!!
My kiddos and I love to go picking. We pick anything we can get our hands on (in Massachusetts… strawberries, cherries, blueberries, peaches, apples, etc). Last year I canned tomatoes and applesauce… this year I wanted to try jam. We LOVED the results of this jammin jam!
How to make Jammin Starwberry Jam:
What you need:
- 10 cups of cleaned, de-topped, mashed, strawberries
- Zest of 2 lemons
- 4 cups of sugar
- 4 cups of honey
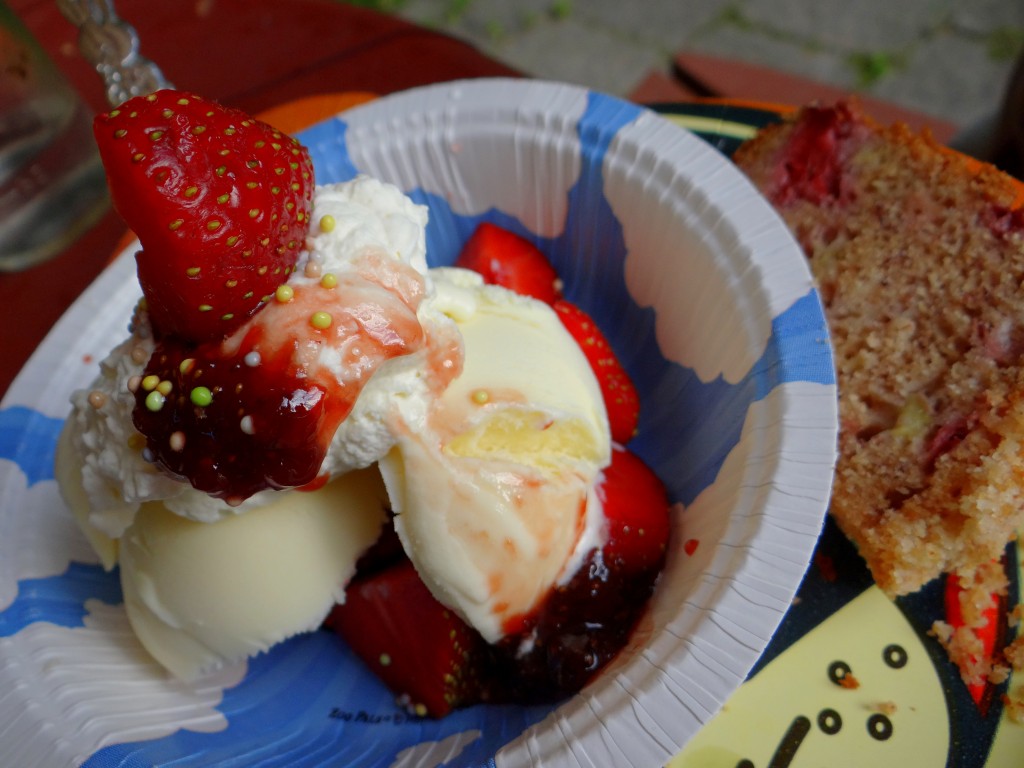
* I think all honey would be fine, it makes your jam a little more runny – but then it can double as ice cream topping. (see below…)
What to do:
- If you’re going to can your jam – get all your supplies ready – get your pot boiling, jars sterilizing, tops and rings hot and clean.
- In the meantime put all of your strawberries, sugar and honey into a pot (I used a big dutch oven type pot). You need time and patience people.
- Stand by the pot of strawberries, boiling away and skim skim skim! Be careful not to let the mixture burn to the bottom (I am still pot scrubbing!).
- The boiling berries produce this foam. You need to remove it (as much as you can).
- Get yourself a big bowl and put it right next to you, and a big, flatish spoon, and skim!
- After about half an hour (or whenever the foaming dies down), you’re ready to add your zest, and fill up your jars and process them for 10 minutes, and then set them aside to cool and pop!
- Enjoy!
Do you jam? Can? What’s your favorite summer item to preserve?
The post Jammin Strawberry Jam appeared first on Day2Day Joys.
]]>The post Jazz Up Your Summer BBQ Menu With Real Food Recipes appeared first on Day2Day Joys.
]]>
Written by Kari @ Living Strong, Health and Wellness, Contributing Writer
With summer in full swing and the Fourth of July right around the corner, we all know that this means a lot of picnics, bbq’s and get togethers are on the calendar. This also means that this will involve a lot of, you guessed it, food!
Is it possible to eat healthy during all these summer festivities? Yes, yes and yes! Eating healthy doesn’t mean that these celebrations have to be boring! In fact, I believe that you can have even better tasting food when you choose real foods prepared properly and with love! Nothing off the grocery store shelf can hold a candle to the greatness of real food!
A couple months ago I released my first cookbook that addresses the reality and simplicity of delicious and healthy food! On my journey to live a healthier lifestyle, I was finding that eating healthy usually meant bland, boring and just plain not good! My family felt the same! I knew that real food could taste amazing, be nourishing and keep you satisfied, so I went to work creating, experimenting and indulging.
Below are two wonderful recipes that can be found in my cookbook that you can incorporate into your summer celebrations! Kari’s Restaurant Style Salsa – to go with those big bowls of tortilla chips and Easy Peasy Peanut Butter Drops for a protein packed sweet treat. I know you will enjoy these real food treats and feel good knowing that you are feeding your family foods that will not harm them.
What You’ll Need:
- 1 can (28 ounce) whole tomatoes, with juice (I use Muir Glen Organic Fire Roasted Tomatoes
)
- 1 can (28 ounce) diced tomatoes with green chilies
- 1/4 cup yellow onion, chopped
- 2 to 3 cloves of garlic
- 1 teaspoon, unrefined sugar (cane, sucanat, coconut) or honey
- 1/2 teaspoon sea salt
- 1/2 teaspoon ground cumin
- 1 cup fresh cilantro
- 2 to 3 tablespoons lime juice (from the actual lime is best, if they aren’t in season, use lime juice)
- 2 small cans diced chilies (hot if you like the zing, otherwise use mild)
- 1 tablespoon diced jalapenos (add these very last to make the salsa more hot) (optional)
- 1/2 to 1 smoked chili pepper (optional – these add zing too)
What You’ll Do:
- Pour one can of the tomatoes in the blender, add the onion, garlic, sugar, sea salt and cumin.
- Blend until smooth.
- Pour this into a large mixing bowl.
- Now, pour the other can of tomatoes in the blender and add the cilantro, lime juice, diced chilies and jalapenos.
- Blend until smooth.
- Add this into the bowl with the other half of the salsa.
- Mix well with a bamboo spoon until combined thoroughly.
- Now it’s taste testing time. Grab some chips and and test it out. Does it need more heat? Add the smoked chili pepper. A little more cumin? Lime juice? This is your time to get creative and create a taste that you and your whole family will love.
- If you need to add more ingredients, scoop a couple cups of salsa back into the blender, add the extra ingredients, blend and pour back into the bowl. Mix again and test again.
- Store in glass jars – this typically makes 2 quarts of salsa.
- Refrigerate. Over the course of a couple days, the flavors will have time to mesh together and you’ll get a wonderful, amazing and fresh salsa!
Easy Peasy Peanut Butter Drops
(Packed with Protein and Energy)
What You’ll Need:
- 1/2 cup natural peanut butter (or another nut butter of choice)
- 1/2 cup raw honey
- 1/2-1 cup unsweetened, finely shredded coconut
- 1/4 –1/3 cup mini dark chocolate chips
- Sucanat (unrefined sugar) for rolling the drops
What You’ll Do:
- In a medium size bowl, mix the peanut butter and honey until combined thoroughly.
- Add the chocolate chips. You can add more or less according to your taste (I always add the larger amount).
- Add the coconut in 1/4 cup amounts until the consistency reaches a thick, yet semi-sticky state.
- You don’t want it so sticky that you can’t roll it, but you don’t want it so dry that it wont hold together. Find the happy medium.
- Once you are able to roll them and they still have some stickiness to them, roll into balls and then roll in the sucanat.
- Place on wax or parchment paper on a baking sheet or plate.
- Refrigerate for a while so they can harden up a bit, transfer to a glass jar and keep in the fridge.
I hope you have a wonderful and amazing summer, making time to enjoy family, friends and delicious food. Take time to cherish these moments and be thankful for the many blessings that God has poured out upon our lives!
**note from Rachel: Make sure you check out Kari’s new cookbook Real Food. Real Kitchen. So Good.: Health Made Easy. It’s actually on sale on amazon right now!

What is your favorite summer dish that brings a smile to your face and everyone who tries it?
The post Jazz Up Your Summer BBQ Menu With Real Food Recipes appeared first on Day2Day Joys.
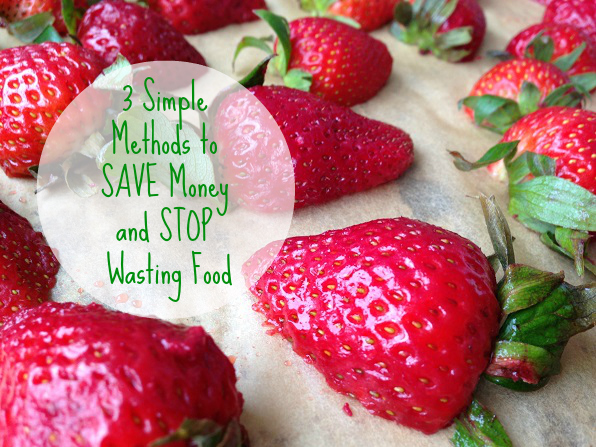
]]>The post 3 Simple Methods to Save Money and Stop Wasting Food appeared first on Day2Day Joys.
]]>
Written by Kari, Contributing Writer
Do you cringe when it comes to wasting food? I certainly do and it seems that in our society it’s not looked down upon like it used to be. There was a time when the only food a family had was what they grew on their land. Maybe small towns had a quaint little corner store that sold some food items – but they weren’t like our Walmart Supercenters or Krogers.
People valued food and I think we’ve lost that in this day and age of abundance, prepackaged foods and laboratory made foods available on every corner in America (think Doritos, Little Debbies, Captain Crunch and Slurpees).
So how can we be good stewards of the provision we have been given when it comes to food? What steps can we take to make our food supply last longer? Even if you don’t have a harvest from a garden, you can take these simple methods and use them when you are buying food from the farmers market or grocery store.
The three simple ways I save money and stop food waste in our home are:
1. Freezing
2. Deyhdrating or Drying
3. Fermenting
Now before you stop reading this thinking this is only for homesteaders – know that this is for everyone! I don’t live on land, own cattle or have a farm. I live in the suburbs with an 8’x12′ garden, a summer farmer’s market up the street and a wonderful health food store near us where they only sell organic produce, YET I employ all these sources in keeping my shelves stocked with amazing food year round.
Let’s take a look at each of these individually…
FREEZING
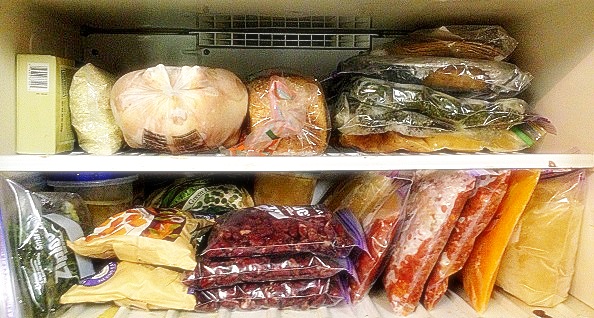
Whether you are harvesting a great yield from your garden or seasonal fruit and vegetables are priced great at the store, take this opportunity to freeze portions of these for use later in the season. Buy more than you’ll need, then freeze the rest. This is also great to do with vegetables, homemade sauces, beans and meat.
Buying meat when prices are good and freezing it (freezing times vary with type of meat) can save some money down the road when prices raise due to seasonal/weather changes or unexpected issues, like drought. Doing a quick search on the internet on instructions for freezing specific foods will provide many resources and instructions on how to successfully achieve this wonderful preservation method.
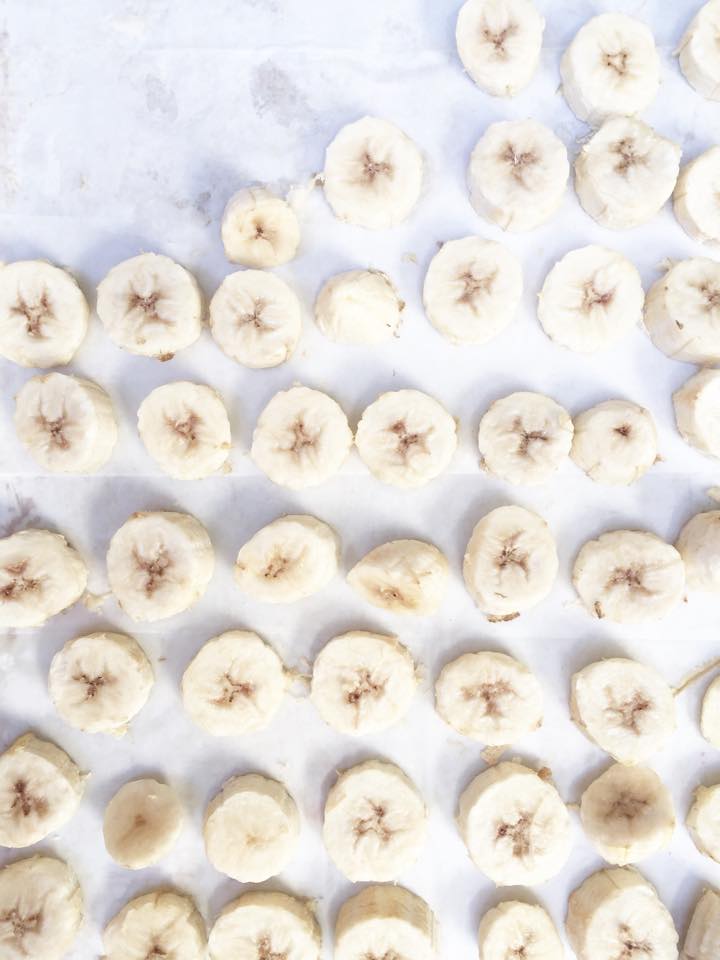
– To freeze fruit, wash and allow them to dry thoroughly. Lay them out in a single layer on a lined baking sheet. Stick this in the freezer until they are frozen, then transfer to a freezer bag or container. – To freeze veggies, it’s more of a process and you’ll need to blanch and chill them before freezing. – Blend up smoothies or juice fruits and veggies, then freeze them in ice cube trays, then transfer them to freezer bags or containers to use in smoothies at a later time. – Pre-make sauces, soups, stock and beans and freeze to use in the cooler months. – Keep all your veggie scraps when making other dishes, freeze them and use them to make vegetable stock. – Save bones from whole fryer chickens to make bone broth.
The possibilities are endless! Just make sure you have a good system in your freezer to store all these items. I find that freezing in freezer bags and laying them flat offers up the most space saving option.
DEHYDRATING OR DRYING
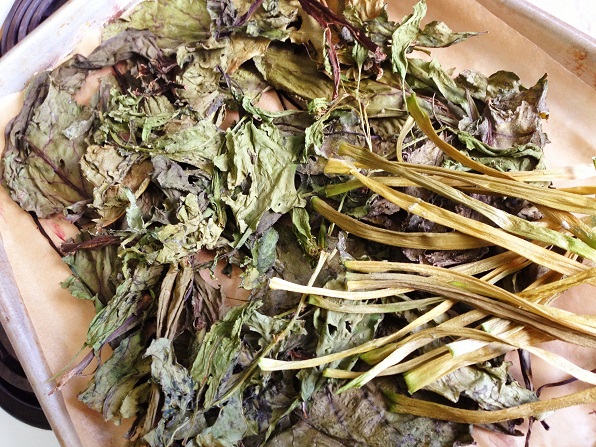
This method is great for all your greens, herbs, some veggies and even fruit. When you only need 2 tablespoons of fresh cilantro, you still have to buy it as a ‘bunch’, so you’re left with extra. Instead of letting it go bad, throwing it out or even composting it (although, once it’s gone bad – this is the best option) – dry or dehydrate the leftovers for your own dried herbs.
Oftentimes I hang my herbs to dry in a cool dark place, then grind them down and store in a glass container. When you buy or grow items like kale, chard, lettuce, spinach, etc., these are great to dehydrate and to process them into a green powder (including stems and leaves). Add these to soups or make your own green powder blend to drink – you’ll get amazing nutritional benefits from these concentrated powders.
If you don’t have a dehydrator, this can easily be done in the oven or even out in the summer sun. When using an oven, choose the lowest setting (150 on older models, 170 on newer) and heat with door shut for 2 hours. At that time, open the oven door slightly for ventilation and allow to continue heating until items are thoroughly dried. During the summer, this is best done in the evening hours so you don’t heat up the house.
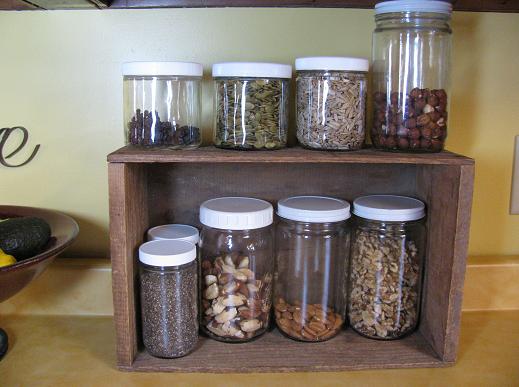
Other foods you can dehydrate are nuts and seeds, which allows for an extended shelf life along with making them healthier and easier to digest. Favorites in my house are homemade trail mix, dehydrated cinnamon apple slices and sweet potato chips with sea salt. I’ve also made raw cookies using a dehydrator and they were amazing!
FERMENTING
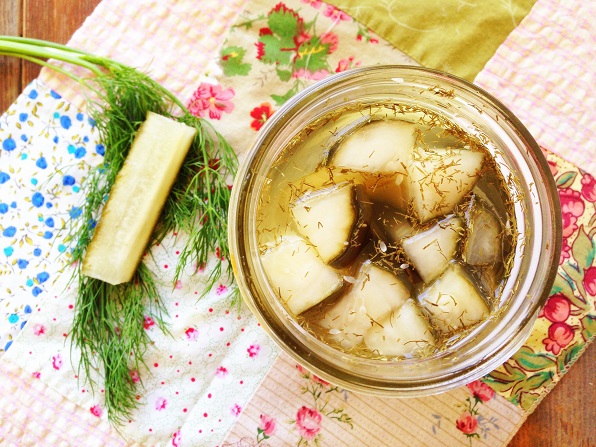
This is such a wonderful preservation method that has been used for centuries and truly offers amazingly healthy foods! We typically think of pickles and sauerkraut, but you can ferment foods such as eggs, cabbage, beets, watermelon, dairy and meat.
There are many wonderful websites out there that will walk you through fermenting foods and they offer delicious recipes. It’s a process of creating an environment for a chemical breakdown and change in food (typically lactic-acid and alcohol fermentation).
A couple favorites at our house are my Summer Sun Pickles, Homemade Cream Cheese, DIY Crème Fraiche and Homemade Yogurt and Dairy Kefir. Make sure you don’t get sidetracked by all those articles that say fermented foods are harmful. This method to preserve food has been around since the beginning of time and research shows that those cultures who used this method (and those that still use this method) are some of the healthiest people on the earth. Refrigerators and stoves are relatively new.
Microwaves are babies in the age of kitchen appliances – so we have to realize that cultures had to prepare and preserve food in ways that didn’t require modern technology. These methods proved to be nutritionally beneficial and insured there was no waste to their provision. Remember they didn’t have Walmart down the street to go stock up on food! I love gleaning from past generation’s wisdom when it comes to food since they were a whole lot healthier then we are in 2013!
These are just three simple and easy methods that will save you money on your grocery bill and keep your pantry, freezer and refrigerator full during fresh food’s off-season! It will feel amazing to be a good steward of your money and food and not to mention that you’ll be feeding your family nutrient dense foods for optimum health!
What is your favorite way to preserve and extend the life of your abundance of food?
The post 3 Simple Methods to Save Money and Stop Wasting Food appeared first on Day2Day Joys.
]]>The post The Easiest Way to Freeze Blueberries appeared first on Day2Day Joys.
]]>
Written by Kristen, Contributing Writer
It’s Blueberry Season!
It’s hard to beat fresh, seasonal berries, especially when you have access to local fruits that you can even pick yourself. The flavor can’t be beat! They are so sweet, so tasty, and sadly, so temporary. Berries aren’t known to have a long shelf-life!
One of my favorite things to do in July is to buy blueberries in bulk from a local farm market. They aren’t grown there, so these berries aren’t quite as fresh as the you-pick varieties we can find at the orchards around us. But this busy mom has limits, and she really likes having the convenience of 10 pound boxes of bulk blueberries!
I put these blueberries in smoothies, oatmeal, desserts, muffins, and more. With all of those uses, I’ve found that 40 pounds is a good amount to get us through the year. While it is much more convenient to buy so many blueberries already picked than to try to do the labor myself, I do come home from the store with an awful lot of blueberries to freeze at once.
The Typical Routine for Freezing Berries
The typical routine for freezing berries is pretty much the same regardless of where you look:
- Wash and sort berries.
- Remove stems and hulls (if they have them) and cut up large berries, like strawberries, if desired.
- Lay on a cookie sheet or pan in a single layer and place in the freezer for a few hours or overnight.
- Once frozen, transfer the berries to a freezer bag that has been labeled with the berry name and date.
- Keep the berries in a deep freezer for long term storage.
It’s not hard. It’s not exactly time-consuming. But when you have 40 pounds of blueberries to freeze, finding enough cookie sheets and pans to stick in the freezer, and enough freezer space to lay them on, is a bit of a challenge. This year I was especially pressed for time, and I didn’t want to have many of my precious seasonal berries end up in the compost! I decided there must be a better way, and there is!
The Easiest Way to Freeze Blueberries

Now, this slacker simplified way of freezing blueberries will only work for blueberries. Don’t try it with strawberries or raspberries. If you have blueberry cousins to freeze, like saskatoons, this might work for them, too, but I’m not sure.
The steps really can’t be easier:
- Wash blueberries in a large colander, then gently shake to remove excess water.
- Dump the berries into a 9×13 baking dish lined with a kitchen towel, filling about 1/3 or 1/2 of the way.
- Gently shake the pan from side to side to shake off more of the water drops and pick out any smashed, squishy, or otherwise bad berries.
- Dump the berries into a heavy-duty freezer bag (labeled with the date and berry name if you want), filling about 2/3 of the way.
- Lay the bag flat in the freezer, spreading the berries out evenly in the bag. After they’ve frozen in the bags completely, move the berries around inside the bag to break up any clumps.
- Keep them in a deep freezer for the best results, and if you are freezing 40 pounds of berries like me, you probably need that extra freezer space.
Voila! Removing that extra cookie sheet step allowed me to quickly get all of those blueberries in the freezer in only an hour or two instead of many hours and lots of waiting over a few days.
You’re probably wondering if the berries aren’t just one giant frozen clump inside of the freezer bags. I’m very glad to announce that blueberries have some sort of magical power that prevents them from freezing together. There’s probably some rational reason for it, but I don’t know what it is. Also, since your berries may be a little damp when you put them in, you might find some extra ice crystals in the freezer bag. This doesn’t bother me, but if it does you, you can try to more thoroughly dry the berries before bagging them.
There may still be some merit in freezing the berries on a cookie sheet first. I’m not sure, but I’ll find out as the winter goes on and I pull out my freezer bags of berries. I have a feeling that any slight disadvantages will pale in comparison with the time and effort this simplified method just saved me, though!
Do you freeze blueberries in the summer? Have you ever tried just putting them in a freezer bag, or do you use some other method?
The post The Easiest Way to Freeze Blueberries appeared first on Day2Day Joys.
]]>The post Meals for the Lazy Days of Summer appeared first on Day2Day Joys.
]]>
Written by Jenn D, Contributing Writer
Here in the Midwest, summer took its sweet time in coming. But we are now fully in the midst of it and I am loving the long days, slower pace, spontaneous day trips, and outdoor adventures.
However, all of this frolicking about means that our usual rhythms have been a bit thrown; dinner, which usually began at 5:30 sharp, now happens…whenever. Meal planning has lately amounted to me checking the pantry in the morning and mentally piecing some randomness together for that evening.
While I usually meal plan for the sake of my sanity and budget, summer seems to bring permission to take a more laid-back approach.
I’m also basking in the flexibility that a backyard garden affords (No dinner plan? Off to the garden to pick a salad!) and the freedom that comes from serving a platter of healthy snacks for dinner.
When summer ends, we’ll get back into more set routines. For now, it feels good to plan less, embrace spontaneity (even if it messes with the dinner hour), and enjoy summer’s bounty of fresh produce.
Here are some simple favorites from my home. Nothing revolutionary, just easy some ideas to make meal prep less daunting on those lazy summer days.
Poolside Picnic Lunch
A staple for days at the pool with the kids, I try to pack easy favorites:
- Peanut Butter and raw honey sandwiches :: Using homemade bread would be great, but lately we’ve been spreading ours on these Ezekiel sprouted tortillas.
- Medley of berries, melons, and/or carrot sticks
- Homemade trail mix :: Raisins, almonds, and chocolate chips
- Smoothies :: I leave these in a small cooler in the car so the kids have a cold drink to enjoy/spill on the ride home. Half of our fam is currently dairy-free, so we’ve been enjoying water kefir, mango, banana, blueberry smoothies with a couple heaping tablespoons of coconut oil. When we’re doing dairy, I’ll make strawberry/banana/orange/yogurt ones or a green smoothie.
Backyard Cookout with Friends
Anything that’s not cooked in the kitchen automatically feels like less work to me. Thank you, grill. Make the potato salad earlier in the day and when dinner rolls around, you won’t have cook inside at all.
- Grilled chicken thighs :: In my pursuit of serving real food on a budget, I’ll often make frugal choices like chicken thighs instead of breasts.
- Less-Dressed Potato Salad*
- Grilled Corn on the Cob :: To grill the corn, pull back the husks and remove the silk. Then, soak it in water for about 15 minutes. Dry and brush with olive oil or butter, rub with salt and pepper. Replace the rusks and grill until the corn is soft, about 15 minutes.
- Homemade Popsicles
*Less-Dressed Potato Salad (adapted from the Vegan Planet cookbook)
Ingredients: 1 1/2 pounds small red potatoes, 1/2 t dried fennel, 1/4 cup olives (the recipe calls for niçoise; I generally end up using Kalamata), 1/4 cup chopped fresh chives, 1/3 cup extra virgin olive oil, 2 T lemon juice, 1 t Dijon mustard, 1 minced shallot, sea salt and pepper to taste
Directions: Boil potatoes, then chop them into small chunks. Put them in a bowl and add the fennel, chives, and olives. In a separate bowl, whisk together the olive oil, lemon juice, mustard, shallot, and salt and pepper. Pour this mixture over the potatoes and gently stir to combine. Taste and adjust the seasoning as necessary (I often add a little more salt). Serve right away or fridge until ready to serve.
Ode to the Salad
My (yummy!) basic salad recipe is as follows:
- Greens (either spinach or mixed)
- A soft cheese (crumbled goat cheese, blue cheese, feta, etc.)
- Caramelized nuts* (almonds, walnuts, or pecans)
- A fruit (apples, blueberries, strawberries, or oranges work well)
- A meat (grilled chicken is my go-to, but steak sounds wonderful too)
- Tossed in a vinaigrette**
For example: A grilled chicken and apple salad over mixed greens with goat cheese and caramelized almonds in a raspberry vinaigrette.
*To caramelize nuts, melt 3ishT of butter in a saucepan over medium heat and add a couple T of organic sugar (or Sucanat, Rapadura, etc.). Add some chopped nuts and stir continuously until the sugar has melted and the mixture begins to thicken. Remove from heat and continue stirring until cool.
**The simplest homemade vinaigrette ever: extra virgin olive oil + balsamic vinegar + some sea salt and a bit of pepper.
- Or try this easy cilantro-lime dressing!
Snacks for Dinner
In my book, if the snacks are healthy and come from a variety of food groups, they totally count as a meal. Put them on a platter and make it a family movie night.
- Homemade Popcorn :: I get organic popping corn from Azure Standard and pop it in coconut oil, then add some sea salt. When I’m feeling wild, I’ll add rosemary.
- Apple Slices and Peanut Butter
- Cheese :: My current favorite is a smoked cheddar goat cheese I get from Azure.
Breakfast for Dinner
Another lovely deviation from the norm, I just love breakfast for dinner.
- Fried egg sandwiches with cheese and turkey bacon :: These sandwiches have long been a favorite. Toss some sautéed tomato and onion on the egg, cheese, and bacon and you’ve got your veggies covered, too.
- Smoothies
What are your favorite low-maintenance summer meals?
The post Meals for the Lazy Days of Summer appeared first on Day2Day Joys.
]]>The post 5 FUN Outdoor Ideas for SUMMER! appeared first on Day2Day Joys.
]]>5 FUN outdoor ideas for SUMMER:
1. Go to a splash pad
We LOVE these! If you have never heard of a splash pad, it is kinda like a water playground. Check out your local park & rec to see if there is one close to you.
2. Go to a pool
3. Go camping
4. Go fruit/veggie picking
*Growing a garden is another idea. If you have a garden, have your kids help you maintain it and care for it.
5. Go to a national park
How are you going to have fun outside with your kids this summer?
The post 5 FUN Outdoor Ideas for SUMMER! appeared first on Day2Day Joys.
]]>


