


Written by Kari @ Living on Purpose, Contributing Writer
I absolutely enjoy entertaining at my house.
Every Christmas season, Hubby and I (okay, mostly me) like to have something at our house. Now, sometimes that means a bunch of screaming little kids are over decorating my amazing sugar cookies, getting frosting all over our walls and furniture, sprinkles and colored sugar crystals become permanent flooring and faces end up stained with the frosting since most of it never makes it onto the cookie.
Fun.
Other times we might have an open house for all our family and friends for the Christmas season – because what would December be if you didn’t have 100 parties to attend? Boring, right? I always tell people, you will never come over to my house and find a lone bowl of microwaved popcorn sitting in the middle of an empty table – and that be your eating for the night.
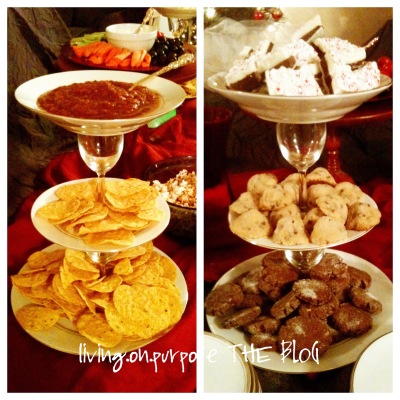
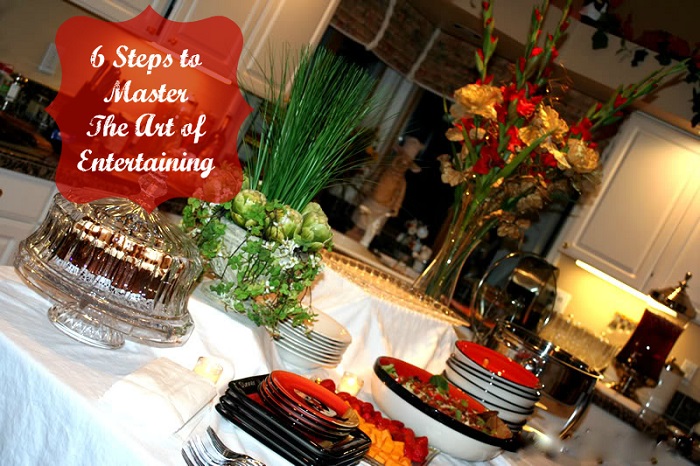
I planned a great menu for the small party of 10! Chicken Tortilla Soup and Chili , warm sourdough bread with REAL BUTTER, seasoned and organic, stove top popcorn, veggies and dip, chips and dip, Chocolate Chip Surprise Cookies, Golly Polly Doodle Cookies, Peppermint Bark (this is the recipe I used), Ginger Ale/Ice Cream Punch, a Make Your Own Mocha station, and more! All of it home-made! 95% of healthy – I threw in some cookies and delicacies that wouldn’t be on my ‘foods you should consume everyday of your life’ list. Come on – don’t be a hater – it was a Christmas Party!

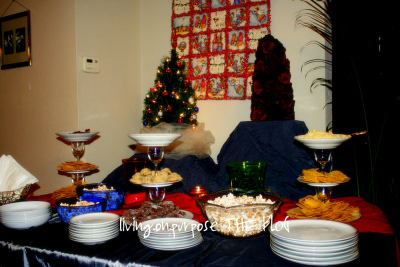
Now, my issue was the presentation of this amazing food.
Now, the fact that I’m addicted to Pinterest has really helped me out of a sticky situation or two. This was no different.
I had secretly been crushing over some tiered serving platters that I had seen on Pinterest.
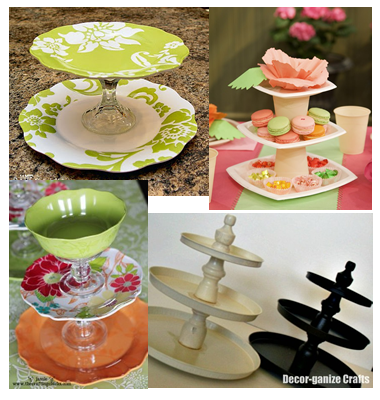 {images above taken from Pinterest}
Now, some of the tutorials I read on these used items that could be toxic (spray painting plastic dishes) and I don’t want to poison my guests. Others went out and bought new dishes and candle stands and made theirs. Now, those were all pretty, but I didn’t exactly want to spend $80 on a couple tiered serving dishes.
So, I came up with my own plan. I went consignment store shopping. We have thrift stores all over the place so I ran up to one by our house and browsed their section of dishes.
I found an entire set of china, yes, real china – each piece only 50 cents!

I grabbed all the dinner plates, salad plates and soup bowls. Then I found 2 different sets of mini wine glasses that each had 8 in the set! Those were also just 50 cents each. After I loaded up on all the china and wine glasses I took them home and sat them in a sink of hot water with lots of natural soap added. Since it’s real china, I couldn’t use boiling water, although that would have been my preference. I let them soak until the water was tepid, drained the sink, rinsed the dishes and repeated the process.
I let them air dry for about 6 days. Six days isn’t necessary, but I didn’t get around to making the serving dishes until then, so they had a while to dry.
When all was said and done the total cost of ONE 3-tiered serving platter was $3.50, dishes and glue included! Not bad!
HOW TO MAKE THE TIERED SERVING PLATTERS
You’ll need:
- clear epoxy (needs to be clear or it will look extremely tacky) and needs to be epoxy, I don’t think any other craft glue will hold forever and as much weight as the epoxy will
- the dishes you are using, depending on how many tiers you are doing
- the glasses you are using for the ‘stands’ – you can also use glass candle stick holders, I personally like the look of the glasses
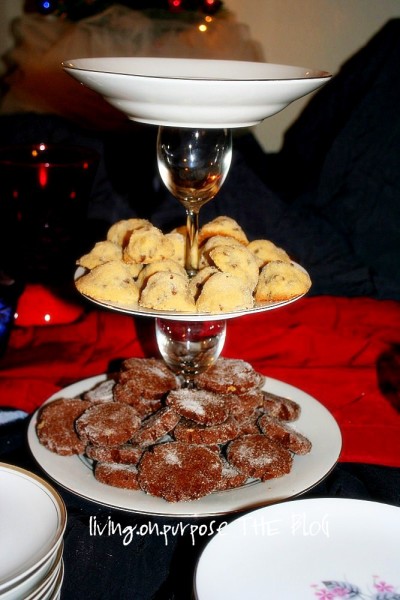
Each one consisted of 1 dinner plate, 1 salad plate and 1 bowl and 2 identical mini wine glasses.
Here’s what to do:
- I began by outlining where each wine glass would go.
- I started with the bowl, which would go on the top, I laid it upside down with the rim on the surface and centered the rim of the wine glass on the bottom of the bowl and drew a LIGHT pencil line around the glass.
- Then I did the salad bowl, which was the middle tier. I used the base of one of the glasses and centered it on the top of the salad plate and drew a LIGHT pencil line.
- Next you repeat the first step, and turn the salad plate over and center the rim of a glass on it and draw a line.
- Next repeat the second step with the dinner plate, using the base of a wine glass.
- Once you have all the lines drawn on the dishes, you can mix your epoxy. If you’re only doing one of these serving platters, mix enough epoxy to cover the rim of one wine glass.
To glue everything together:
- Make sure everything is clean and the glasses have no prints on them on the inside of the glass or on the base. If you don’t catch this now and clean it, those prints will forever be a part of the serving platters since once they are glued, you’ll never get to them again.
- Start with the bowl, which is the top tier.
- Turn the bowl upside down and place on a flat surface.
- Using a toothpick or skinny wooden craft stick, apply the epoxy to the rim of the first glass. Remember to work fast. Once the rim is covered in glue (try to do it neatly – it is possible, I was able to do it), slowly place the glass, rim side down on the outline you made on the bottom of the bowl. Apply gentle but firm pressure to the glass so it adheres to the plate. Allow to sit for about 5 minutes before you continue on.
- Once the bowl is dry enough, mix up a little more epoxy (this time enough to do the base of 2 glasses) and apply it to the edge of the base of the wine glass this is already attached to the bowl. Once the epoxy is on, turn the bowl and glass right side up and slowly set it down on the salad plate where the outline is. Again, apply gentle but firm pressure so the glass adheres to the plate. Next apply epoxy to the base of the 2nd wine glass and slowly place it on the outline on the dinner plate (the bottom tier). This time I would allow both to dry for about 10-15 minutes before moving on. If you do not allow enough time for epoxy to set, the glasses and dishes will slide and shift and you will end up with un-centered glasses – doesn’t look pretty.
- After the 10-15 minutes, turn the bowl, glass and salad plate upside down so the top of the bowl is on a flat surface. Next mix up a small amount of epoxy to put on the rim of the wine glass that is on the dinner plate. Once the rim is covered in epoxy, slowly place the bottom plate and glass on the outline you made on the bottom of the salad plate. Apply gentle but firm pressure and then allow to sit for about 20 minutes.
- After 20 minutes it should be safe enough to turn back over so it’s facing upright. I let my stands sit for 24 hours before messing with them. Once the epoxy had set – those suckers were indestructible! Really!
To Clean:
It’s easiest to wipe down with warm soapy water to clean. If you have a ginormous sink – you can wash them in your sink. The epoxy will withstand all the soap and water, so you don’t have to worry about it falling apart if it gets wet!
These are WONDERFUL because they are so VERSATILE! I pulled out my 2 sets of china for everyone to dine on and I also pulled out my gold plated silverware and my SILVER silverware! Those special touches are amazing!
What special touches do you add to your holiday celebrations to make them special?


I have made this before as Christmas gifts! I love how varied you can make them…all crystal or all white or a mix of colors and patterns. I made mine with tea cups but I like the idea of wine glasses!