


Written by Karen @ To Work With My Hands, Contributing Writer
Fall is here and soon the ground will be adorned with the gorgeous array of rich-colored leaves.
Every year my children collect the prettiest leaves they can find, bring them inside, and it sometimes looks as if there must be a tree growing somewhere inside our house! They simply love the beautiful, showy leaves of fall, and so do I.
Quite a few years ago, when our oldest boys were still pretty small, my husband helped me make our own leaf press. For years we’ve used it and untold numbers of leaves have been preserved in its layers.
This year, I decided it was time to add a second press to our collection. The leaves are already making their way indoors, and I want to be able to preserve as many as we can for fun fall crafts, and just for the joy of experiencing their beauty a bit longer.
The supplies are few and inexpensive, and the press will last for years – long after your leaf-collectors are grown and probably have their own little ones.
If you have easy access to a table saw and scrap lumber, you can make one even more economically. Although I do have access to both, our busy fall schedule kept me from having easy access to the people who could operate the saw :), so I chose the craft store route this time instead.
You can make your press any size you like, but keep in mind that a very large press will be more difficult to manage or take with you on nature outings. We like the size and portability of a press that is one square foot or less in size.
Make Your Own Leaf Press
Here’s what you need:
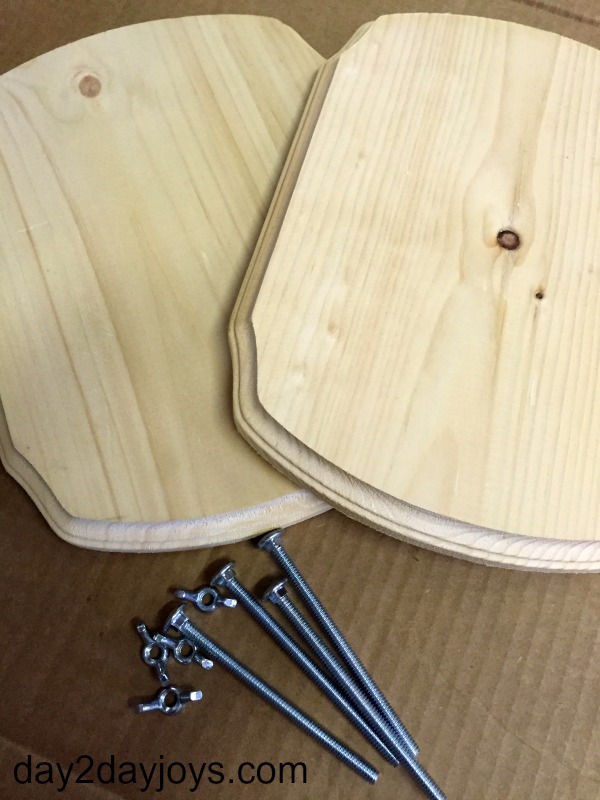
- 2 pieces of wood, 1/2-inch thick
- 4 stainless steel bolts (we used 4″)
- 4 wing nuts to fit the bolts
- 8-10 pieces of cardboard cut to fit the wood
- craft paint (optional)
- drill press or electric hand drill
- clamps
-
Here’s what you do:
If you use lumber, such as plywood, cut two pieces in the size you want, creating a rectangle or square. Our first press was an 8-inch square and worked great for little hands.
Alternatively, you can purchase pre-cut and routed unfinished plaques at craft stores. The ones I used in this press were purchased at Michael’s for $3.49 each. (If you have their app on your phone, you can use their mobile coupons too. They typically have a 40% off any regularly-priced item every week just like Hobby Lobby does.)
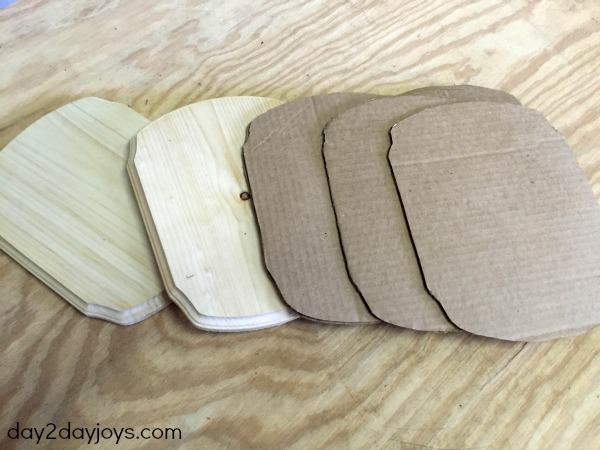
Next, Cut as many pieces of cardboard as you would like for your press – I cut 8 for ours. Lay one of your pieces of wood onto an opened cardboard box and trace around it. Using a craft knife, cut the pattern out. Repeat until you have as many layers as you like.
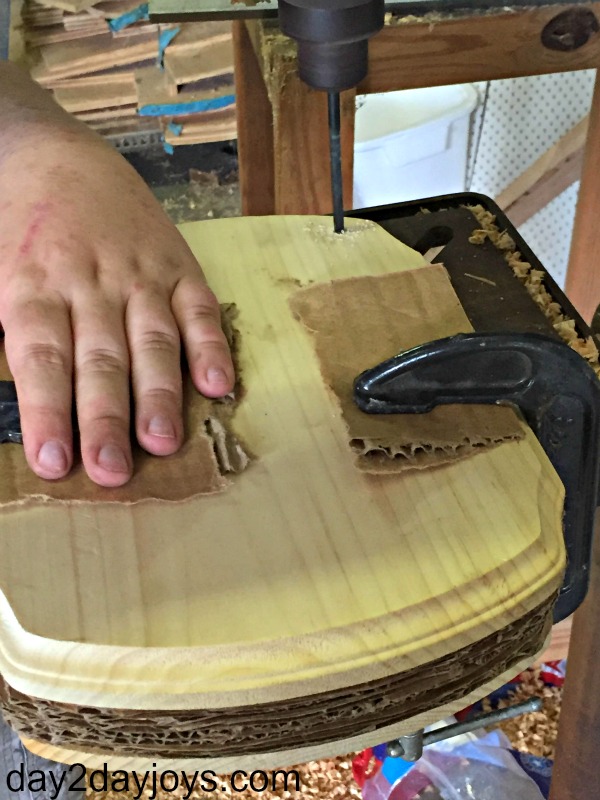
Stack the cardboard layers between the two wood layers and clamp to hold them steady while you drill the holes. To prevent the clamps from marring the wood, slide an extra piece of cardboard between the wood and clamp before tightening.
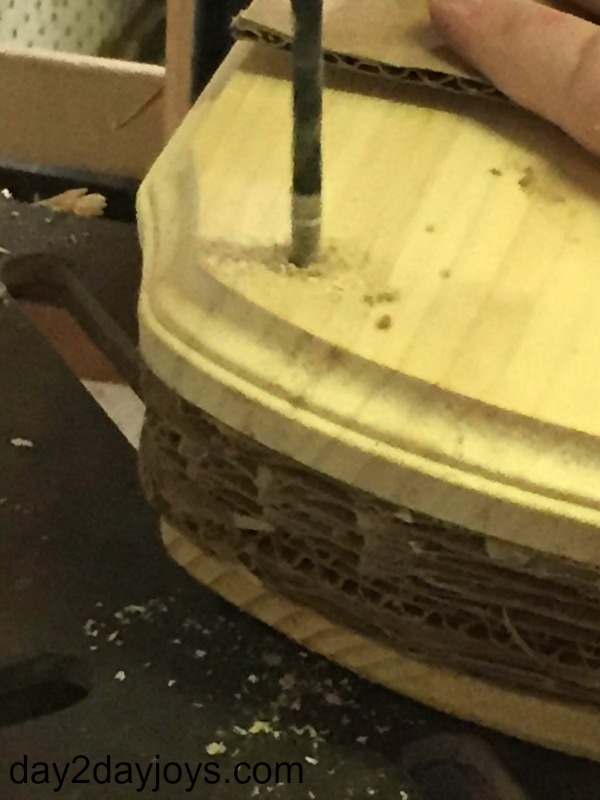
With the layers secure, you can now drill the holes. We chose 1/4″ bolts and used a 5/16″ drill bit (This is where I was stunned by how much my 11-year old knows about using a drill press and choosing and changing bits. My husband has done a fantastic job of teaching our boys to do the shop things, and I’m so grateful!)
If you don’t have a drill press, you can also use an electric hand drill.
Once the holes are drilled, check the fit of your bolts before removing the clamps. Screw the wing nuts onto the bolts, and remove the clamps.
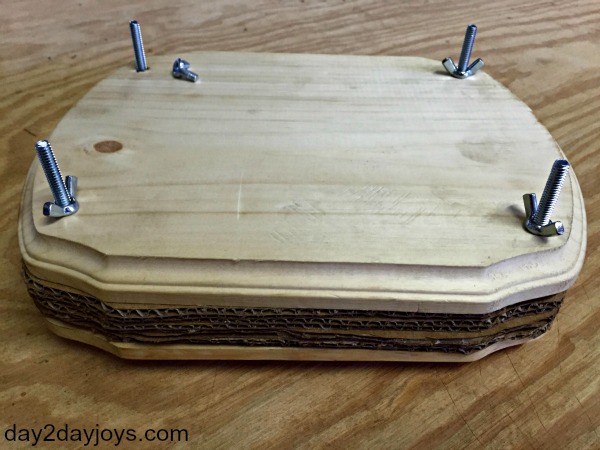
Your leaf press is finished!
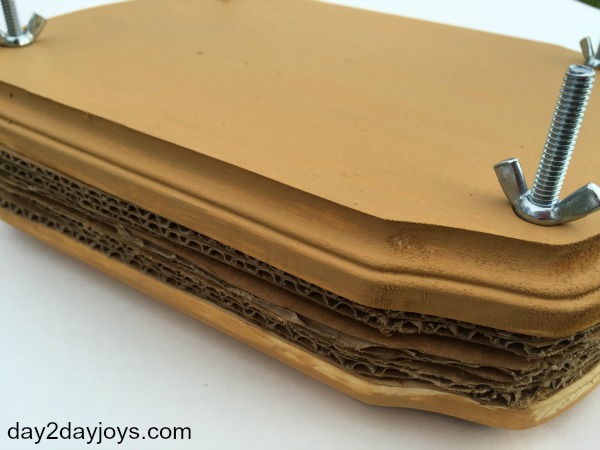
If you want to dress your press up a bit, you can give the top and bottom a few coats of craft paint. We left our first press natural and after so many years of use, it has become quite dirty.
You could also decorate it with pressed leaves using Modge-Podge, or hand-paint a beautiful scene. Use your imagination and have fun.
Using the press:
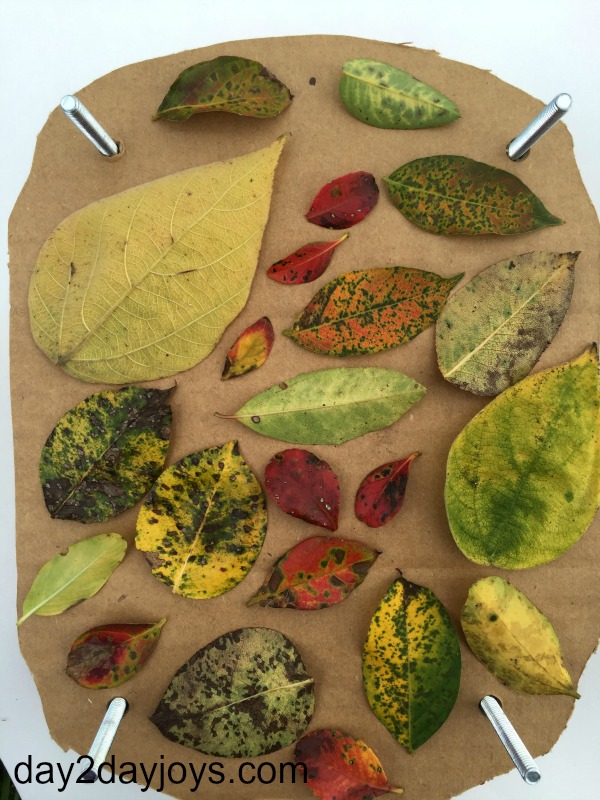
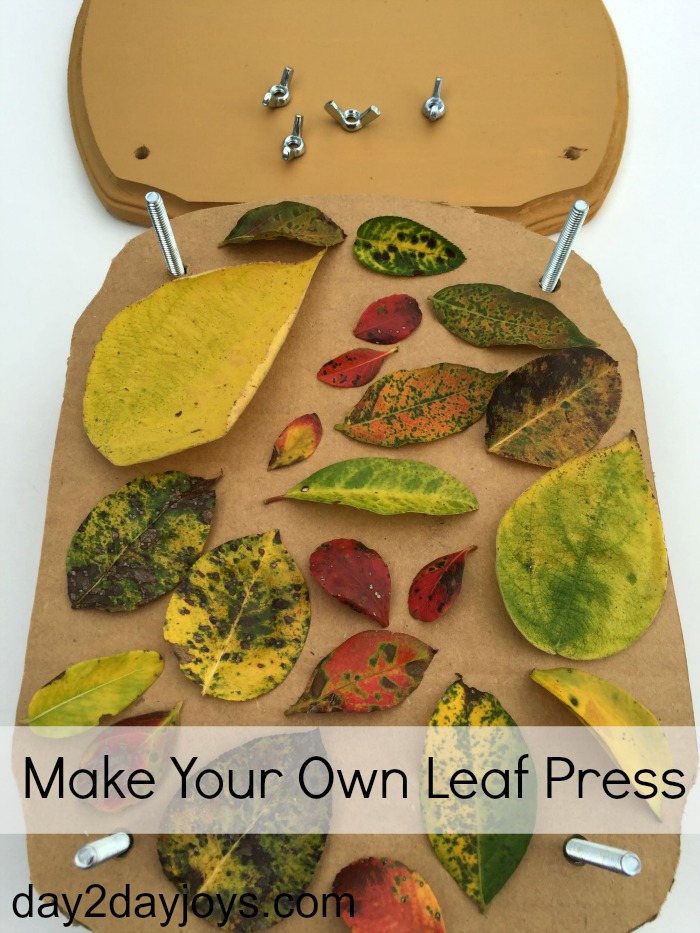
After collecting your leaves, lay them in single layers on the bottom piece of wood, taking care not to overlap leaves even slightly.
When there’s no room left, place a piece of cardboard on top of the leaves, carefully sliding it down the bolts. Repeat until you have as many layers as you need.
Place the top piece of wood on last, and screw down the wing nuts as tightly as you can.
Check the leaves after a week. If they aren’t completely dry, screw the nuts down again and give them a few more days.
When the leaves are dry, carefully remove them from the cardboard layers. Some may be quite brittle, so take care to remove them gently.
Making your own leaf press is fun and easy and a great way to get your kids involved one step further in the process of enjoying fall leaves.
Your press isn’t just for fall, however! You can use it in the spring and summer to press beautiful grasses and flowers too. It’s a wonderful way to expand nature study and preserve specimens that are otherwise short-lived.
One of our favorite pressed leaf projects has been using this book to create nature scenes with our leaves. Look What I Did With a Leaf! is filled with inspiring and creative scenes made exclusively with pressed leaves.
Tip: It’s a good idea to put a small mark on the correct side of the top or bottom of each piece of cardboard. Likely the holes are not totally interchangeable, and unless they are in the same position as when you drilled them, you may have some binding.
Do your children collect fall leaves? How do you enjoy the beautiful, yet short-lived colors of fall?


Recent Comments