The post Why I LOVE Leftover Mashed Potatoes appeared first on Day2Day Joys.
]]>Heading into the holiday season, keeping meals simple is a must. Days are busy with class parties, extra crafting projects, special outings, and much more.
I love planning delicious holiday meals, but for the everyday, ordinary meals I like to keep the menu plan quick and easy.
One thing I try to do when preparing for a busy week or season is to make more than what I need so that I can then repurpose it into another meal or two. I double the rice I need so that fried rice can be made quickly later on. Extra chicken can be turned into many different meals.
And making extra mashed potatoes means I can make one of my favorite repurposed leftover dishes– crispy potato cakes.
My mom made them for us when I was a child and they were a favorite back then too. Crispy on the outside and creamy on the inside, when topped with a little pat of butter, they are so yummy.

Occasionally, I will make crispy potato cakes for a side with dinner, but more often, I like to enjoy potato cakes at breakfast. They pair very well with a fried egg, bacon or ham, and maybe some cheese or greens.
This holiday season, if you have leftover mashed potatoes on hand, try making these crispy potato cakes! They are simple to make and sure to please!
Crispy Potato Cakes:
What you need:
- 2-3 C mashed potatoes
- 1 egg
- 1/2 tsp garlic powder
- 1/2 tsp kosher salt
- 1 Tbsp butter
What to do:
- 1. Mix together potatoes, egg, garlic powder, and salt in a bowl until well-combined.
- 2. Heat a pan over medium-high heat. Melt 1/2 Tbsp butter in the pan. Form half the potato mixture into small patties and place in hot pan. Cook for 5 minutes on each side until crispy, gently turning the potato cake halfway through cooking.
-

- 3. Repeat step 2 with the remaining potato mixture.
- 4. Serve warm with extra butter, if desired.
-

Do you have any easy meal ideas to use up left over potatoes?
The post Why I LOVE Leftover Mashed Potatoes appeared first on Day2Day Joys.
]]>The post Lemon Meringue Pie for Spring appeared first on Day2Day Joys.
]]>Around Easter-time, we always look for simplicity, quality family time and enjoying special treats. As a total baking fanatic, I love to bake something delicious that entire family can enjoy.

Lemon Meringue Pie for Spring
There are several lemon meringue recipes available, but my absolute favorite is the one I am sharing with you today.


- 250 ml measuring cup
- 20 ml tablespoon
- 9 inch (23 cm) diameter pie dish
- 1 large egg
- 120 g cold butter (cut in small pieces)
- 70 g (1/2 cup) self-raising flour
- 130 g (3/4 cup and 1 tablespoon) plain flour
- 30 g (1 tablespoon and 3 teaspoons) caster sugar
- 56 g (4 tablespoons and 3 teaspoons) cornflour
- 170 g (3/4 cup) golden caster sugar
- 180 ml (2/3 cup and 2 teaspoons) fresh lemon juice (approximately 3 lemons)
- 230 ml (2/3 cup and 1/4 cup) water
- 60 g butter (cut in small pieces)
- 3 large egg yolks
- 3 large egg whites
- 170g (3/4 cup) golden caster sugar
- Put the flours, caster sugar and butter in a food processor. Process until the mix resembles fine fresh breadcrumbs. Add egg and process on medium speed for about 20 seconds, until the mix clumps together.
- Next, form dough into a flattened round. Put it in a freezer bag (or wrap in plastic wrap). Put it into the fridge and refrigerate it for at least an hour (or overnight).
- Combine sugar, cornflour, lemon juice and water in medium saucepan. Use medium-high heat and stir constantly until the mix starts to boil. Reduce heat to low and continue stirring until the mix becomes transparent and smooth. Remove saucepan from heat and stir in both butter and egg yolks. Stir until entire butter has melted and the mix is smooth. Pour filling into a small bowl or container with a cover and put it into the fridge. Keep it in your fridge until it is cold.
- Set the oven to 180 degrees Celsius and roll out pastry on a lightly floured board. Put it into pie plate and gently press into dish. Place a sheet of baking paper on the pastry and fill it with pastry weights. Bake at 180 degrees Celsius for 10 minutes. Remove weights with baking paper and continue baking for 10-15 minutes. Let the pastry cool completely.
- Preheat oven to 200 degrees Celsius.
- Place egg whites in a bowl. Use electric mixer on high speed until at soft peak stage. Start adding the sugar gradually on the same time beating well until the sugar has dissolved and the mix is thick. There shouldn’t be any sugar crystals.
- Spoon lemon filling on cooled pastry and spread meringue to cover filling. Form peaks in the meringue with a spoon. Bake it approximately 7-10 minutes.
- Allow the lemon pie to cool to room temperature, cover it and put it to the fridge. Serve it cold for instance with ice cream.
What’s your favorite pie for Spring?
The post Lemon Meringue Pie for Spring appeared first on Day2Day Joys.
]]>The post The Best Beef Stew in the Crockpot appeared first on Day2Day Joys.
]]>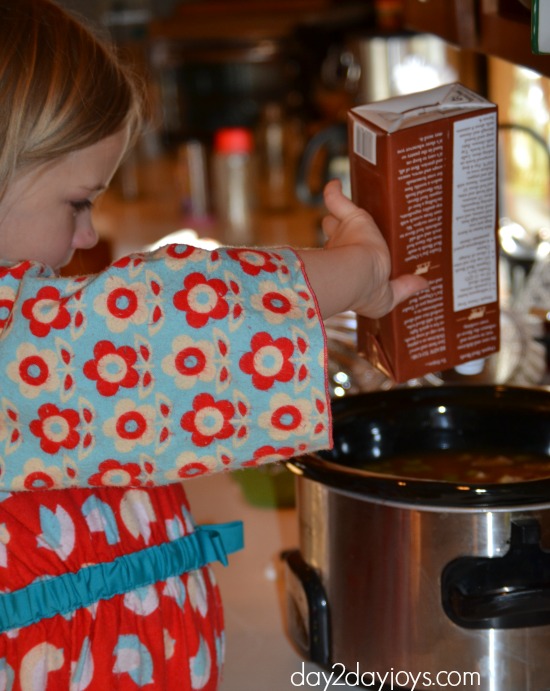
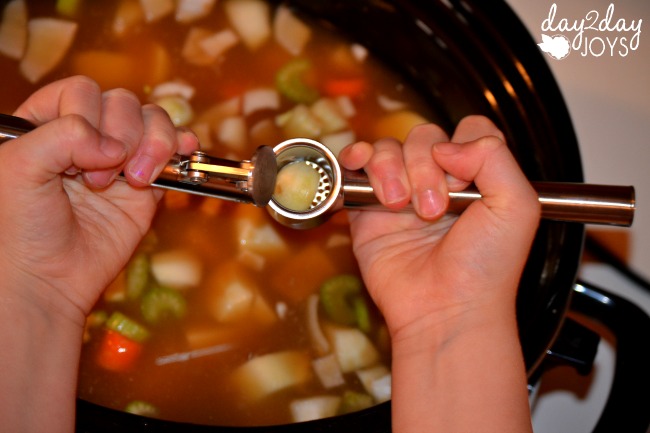
Cooking with my daughter Julia is one of my favorite things to do.
She loves helping! I have been slacking on my meal planning lately, but when I am on top of it, she is right there by my side eager to help.
Cooking when it’s easy and tasty is something I always strive to do. This Beef Stew is the best because you just dump the ingredients into the crockpot and later you have a delicious dinner… AND the best part? No huge mess to clean up! 
**I wish I had a photo of the cooked stew but after basketball practice we ate it up so quickly. 
- About 20-25 baby carrots, diced
- 2-3 potatoes, chopped (can use sweet potatoes)
- 1 small onion, chopped
- 1 stalk celery, chopped
- 32 ounces organic beef broth + 10 ounces of more broth or water
- 1-2 pounds of grass-fed stew beef
- 1 C corn
- 2 T ketchup
- 1 t paprika
- 1 T parsley
- 1 t onion powder
- 2-3 cloves of garic, minced
- 1 t apple cider vinegar
- 1 t sea salt
- ¼+ t pepper
- ¼ C *flour (I used arrowroot) for the roux
- 2 T butter- use some in roux & before serving
- optional: 1 C frozen peas (not shown)
- Gather ingredients
- Chop and dice all vegetables
- Turn your crockpot on high heat and add the beef
- Pour in chopped veggies then cover with beef stock
- Scoop in the herbs & seasonings, stir and cover
- Let cook for several hours
- After about 4+ hours, make a roux with some of the butter, mix in with stew
- Before serving add remainder of the butter, stir
- Serve in glass bowls, repeat

What is your favorite soup or stew in the crockpot?
The post The Best Beef Stew in the Crockpot appeared first on Day2Day Joys.
]]>The post Jasmine London Fog Tea appeared first on Day2Day Joys.
]]>
Written by Contributing Writer, Kari @ Living Strong, Health & Wellness
I like hot beverages. Coffee, hot chocolate, hot cider, tea…you name it.
If you’re a tea connoisseur, then you need to try this amazing recipe. Even if you don’t usually like tea, this has such a sweet and delicate taste, you may actually like this. Adding milk to tea is a tradition practiced in many cultures, American culture not being one of the top ones. So, this isn’t a common drink for many people, but it’s definitely one you may wan to add to your list of favorites. Typically London Fog Tea is made with Earl Grey tea and milk, but last summer I tried a different version at our local coffee shop. London Fog with Jasmine tea.
Oh my goodness.
The sweetness this drink has is beautiful. It’s a soft, yet gentle sweet taste and with the raw honey – it gives it that extra pizazz in the taste department.
If you like hot beverages, but don’t like coffee or don’t always want to drink coffee, this is a great alternative. My kids even enjoy this!
It’s simple, easy and takes less than 10 minutes to prepare. I use whole milk, but you could use any dairy or dairy sub you prefer. I’m sure they’d all alter the taste a bit, but I only think it would make it more unique. Go ahead and give it a shot. All you need to do is:
Steep that tea.
Add warmed milk.
Add the hot tea.
Then add the raw honey.
Doesn’t it look delicious?
Just three simple ingredients. Go ahead and give it a shot!
- 4 ounces Jasmine tea, hot
- 4 ounces whole milk or dairy subsitute, warmed
- 1-3 teaspoons raw honey
- Prepare a cup of Jasmine tea according to directions on box.
- In a small saucepan, warm 4 ounces of milk or dairy substitute over medium-low.
- Combine the hot tea and warmed milk in a mug.
- Add the raw honey and stir until dissolved.
- Enjoy!
What is your favorite tea?
The post Jasmine London Fog Tea appeared first on Day2Day Joys.
]]>The post DIY Tiered Serving Platters appeared first on Day2Day Joys.
]]>I absolutely enjoy entertaining at my house.
Every Christmas season, Hubby and I (okay, mostly me) like to have something at our house. Now, sometimes that means a bunch of screaming little kids are over decorating my amazing sugar cookies, getting frosting all over our walls and furniture, sprinkles and colored sugar crystals become permanent flooring and faces end up stained with the frosting since most of it never makes it onto the cookie.
Fun.
Other times we might have an open house for all our family and friends for the Christmas season – because what would December be if you didn’t have 100 parties to attend? Boring, right? I always tell people, you will never come over to my house and find a lone bowl of microwaved popcorn sitting in the middle of an empty table – and that be your eating for the night.
I planned a great menu for the small party of 10! Chicken Tortilla Soup and Chili , warm sourdough bread with REAL BUTTER, seasoned and organic, stove top popcorn, veggies and dip, chips and dip, Chocolate Chip Surprise Cookies, Golly Polly Doodle Cookies, Peppermint Bark (this is the recipe I used), Ginger Ale/Ice Cream Punch, a Make Your Own Mocha station, and more! All of it home-made! 95% of healthy – I threw in some cookies and delicacies that wouldn’t be on my ‘foods you should consume everyday of your life’ list. Come on – don’t be a hater – it was a Christmas Party!
Now, my issue was the presentation of this amazing food.
Now, the fact that I’m addicted to Pinterest has really helped me out of a sticky situation or two. This was no different.
I had secretly been crushing over some tiered serving platters that I had seen on Pinterest.
 {images above taken from Pinterest}
Now, some of the tutorials I read on these used items that could be toxic (spray painting plastic dishes) and I don’t want to poison my guests. Others went out and bought new dishes and candle stands and made theirs. Now, those were all pretty, but I didn’t exactly want to spend $80 on a couple tiered serving dishes.
So, I came up with my own plan. I went consignment store shopping. We have thrift stores all over the place so I ran up to one by our house and browsed their section of dishes.
I found an entire set of china, yes, real china – each piece only 50 cents!
I grabbed all the dinner plates, salad plates and soup bowls. Then I found 2 different sets of mini wine glasses that each had 8 in the set! Those were also just 50 cents each. After I loaded up on all the china and wine glasses I took them home and sat them in a sink of hot water with lots of natural soap added. Since it’s real china, I couldn’t use boiling water, although that would have been my preference. I let them soak until the water was tepid, drained the sink, rinsed the dishes and repeated the process.
I let them air dry for about 6 days. Six days isn’t necessary, but I didn’t get around to making the serving dishes until then, so they had a while to dry.
When all was said and done the total cost of ONE 3-tiered serving platter was $3.50, dishes and glue included! Not bad!
HOW TO MAKE THE TIERED SERVING PLATTERS
You’ll need:
- clear epoxy (needs to be clear or it will look extremely tacky) and needs to be epoxy, I don’t think any other craft glue will hold forever and as much weight as the epoxy will
- the dishes you are using, depending on how many tiers you are doing
- the glasses you are using for the ‘stands’ – you can also use glass candle stick holders, I personally like the look of the glasses
Each one consisted of 1 dinner plate, 1 salad plate and 1 bowl and 2 identical mini wine glasses.
Here’s what to do:
- I began by outlining where each wine glass would go.
- I started with the bowl, which would go on the top, I laid it upside down with the rim on the surface and centered the rim of the wine glass on the bottom of the bowl and drew a LIGHT pencil line around the glass.
- Then I did the salad bowl, which was the middle tier. I used the base of one of the glasses and centered it on the top of the salad plate and drew a LIGHT pencil line.
- Next you repeat the first step, and turn the salad plate over and center the rim of a glass on it and draw a line.
- Next repeat the second step with the dinner plate, using the base of a wine glass.
- Once you have all the lines drawn on the dishes, you can mix your epoxy. If you’re only doing one of these serving platters, mix enough epoxy to cover the rim of one wine glass.
To glue everything together:
- Make sure everything is clean and the glasses have no prints on them on the inside of the glass or on the base. If you don’t catch this now and clean it, those prints will forever be a part of the serving platters since once they are glued, you’ll never get to them again.
- Start with the bowl, which is the top tier.
- Turn the bowl upside down and place on a flat surface.
- Using a toothpick or skinny wooden craft stick, apply the epoxy to the rim of the first glass. Remember to work fast. Once the rim is covered in glue (try to do it neatly – it is possible, I was able to do it), slowly place the glass, rim side down on the outline you made on the bottom of the bowl. Apply gentle but firm pressure to the glass so it adheres to the plate. Allow to sit for about 5 minutes before you continue on.
- Once the bowl is dry enough, mix up a little more epoxy (this time enough to do the base of 2 glasses) and apply it to the edge of the base of the wine glass this is already attached to the bowl. Once the epoxy is on, turn the bowl and glass right side up and slowly set it down on the salad plate where the outline is. Again, apply gentle but firm pressure so the glass adheres to the plate. Next apply epoxy to the base of the 2nd wine glass and slowly place it on the outline on the dinner plate (the bottom tier). This time I would allow both to dry for about 10-15 minutes before moving on. If you do not allow enough time for epoxy to set, the glasses and dishes will slide and shift and you will end up with un-centered glasses – doesn’t look pretty.
- After the 10-15 minutes, turn the bowl, glass and salad plate upside down so the top of the bowl is on a flat surface. Next mix up a small amount of epoxy to put on the rim of the wine glass that is on the dinner plate. Once the rim is covered in epoxy, slowly place the bottom plate and glass on the outline you made on the bottom of the salad plate. Apply gentle but firm pressure and then allow to sit for about 20 minutes.
- After 20 minutes it should be safe enough to turn back over so it’s facing upright. I let my stands sit for 24 hours before messing with them. Once the epoxy had set – those suckers were indestructible! Really!
To Clean:
It’s easiest to wipe down with warm soapy water to clean. If you have a ginormous sink – you can wash them in your sink. The epoxy will withstand all the soap and water, so you don’t have to worry about it falling apart if it gets wet!
These are WONDERFUL because they are so VERSATILE! I pulled out my 2 sets of china for everyone to dine on and I also pulled out my gold plated silverware and my SILVER silverware! Those special touches are amazing!
What special touches do you add to your holiday celebrations to make them special?
The post DIY Tiered Serving Platters appeared first on Day2Day Joys.
]]>The post Simple Pinecone Swag appeared first on Day2Day Joys.
]]>Recently our family was out on a walk together and we came across a trail littered with beautiful pinecones. Don’t you love how God decorates for us in the beauty of nature?!  Beyond the physical beauty of pinecones, just think about their picture of renewal and growth. It is not until a pinecone experiences hot/dry/difficult times that it open up to fulfill the greatness it was created for. If a pinecone never opens up and grows, it cannot spread any seed or fulfill its purpose. So lovely!
That day it didn’t occur to me to pick some up and bring them home…so I had to go back another day when I had decided to put this project together.

DIY Simple Pinecone Swag
What you need:
- 7 large pinecones (with stems preferred)
- 3-4 yards Wide ribbon
- 1-2 yards Thin ribbon
What to do:
1. If you use pinecones that are fresh from the forest for any craft project, it’s a good idea to “bake out the bugs” first. Line them in a single layer on a baking sheet. Bake at 200 degrees for 30 minutes.

2. Cut the wide ribbon into varying lengths as to where you want the pinecones to rest. Tie the lengths together in a wide loose knot at the top. Tie a length of the thin ribbon through the knot for hanging the swag when it is complete.


3. Cut seven strips of thin ribbon about 6 inches long. Tightly, wrap and tie one piece of thin ribbon around each pinecone stem. Then tie each of the pinecones, staggered in length, to one of the wide ribbons.


4. Finish off the ribbon ends in a clean angled cut and the swag is complete!


Do you have any favorite pinecone projects? Please, share your ideas, I picked up PLENTY of pinecones!
The post Simple Pinecone Swag appeared first on Day2Day Joys.
]]>The post Chicken Tortilla Soup With A Kick appeared first on Day2Day Joys.
]]>
Written by Kari @ Living Strong, Health & Wellness, Contributing Writer
It is October and it’s officially cooling down enough to try this great recipe, which is perfect for any chilly weather you might experience over these next few months!
This belly warming soup is simple, quick and so delicious! All you need is a blender and a stock pot (or slow-cooker) and you’re set to make the most amazing tortilla soup you have ever had! You can keep this a mild meal or add some extra peppers to give it that kick that keeps you coming back for more!
This is not only a favorite in our house, but in houses all over these wonderful states! I’ve shared this recipe over the years and then it was included in my cookbook – and it gets rave reviews every time! I have never found a restaurant that has a soup that compares to this! You definitely need to try it! I’ve taken the text from the cookbook to include allergen-free information as well as more tips to make it even healthier!
Chicken Tortilla Soup With A Kick:
What you need:
- 1 whole fryer chicken
- 8 cups chicken broth (can make while cooking the chicken)
- 16 ounces of diced tomatoes
- 1 medium yellow or white onion, cut in half
- 2 cloves garlic – ½ cup fresh cilantro
- 1 teaspoon raw honey
- 3 chipotle peppers soaked in adobe sauce
- optional, 2 avocados
- optional, ½ cup full-fat yogurt, plain
- optional, tortilla chips
- optional, shredded cheese
What you do:
- To prepare the stock and the chicken, plan to start preparing the meal in the morning.
- Cook the whole fryer by placing in a slow cooker, covering completely with water, adding seasonings and spices (salt, garlic powder, parsley, pepper) and cook on low for 8 hours.
- After 8 hours, remove the whole fryer from the slow-cooker using slotted spoons. Place in a bowl and allow to cool for about 5-10 minutes. Begin removing the chicken from the bones and place on a plate. Pull the meat with two forks. This is your shredded chicken.
- Strain out the liquid in the slow-cooker into a bowl (if you’ll cook the soup in the slow-cooker) or stock pot (if cooking soup on the stove) to remove any large pieces of meat or bone that fell off the chicken (it gets super tender). If you used a bowl, once it’s strained, replace liquid back in slow-cooker.
- Separate about 1 ½ to 2 pounds of shredded chicken and add to the broth.
- In a blender, puree the tomatoes, onion, garlic, cilantro and honey until smooth.
- Pour this mixture in with the broth and chicken. Stir to combine.
- Add the chipotle peppers if you are wanting that kick to your soup. If not, omit.
- Continue cooking in the slow-cooker for about an hour and a half or on the stove-top over medium for 45 minutes.
- To serve, prepare the bowls by putting some avocado and yogurt in the bottom of the bowl. Crunch tortilla chips and place on top. Next, ladle the soup over the prepared bowls and top with shredded cheese. Wow, get ready!
Yield: Approximately 14 cups
I’m special because (if using “optional” ingredients, the allergy-free info below may change):
dairy-free, egg-free, gluten-free, grain-free, soy-free
Substitutions:
*Full-fat yogurt: full-fat sour cream
Health Made Easy:
if you’re short on time, you can purchase your broth, but make sure it’s organic and low-sodium | homemade broth will supply your body with so many nutrients that you’ll never get out of store bought brands, so choose homemade if possible | don’t have time to cook a whole fryer, purchase chicken thighs, bake and shred | use fire-roasted tomatoes or seasoned diced tomatoes | you don’t need to put all the optional extras in the bowl first, but boy does it sure taste good that way | store leftovers in glass mason jars in the fridge | if you use the chipotle peppers the soup will get spicier over a couple days | choose non-gmo tortilla chips
Enjoy! Enjoy! Enjoy!
What is your favorite soup to keep you warm during the autumn and winter seasons?
The post Chicken Tortilla Soup With A Kick appeared first on Day2Day Joys.
]]>The post Crockpot Stuffed Peppers appeared first on Day2Day Joys.
]]>
Written by Kelly @ Eyes On The Source, Contributing Writer
Is it feeling Fall-ish at all for any of you yet? Maybe with the kids going back to school and possibly cooler temperatures. But here in Florida it is still a hot, humid 95 degrees most days. So either way, a warm and cozy meal that doesn’t heat up the house works for us all! 

How to make Crockpot Stuffed Peppers:


- 6 multi-colored peppers
- 4 Cups cooked Brown Rice/Quinoa
- 1 Cup black beans (or more if you omit meat)
- 2 Cups of cooked bite size meat of your choice (optional)
- 2 Cups Vegetable broth
- Seasonings to taste (cumin, oregano, garlic, red pepper flakes etc.)
- Cut off the tops of the peppers and scrape or wash out the seeds. Save the tops!
- Pour the 2 cups of broth into the bottom of the crockpot.
- Add a little less than half of the rice/quinoa. You need just enough to help keep the peppers from tipping over.
- Make a mixture of the rest of the rice/quinoa, black beans and meat.
- Add your preferred seasonings. (Honestly, I am not very good at exact measurements of seasonings. I usually just throw in a pinch of this or that until it tastes good to me!)
- Place the bottom half of the peppers in the crockpot and then fill with rice/meat mixture. Place the tops back on the peppers to keep the mixture from drying out.
- Cover and cook in the crockpot for 4 hours on high or 6 hours on low. Less if you want them the peppers to be more firm.


What is your favorite warm and cozy meal for Fall?
The post Crockpot Stuffed Peppers appeared first on Day2Day Joys.
]]>The post 10 Easy Freezer Meals {Including a Family Favorite} appeared first on Day2Day Joys.
]]>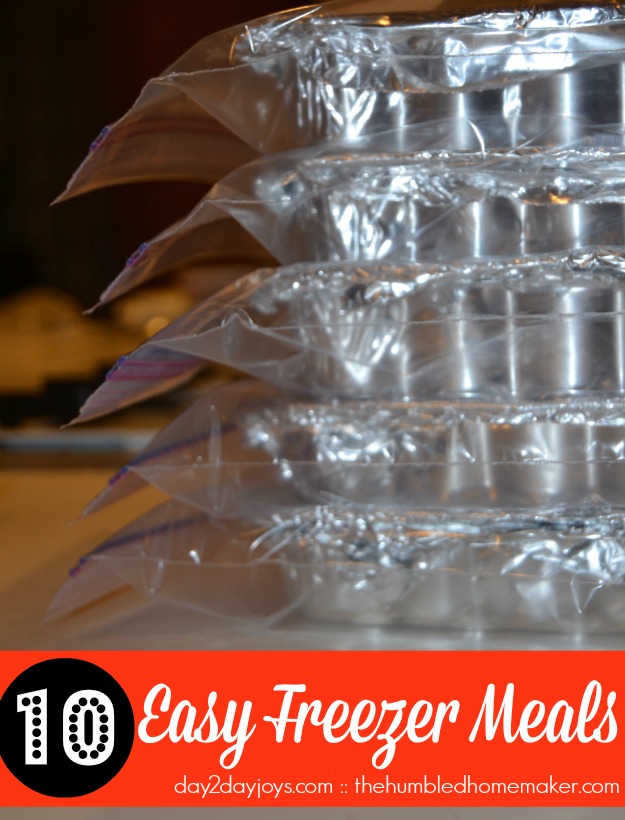
Freezer meals are so easy and convenient.
As a busy mom of 3, some days I fail to plan dinner, 4pm rolls around and I’m thinking what in the world is for dinner? I don’t like to admit it but meal planning is one of my weaknesses. Can any of you relate?
So when I have meal planned, it helps, but what I find helps me the most are freezer meals. This can be done several different ways but the ways I think are the easiest are the “dump all ingredients into a freezer zip bag and freeze method” and the method used to make this chicken divan recipe I am about to share with you.
When I was late into my 3rd pregnancy and preparing for my first homebirth, I decided to make a bunch of meals, for our family to enjoy when baby London arrived and to share with a couple of friends who were also having babies around the same time.
This method is preparing several batches of the same recipe and freezing them in a….
Please join me over at The Humbled Homemaker where I am sharing this recipe, plus 9 other ideas!
Do you ever make freezer meals? What are your favorite recipes?
The post 10 Easy Freezer Meals {Including a Family Favorite} appeared first on Day2Day Joys.
]]>The post Easy Summer Appetizer {Plus 10 Other Recipes} appeared first on Day2Day Joys.
]]>
A couple months ago we went to my friend Melissa’s house. She and her sweet family are friends of ours whom we often celebrate some holidays with since we don’t have family near by.
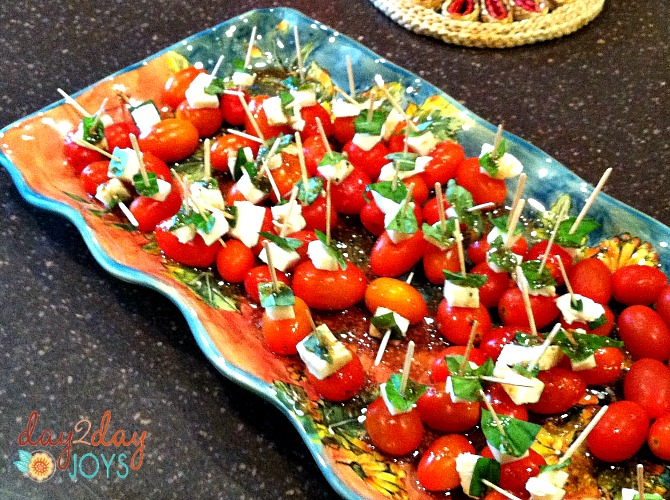
This time we were celebrating Mother’s Day and her birthday. When we arrived she had some appetizers out and one of them was this Easy Summer Appetizer!

Here is a picture of us on Halloween one year
She said this appetizer was her hubby’s idea but I’ll give her the credit here. 
Melissa’s Easy Summer Appetizer
What you need:
- grape tomatoes
- fresh mozzarella, cut into small squares
- fresh basil, chopped
- balsamic vinaigrette
What to do:
We hope you love this EASY recipe!
Here are 10 other recipes that would be great for summer too:
- Slow Cooker Chex Mix
- Sombrero Dip
- Black Bean Corn Salsa
- Bacon Wrapped Pepper Poppers
- Olive Sun Dried Tomato Hummus
- Not Your Average Guacamole
- Homemade Crackers
- Delicious Kale Chips
- Cheese Stuffed Fried Squash Blossoms
- Crostinis
*Linked to Wellness Wednesdays, Titus Tuesdays, Works for Me
What are your favorite summer appetizers? Do you like to use summer veggies?
The post Easy Summer Appetizer {Plus 10 Other Recipes} appeared first on Day2Day Joys.
]]>


