The post Spiced Pumpkin Pie with Flaky Pastry Crust appeared first on Day2Day Joys.
]]>
Written by Kari @ KariNewsom.com, Contributing Writer
Autumn is officially here! At least in Colorado! We are having beautiful and warm days (high 70’s to low 80’s), but the nights are cool and crisp! Leaves are turning bright yellow, orange and red – and the morning has brought a slight haze these past few days.
Typically I am more of a warm-weather person. I’m all about the sun, flip flops and being outside. That being said, I’m still a Colorado girl at heart. I like to get bundled up in chunky sweaters, wool socks and fur lined shoes. I like jumping in the Jeep with my husband and kids, all bundled up, to drive to the mountains to see the Aspen’s turning. And since we’re Colorado natives, no matter what the weather, you roll the windows down, crank the heat and put those hats on and enjoy the drive!
The other thing I like about autumn is that I start spending more time in the kitchen again, making delicious and yummy smelling foods! A few years ago I wanted to make a pumpkin pie – a pie that I’ve never liked. As in ever. I figured it was because store bought pumpkin pies were not close to one made from scratch, so I wanted to try making one COMPLETELY from scratch to see if I could like a real pumpkin pie!
I have to say, when I took the first bite of this from-scratch creation, I instantly became hooked. This is a tad more involved than other recipes – okay, a lot more involved, so make your special occasions more special by incorporating this into the menu. It is absolutely delicious! If you’re already a pumpkin pie lover – then you MUST try this and add it to your favorite’s list! It’s on ours, which is why we included it in my first cookbook – Real Food. Real Kitchen. So Good!

Spiced Pumpkin Pie with
Flaky Pastry Crust
Yield: 2-3 pies
What you need:
*for the flaky pastry crust
- 3 ¾ cups white spelt flour
- 1 tablespoon cane sugar
- 1 1/2 teaspoon sea salt
- 1/2 teaspoon baking powder, aluminum-free
- 1 ¾ cup cold real butter
- 2/3 cups ice cold filtered water
- 2 tablespoons full-fat plain yogurt
- 1 teaspoon white vinegar
*for the spiced pumpkin pie filling and topping
(this will fill at least 2 pie dishes, depending on the size you make – believe me you’ll be glad you have more than one)
- TOPPING
1/2 cup (1 stick) real butter , at room temperature - 1 cup spelt flour
- 2/3 cup packed brown sugar
- 1 cup chopped pecans
- 1 teaspoon cinnamon
- 1 teaspoon vanilla
- FILLING
1 1/2 cups packed dark brown sugar - 1 teaspoon sea salt
- 2 teaspoon cinnamon
- 4 tablespoons of freshly grated ginger
- 1/2 teaspoon ground clove
- 1/2 teaspoon allspice
- 4 eggs, from pasture-raised chickens
- 2 egg yolks, from pasture-raised chickens
- 2 teaspoon finely grated orange rind
- 29 ounces pure pumpkin, pureed
- 2 (12oz) cans evaporated milk
What You Do:
FOR THE FLAKY PASTRY CRUST:
- In a VERY large bowl, combine the flour, sugar, salt and baking powder and blend well.
- With a pastry blender – or 2 butter knives, cut in the cold butter until you have chunks the size of peas.
- In a measuring glass, mix cold water, yogurt and vinegar together. Add liquid, all at once, to the flour mixture.
- Stir quickly to distribute the liquid BUT DO NOT over mix. The consistency of the dough at this point will be a tad crumbly.
- Allow the dough to rest in the fridge for 2 hours or overnight. When the dough is ready it will break and not stretch.
- Divide into three portions and shape into discs. For the ones you won’t be using right now, wrap in wax paper and store in an freezer safe zip lock bag and place in the freezer for up to one month or in the fridge for up to 3 days. If you do freeze it, thaw it in the fridge overnight – do not leave it out on the counter to thaw out.
- When ready to use, roll out to around 12″ diameter so it will fit right in a 9″ pie dish. Transfer dough to the pie dish and trim the edge so it’s hanging over the edge by 1/2″. Fold over the edge and shape as desired. With a fork, prick the bottom and sides of the crust and place in the freezer for 10 minutes.
- To “blind bake” the crust, place a piece of parchment paper in the pie dish, on top of the crust and fill with dry beans so it’s weighted down. Place pie crust on a cookie sheet and bake for 30 minutes at 350F degrees. After 30 minutes, remove the parchment paper and beans and bake for 5 more minutes. Remove from the oven and cool before placing any filling inside.
For Spiced Pumpkin Pie Filling and Topping:
- Preheat oven to 425F degrees.
- Combine all the TOPPING ingredients in a medium size bowl and set aside.
- Combine all the FILLING ingredients in a large bowl and whisk well. Pour this mixture into the cooled down pie crusts.
- Bake pies for 15 minutes. Reduce the oven temp to 350F degrees and bake for an additional 30 minutes.
- Remove from the oven and sprinkle the topping on both pies. Return to the oven and bake for 15 minutes or until a knife inserted in the center of the pie comes out clean. If you find the edges begin to burn while finishing the bake time, place foil over the edges to during those last 15 minutes of baking.
SUBSTITUTIONS:
- White spelt flour: whole white wheat, whole wheat pastry, unbleached & unenriched white flour
- Cane sugar: coconut sugar, palm sugar
- Full-fat plain yogurt: full-fat sour cream, crème fraiche
- Brown sugar: coconut sugar or cane sugar with 2 tablespoons of molasses added
- Freshly grated ginger: use 1 teaspoon ground ginger if you can’t get fresh ginger
HEALTH MADE EASY:
if using canned pumpkin puree, choose organic | make your own puree using “pie pumpkins”, which is a pretty simple process | since it makes 3 pies, you can either bless someone else with one or freeze them for up to a couple months | the fresh ginger really makes a difference in the taste, I prefer fresh over ground
What is your favorite autumn recipe that makes you smile from ear to ear?
The post Spiced Pumpkin Pie with Flaky Pastry Crust appeared first on Day2Day Joys.
]]>The post Whipped Naked Magnesium Butter appeared first on Day2Day Joys.
]]>
Written by Kari @ Living Strong Wellness, Contributing Writer
It seems these days that good, restful sleep is hard to come by. Not only with adults, but children as well. As this is not an exciting fact, it is a reality and I believe we have a wonderful variety of natural options to help us.
For instance, there are herbal teas, essential oils, supplements and something I want to share with you today – magnesium butter.
Ahhh, this stuff is amazing. Why do I love it so much? Because it provides our body something that is lacking so severely in today’s generation – magnesium.
There are many benefits of healthy magnesium levels. To mention just a few:
- Magnesium helps muscle and nerve function. Serving as calcium’s vital partner, magnesium will allow calcium to do it’s job to build muscle growth.
- Magnesium plays an important role in gut health. Without good levels of magnesium aid in the absorption of copper, potassium, vitamin D and zinc. It also helps regulate blood sugar levels, which will lessen the risk for diabetes.
- Magnesium can help lower blood pressure or keep blood pressure low by allowing your muscles to relax, contract and push blood through the arteries and veins without force.
- Magnesium helps melatonin (the sleep regulating hormone) stay balanced, which allows for more peaceful sleep.
- Magnesium can help balance stress hormones, eliminating stress and tension and allowing for a more relaxed state of being (which in return will help with rest as well).
The list goes on and on, but those five points alone should get people’s attention when it comes to supplementing with safe sources of magnesium. Data from 2012 stated that 48% of the American population, 79% over the age of 55, were deficient in magnesium. This isn’t good, especially when it is such a vital mineral and nutrient for our bodies.
Along with taking a liquid mineral supplement, we use magnesium butter every evening before we go to bed. We just spread a thin layer either behind our knees or on our inner arm (where the skin in thin) and that’s it! I have made this for several family members and friends and they all love it and can tell a huge difference in their quality of sleep (especially the adults…go figure)!
The recipe is simple and last a long time on the shelf! We always use it, so we go through a 4 ounce container in about 3-4 months (three of us use it). Since the recipe doesn’t contain water, it would probably last a good 6-8 months if kept clean (wash hands before using the butter) and can always be extended to 12-18 months or longer if refrigerated!
You can make this recipe ‘naked’, meaning adding no essential oils, or you can add your favorite calming and sleep inducing oils such as lavender, cedarwood, vetiver, ylang ylang or sandalwood! If you are using therapeutic grade essential oils, only use a total of 40 drops of oils combined for this amount, which is one cup.
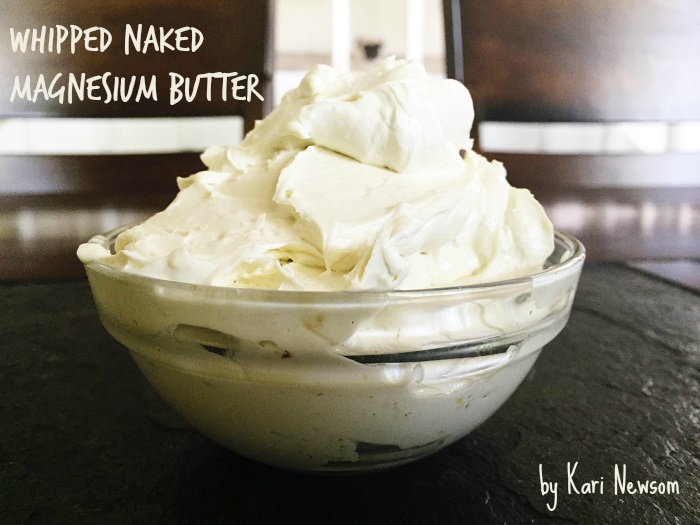
The end result with the color will vary depending on the type of shea butter you use. We use a raw shea butter that has a deep, deep yellow tone and rich scent and amazing benefits that trump refined and bleached shea butters.
Whipped Naked Magnesium Butter
What You’ll Need:
- 3/8 cups virgin coconut oil
- 3/8 cups raw shea butter
- ¼ cup magnesium oil (how to make it yourself)
- ¼ cup almond or jojoba oil
What You’ll Do:
- Melt the virgin coconut oil and raw shea butter over low heat just until it’s all liquid.
- Add the almond or jojoba oil, pour into a medium glass bowl and allow to cool to room temp. You can leave on the counter for an hour or so or you can stick it in the fridge to speed up the process. I like the fridge :o)
- Using a hand mixer or immersion blender, take your room temp oil mix, turn on the blender and slowly add the room temp magnesium oil.
- Mix or blend this until it is creamy. You can’t have any separation, which means, no water droplets anywhere. This can take a few minutes if the oils are room temp. If they are too warm, it will take longer.
- Place the bowl in the fridge for around 30 minutes. You want to see it starting to harden and solidify.
- Once it’s solidifying, remove the bowl and using the mixer or blender with a whisk attachment, whip the mixture until light and fluffy! If you are adding essential oils, do it during this step.
- Store in a glass jar or container and place in a cool, dark place.
I hope you enjoy the wonderful benefits of this magnesium butter that is safe for you and your entire family!
What is your favorite natural solution for calming and peaceful sleep?
The post Whipped Naked Magnesium Butter appeared first on Day2Day Joys.
]]>The post Easy “Sun Dried” Tomatoes appeared first on Day2Day Joys.
]]>
Written by KT @ One Organic Mama, Contributing Writer
If your garden is anything like mine – you are being inundated by tomatoes… of all varieties… let me explain. Because we compost we always get lots of sprouts of various old seeds from the year before… this year because I was pregnant/just had a baby I wasn’t so great at pulling them… Now my backyard is a total jungle of hundreds of tomatoes.
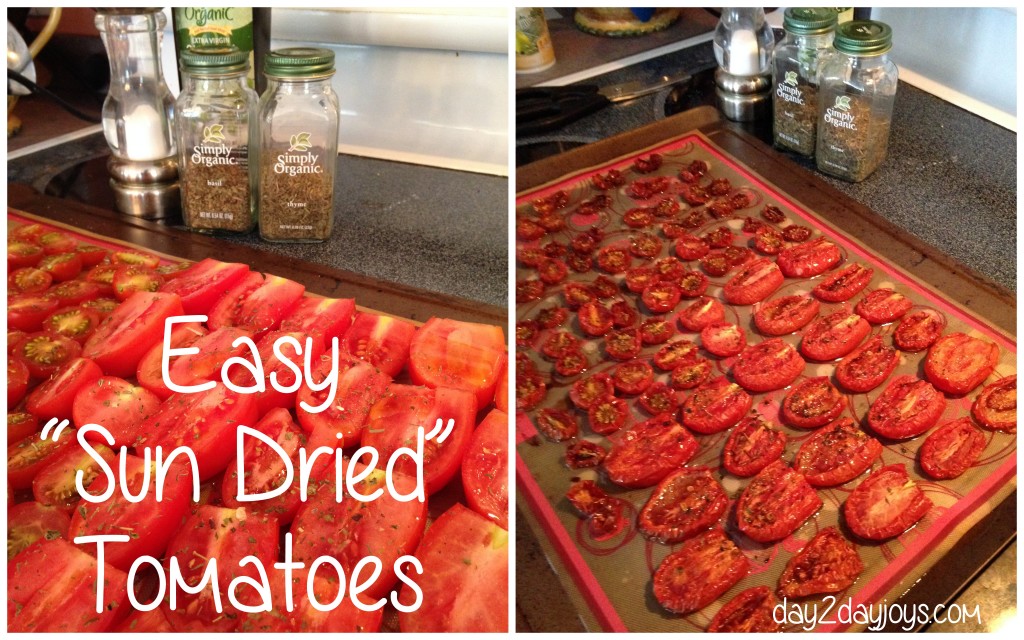
Each week I make 150+ of them into tomato sauce and freeze it. The remaining tomatoes get either eaten raw or turned into these super simple sun dried tomatoes. Don’t worry – you won’t need any sun for these – actually they would make a great rainy day activity!
Sun Dried Tomatoes
Ingredients:
- Tomatoes – a low moisture variety – we use plum and cherry tomatoes – any amount of them is fine you can cram them onto a cookie sheet!
- Olive oil (you need a bunch of this – you’re using it to cook and then to pack the tomatoes)
- Dried Thyme
- Dried Basil
- Salt
Directions:
Pre-heat your oven to 250 degrees. Line a cookie sheet with either parchment paper or a silicone mat. Jam as many tomato halves on there as you can! They won’t need the space because they are going to shrink. Douse them with a considerable amount of olive oil (you’re going to dump the excess into a jar for the tomatoes when you’re finished and it will be all yummy flavored – so be generous). Sprinkle the tomatoes liberally with salt, basil, and thyme. Put your tomatoes in the oven for 2-8 hours! Taste the tomatoes along the way and also give them a feel. You don’t want them to get crunchy on the edges. You want them to be soft, but with most of the water gone from them. When they are finished – dump the whole tray, oil included, into a jar and then top with additional olive oil. Refrigerate! The oil will harden in the fridge, but no matter, just take it from the fridge a couple of minutes before you need it and they will be ready to eat! We love to throw them into the food processor with some fresh basil and then served with Parmesan cheese over warm pasta… mmmmmmm.
How do you use up your excess garden produce?
The post Easy “Sun Dried” Tomatoes appeared first on Day2Day Joys.
]]>The post Easy Cauliflower Crust Pizza {for a Large 16 inch Pizza} appeared first on Day2Day Joys.
]]>
One thing I love is pizza, I mean who doesn’t???
There’s something nostalgic about it, you bite into a cheesy piece of deliciousness and your tastebuds erupt with excitement and fun memories.
We have pizza night on Friday nights, a lot, not always but I’d say at least 1-2 times per month. You can make pizza healthier, for one, done’t get delivery, make your own. For the crust, you can use whole wheat (if it’s sprouted, even better) use sourdough, use a gluten free flour or even a healthier grain like quinoa or a veggie like cauliflower.
This recipe has no flour or grains, the crust is made from cauliflower. AND It’s so good!
Cauliflower Crust Pizza
What you need:
- 4 C grated cauliflower (about 1 head of cauliflower)
- 2 eggs
- 2 C shredded mozzerella cheese
- 4 T Parmesan
- 1 t salt
- *your favorite toppings: sauce, cheese, pepperonis, olives, etc.
What to do:
- Turn oven on to 425 degrees
- Line pan with parchment paper, set aside
- Grade cauliflower (be careful because this is messy)
- Steam/cook cauliflower until tender
- Next, drain access water and pat dry
- Combine all ingredients (except toppings), mix well. I used my KitchenAid mixer
- Pour mixture onto a 16 inch pizza pan
- Pat down until you make a 16 inch circle
- Bake for 10-20 minutes, until golden
- Remove from heat, add toppings
- Place back into oven until cheese is golden
- Take out and Enjoy!
Do you have pizza night? What healthier versions have you tried?
The post Easy Cauliflower Crust Pizza {for a Large 16 inch Pizza} appeared first on Day2Day Joys.
]]>The post Tropical Delight Smoothie appeared first on Day2Day Joys.
]]>
Tropical Delight Smoothie
What you need:
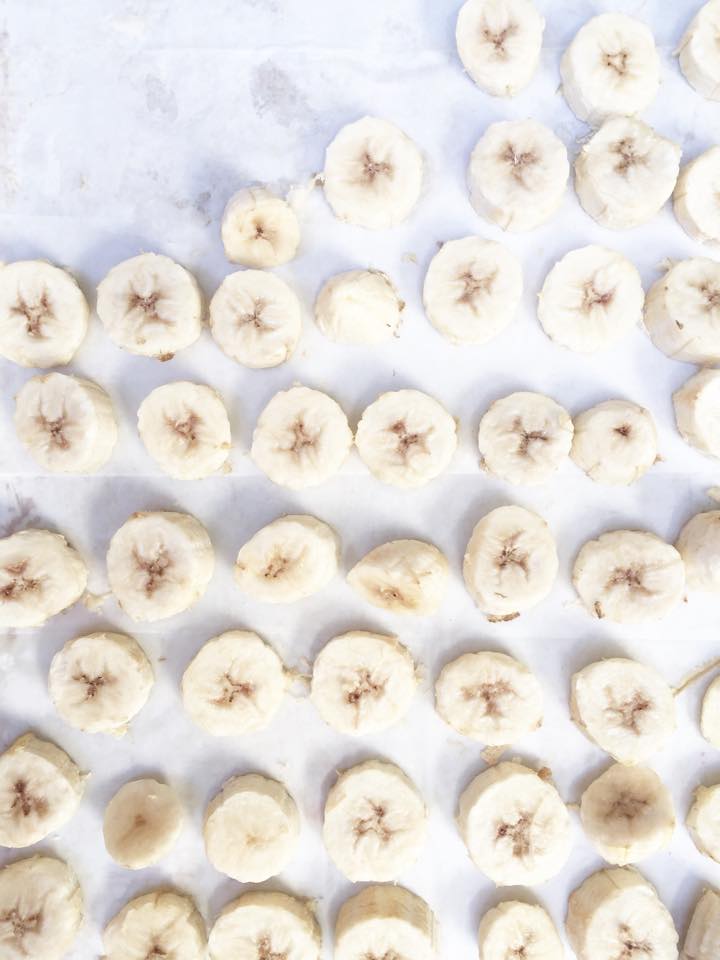
1 banana, sliced (either fresh or frozen)
1/2 cup pineapple, fresh or frozen
1/2 cup ice (this is optional and typically used when the fruit you are using isn’t frozen, if you are using frozen fruit, it usually is plenty cold and you won’t need the ice)
What to do:
What is your family’s favorite smoothie?
The post Tropical Delight Smoothie appeared first on Day2Day Joys.
]]>The post Protein Packed Nut Butter Bites appeared first on Day2Day Joys.
]]>
Written by Contributing Writer, Kari at Living Strong, Health & Wellness
Snack time!
Personally, I’m not a big “snacker”. I can go meal to meal without needing any extra food to keep me going. Although, having a family, I need to have a plan on hand for our meals and snacks and then I need to make sure they are ready and available to eat!
My kids, on the other hand, seem to need a snack every 30 minutes. I can understand why since they are on the go, non-stop, active kids. This can present a problem when you are wanting to feed your family healthy foods that nourish the body. Unfortunately, the quick and convenient, grab and go processed options you find on the grocery store shelves don’t make the cut for me. It’s hard enough to make sure they have nourishing and healthy lunches everyday – then to add in snacks to mix, that means more creative ideas are needed!
I know it would be easier to go this route, but I’ve spent too many years building a strong foundation of health in my family, this is one area I don’t want to skimp on. This means I need to be creative in the kitchen when it comes to snacks.
I have a long list of snacks that we rely on, but one of our favorites are these Nut Butter Bites! The kids love helping with them as well – which I think makes them even more enjoyable. Kids love helping and being a part of creating the food they eat.
These amazingly healthy bites are a great snack for my active kids and only a couple are needed for them to feel satisfied. Packed with protein from the nut butter, a healthy source of energy from raw honey, good and healthy fat from the coconut and extremely low in sodium – you can ‘t go wrong with these delicious treats! They are more like a dessert than a snack. That’s always a plus!
To top off these already great nut butter bites, roll them in sucanat (unrefined cane sugar), shredded coconut, cocoa powder or mini chocolate chips (we like Enjoy Life! allergen-free brand). Hands down, these are healthier than any overly processed and refined ‘snack’ you can get off a shelf.
Sure, there’s a few minutes of time involved, but isn’t your family worth it? Of course they are!
Along with many other healthy snacks, appetizers, beverages, main dishes and desserts, this recipe can be found in my cookbook, Real Food. Real Kitchen. So Good! I hope you and your family enjoy these as much as we do!
- ½ cup organic natural peanut butter (no added ingredients, just peanuts) or nut butter of choice
- ½ cup organic raw honey
- ½ – 1 cup organic unsweetened coconut, finely shredded
- ⅓ cup organic mini dark chocolate chips, soy-free (we like Enjoy Life! brand, allergen-free)
- sucanat (unrefined sugar) for rolling the bites (other options: you can roll them in coconut, chocolate chips or cocoa powder)
- In a medium size bowl, mix the peanut butter and honey until combined thoroughly.
- Add the chocolate chips. You can add more or less according to your taste (I always add the larger amount).
- Add the coconut in ¼ cup amounts until the consistency reaches a thick, yet semi-sticky state.
- You don’t want it so sticky that you can’t roll it, but you don’t want it so dry that it wont hold together. Find the happy medium.
- Once you are able to roll them and they still have some stickiness to them, roll into balls and then roll in the sucanat.
- Place on wax or parchment paper on a baking sheet or plate.
- Refrigerate for a while so they can harden up a bit, transfer to a glass jar and keep in the fridge.
What is your favorite healthy snack?
The post Protein Packed Nut Butter Bites appeared first on Day2Day Joys.
]]>The post Crock-Pot Apple Crumble {Sugar & Gluten Free} appeared first on Day2Day Joys.
]]>
Fall is my favorite season! It’s not quite yet Fall weather here in Tennessee but I know it’s right around the corner.
I have been trying to avoid using the oven since ours is gas and it heats up the whole house, although the warmth has been feeling nicer as Fall is approaching.
Using the crockpot is a great way to avert the heat… PLUS, it’s easy!
Dump ingredients, turn on and walk away. Well, it’s mostly that easy. Most recipes like chili or stew are that easy but this one needs some attention here and there.
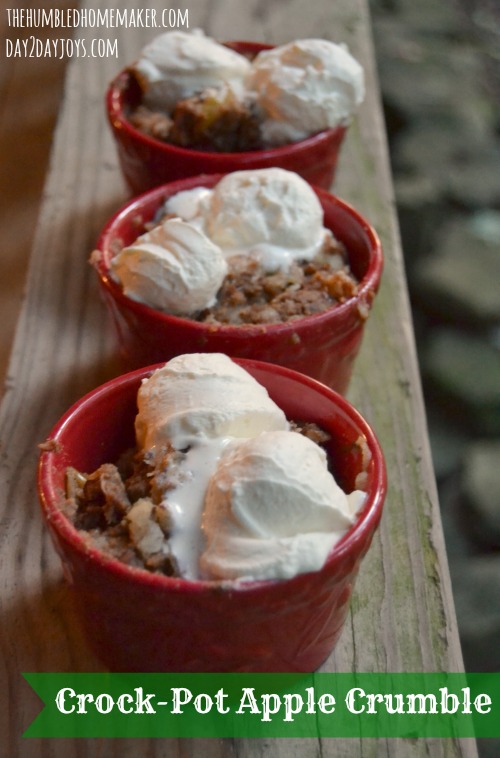
My daughter loves to help me cook, whether it’s cleaning the produce, cutting up veggies or adding things to the pot, crock-pot in this instance. I try my best to teach her what a good homemaker is because one day she might be one. I am still a work in progress and fail miserably at times but I hope I am instilling in her a love for God, how to love her husband, be a mother and how to keep a home, among other things.
She even helped me make this recipe and take pictures with me after.
Join me over at The Humbled Homemaker for the recipe!
What’s your favorite Fall treat?
The post Crock-Pot Apple Crumble {Sugar & Gluten Free} appeared first on Day2Day Joys.
]]>The post Cranberry Maple Brussel Sprouts appeared first on Day2Day Joys.
]]>Anyone else think brussel sprouts were disgusting when they were younger? Oh, man! Just the name, eeeew.  But now I love, love, LOVE them! Have you tried them on the grill before? YUM! My six-year old son walked into the kitchen holding his nose when I made them this time, ha! Needless to say, hubby and I ate them all by ourself, but we didn’t mind not sharing.

This month I have a 31 Day series happening on the blog all about Grain Free/Sugar Free Recipes. Sugar and unhealthy grains are in most everything. Even foods disguised as healthy! I am constantly researching and reading to determine healthy menus/recipes for my family, but it can be so hard. Basically the more I research, the more foods I want to avoid. Sugar is such an addiction, whether we realize it or not, because it’s in everything and the more we have, the more we want! Most any prepared food has added sugar that may be disguised with a different name, but it is sugar no matter what you call it!
Grains are so confusing, as those we would think or hope to be good for us, have actually had all the “good stuff” removed. We are hard pressed to find a healthy grain and then on top of that we are pushed into eating more of them than we should. Anyone else think the standard food pyramid is just plain messed up?
I have specifically been looking at sugar and grains as they relate to heart and brain health and will continue to post more as I delve into this research. So many health problems could be avoided if we seek to prevent them instead of trying to reverse them when it’s too late. Anyway…enough of me on my soap box.  Le’t get on to the recipe!

Here’s the recipe for Cranberry Maple Brussel Sprouts:


- 2 C Brussel Sprouts (washed and stems removed)
- 1/2 C Dried Cranberries
- 1/4 C Chopped Pecans
- 1-2 Tbsp Maple Syrup
- 2 Tbsp Apple Cider Vinegar
- Coconut Oil
- Coat bottom of saute pan with Coconut Oil and heat. (make sure oil is hot so brussels will brown).
- Brown brussel sprouts for 2 minutes.
- Stir in Maple Syrup and Cider Vinegar and cook for another 2 minutes.
- Add Cranberries and Pecans, stir and cook until Brussel Sprouts are tender.
- Remove from heat, serve right away.
- Adding bacon crumbles to the recipe is another tasty option!


Does your family like brussel sprouts? What is your favorite recipe?
The post Cranberry Maple Brussel Sprouts appeared first on Day2Day Joys.
]]>The post Chicken Tortilla Soup With A Kick appeared first on Day2Day Joys.
]]>
Written by Kari @ Living Strong, Health & Wellness, Contributing Writer
It is October and it’s officially cooling down enough to try this great recipe, which is perfect for any chilly weather you might experience over these next few months!
This belly warming soup is simple, quick and so delicious! All you need is a blender and a stock pot (or slow-cooker) and you’re set to make the most amazing tortilla soup you have ever had! You can keep this a mild meal or add some extra peppers to give it that kick that keeps you coming back for more!
This is not only a favorite in our house, but in houses all over these wonderful states! I’ve shared this recipe over the years and then it was included in my cookbook – and it gets rave reviews every time! I have never found a restaurant that has a soup that compares to this! You definitely need to try it! I’ve taken the text from the cookbook to include allergen-free information as well as more tips to make it even healthier!
Chicken Tortilla Soup With A Kick:
What you need:
- 1 whole fryer chicken
- 8 cups chicken broth (can make while cooking the chicken)
- 16 ounces of diced tomatoes
- 1 medium yellow or white onion, cut in half
- 2 cloves garlic – ½ cup fresh cilantro
- 1 teaspoon raw honey
- 3 chipotle peppers soaked in adobe sauce
- optional, 2 avocados
- optional, ½ cup full-fat yogurt, plain
- optional, tortilla chips
- optional, shredded cheese
What you do:
- To prepare the stock and the chicken, plan to start preparing the meal in the morning.
- Cook the whole fryer by placing in a slow cooker, covering completely with water, adding seasonings and spices (salt, garlic powder, parsley, pepper) and cook on low for 8 hours.
- After 8 hours, remove the whole fryer from the slow-cooker using slotted spoons. Place in a bowl and allow to cool for about 5-10 minutes. Begin removing the chicken from the bones and place on a plate. Pull the meat with two forks. This is your shredded chicken.
- Strain out the liquid in the slow-cooker into a bowl (if you’ll cook the soup in the slow-cooker) or stock pot (if cooking soup on the stove) to remove any large pieces of meat or bone that fell off the chicken (it gets super tender). If you used a bowl, once it’s strained, replace liquid back in slow-cooker.
- Separate about 1 ½ to 2 pounds of shredded chicken and add to the broth.
- In a blender, puree the tomatoes, onion, garlic, cilantro and honey until smooth.
- Pour this mixture in with the broth and chicken. Stir to combine.
- Add the chipotle peppers if you are wanting that kick to your soup. If not, omit.
- Continue cooking in the slow-cooker for about an hour and a half or on the stove-top over medium for 45 minutes.
- To serve, prepare the bowls by putting some avocado and yogurt in the bottom of the bowl. Crunch tortilla chips and place on top. Next, ladle the soup over the prepared bowls and top with shredded cheese. Wow, get ready!
Yield: Approximately 14 cups
I’m special because (if using “optional” ingredients, the allergy-free info below may change):
dairy-free, egg-free, gluten-free, grain-free, soy-free
Substitutions:
*Full-fat yogurt: full-fat sour cream
Health Made Easy:
if you’re short on time, you can purchase your broth, but make sure it’s organic and low-sodium | homemade broth will supply your body with so many nutrients that you’ll never get out of store bought brands, so choose homemade if possible | don’t have time to cook a whole fryer, purchase chicken thighs, bake and shred | use fire-roasted tomatoes or seasoned diced tomatoes | you don’t need to put all the optional extras in the bowl first, but boy does it sure taste good that way | store leftovers in glass mason jars in the fridge | if you use the chipotle peppers the soup will get spicier over a couple days | choose non-gmo tortilla chips
Enjoy! Enjoy! Enjoy!
What is your favorite soup to keep you warm during the autumn and winter seasons?
The post Chicken Tortilla Soup With A Kick appeared first on Day2Day Joys.
]]>The post Crockpot Stuffed Peppers appeared first on Day2Day Joys.
]]>
Written by Kelly @ Eyes On The Source, Contributing Writer
Is it feeling Fall-ish at all for any of you yet? Maybe with the kids going back to school and possibly cooler temperatures. But here in Florida it is still a hot, humid 95 degrees most days. So either way, a warm and cozy meal that doesn’t heat up the house works for us all! 

How to make Crockpot Stuffed Peppers:


- 6 multi-colored peppers
- 4 Cups cooked Brown Rice/Quinoa
- 1 Cup black beans (or more if you omit meat)
- 2 Cups of cooked bite size meat of your choice (optional)
- 2 Cups Vegetable broth
- Seasonings to taste (cumin, oregano, garlic, red pepper flakes etc.)
- Cut off the tops of the peppers and scrape or wash out the seeds. Save the tops!
- Pour the 2 cups of broth into the bottom of the crockpot.
- Add a little less than half of the rice/quinoa. You need just enough to help keep the peppers from tipping over.
- Make a mixture of the rest of the rice/quinoa, black beans and meat.
- Add your preferred seasonings. (Honestly, I am not very good at exact measurements of seasonings. I usually just throw in a pinch of this or that until it tastes good to me!)
- Place the bottom half of the peppers in the crockpot and then fill with rice/meat mixture. Place the tops back on the peppers to keep the mixture from drying out.
- Cover and cook in the crockpot for 4 hours on high or 6 hours on low. Less if you want them the peppers to be more firm.


What is your favorite warm and cozy meal for Fall?
The post Crockpot Stuffed Peppers appeared first on Day2Day Joys.
]]>


