The post Year of Dates || 12 Months of Pre-planned dates with your Husband appeared first on Day2Day Joys.
]]>
I’ve been seeing the infamous ‘Year of Dates’ idea floating around social media and pinterest for years now but anytime I thought “I should do that” it was right before a holiday or anniversary with not enough time to actually get it done, so I moved on and decided not to do it.
Last year was a really hard year for us, I lost a baby. And a lot of things went on the backburner, including date nights. So towards the Fall, I thought, I NEED to do that ‘Year of Dates’ idea! Marriage IS important! Marriage IS something to invest in. We HAVE to make time for it!
“A good marriage isn’t something you find; it’s something you make.” –Gary L. Thomas
Marriage over the years doesn’t come as easily as when you first met and were romancing each other every chance you got… if you’ve been married any amount of time, you know this to be true. Life happens, maybe you have kids, y’all have activities, school and extra-curriculars. There’s bills to be paid, responsibilities around the house and more than I could ever list that comes up in all of our lives. Date nights become last on our priorities and then it’s another month or year with little to no time together flourishing as a couple.
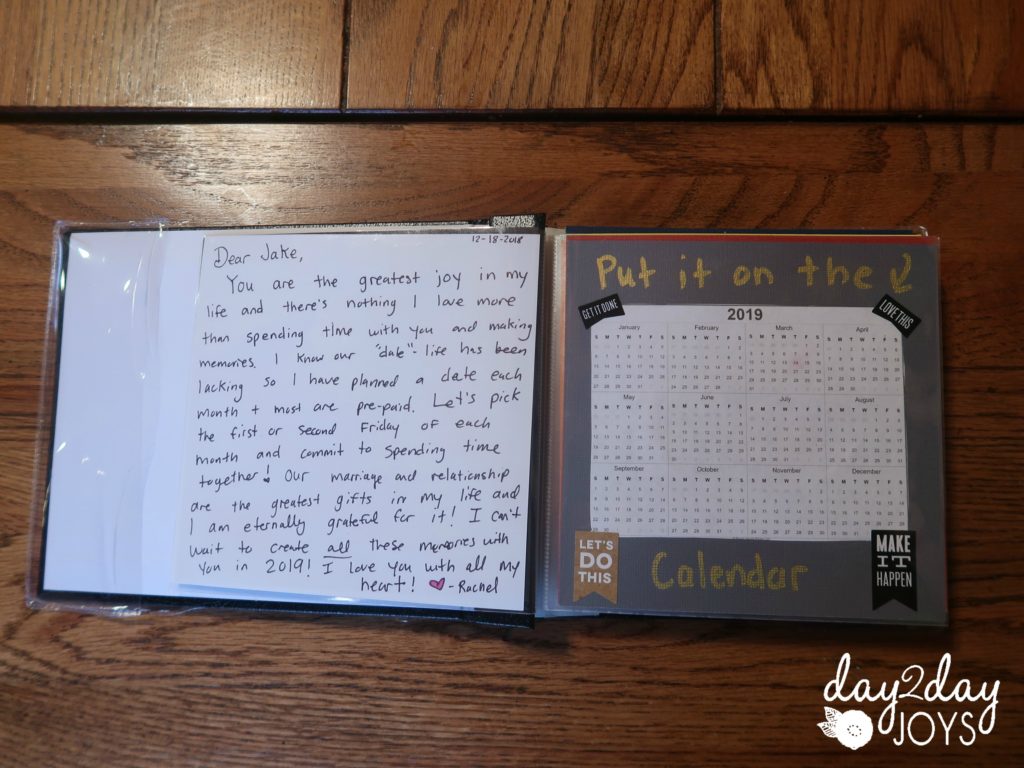
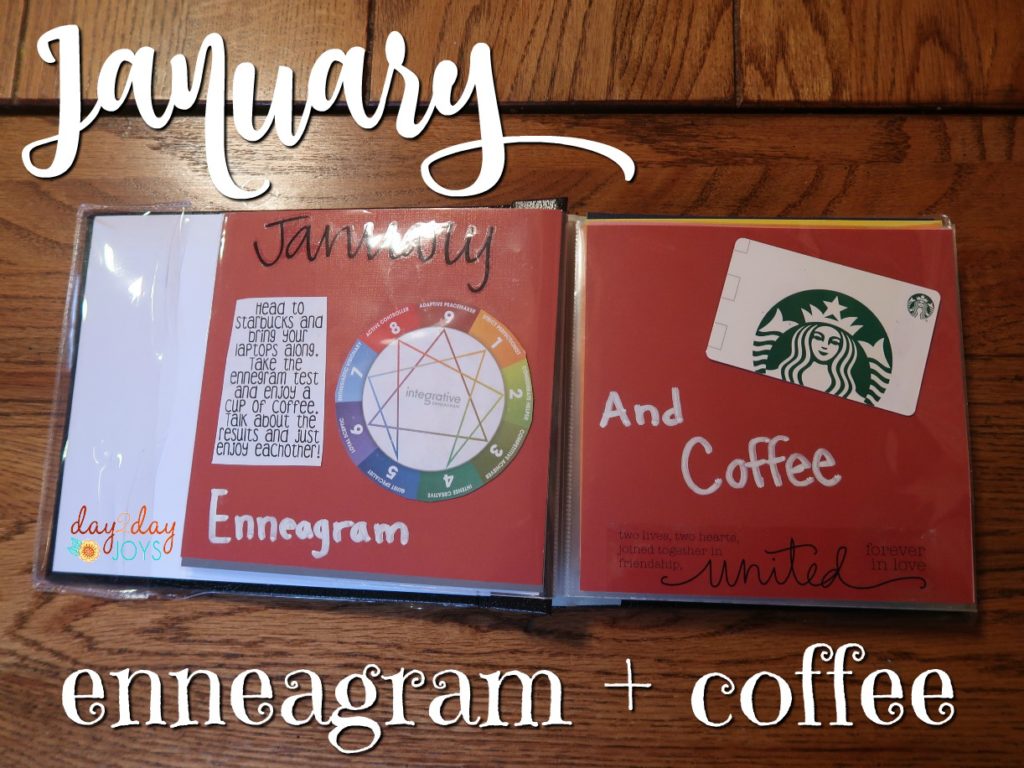
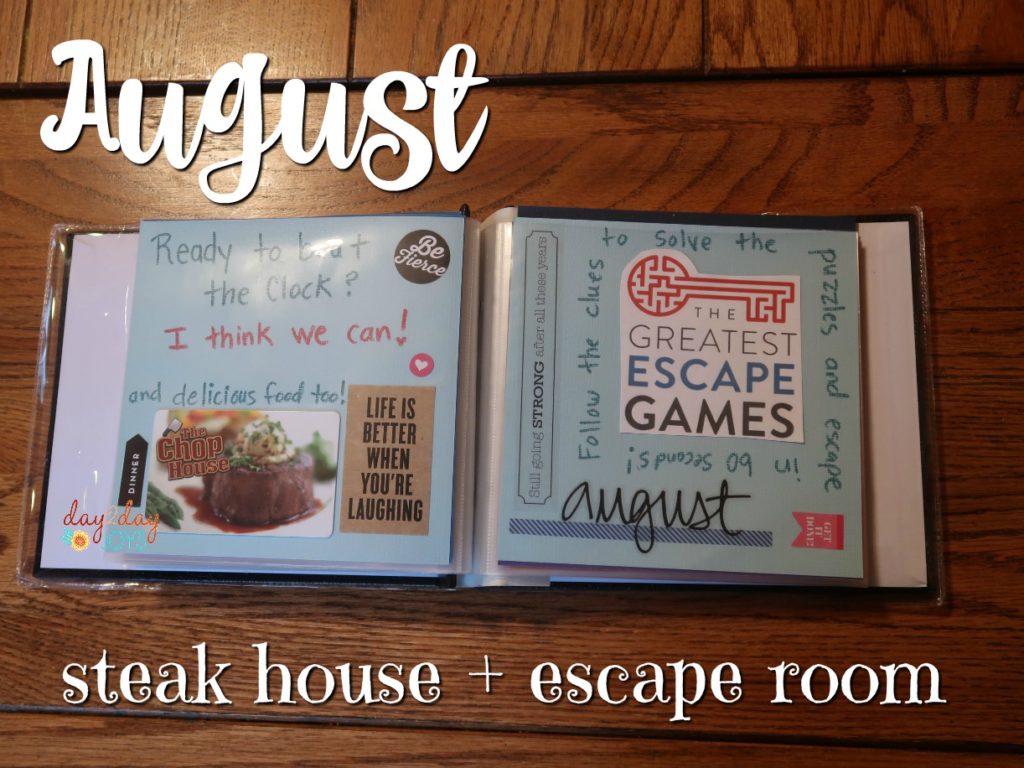
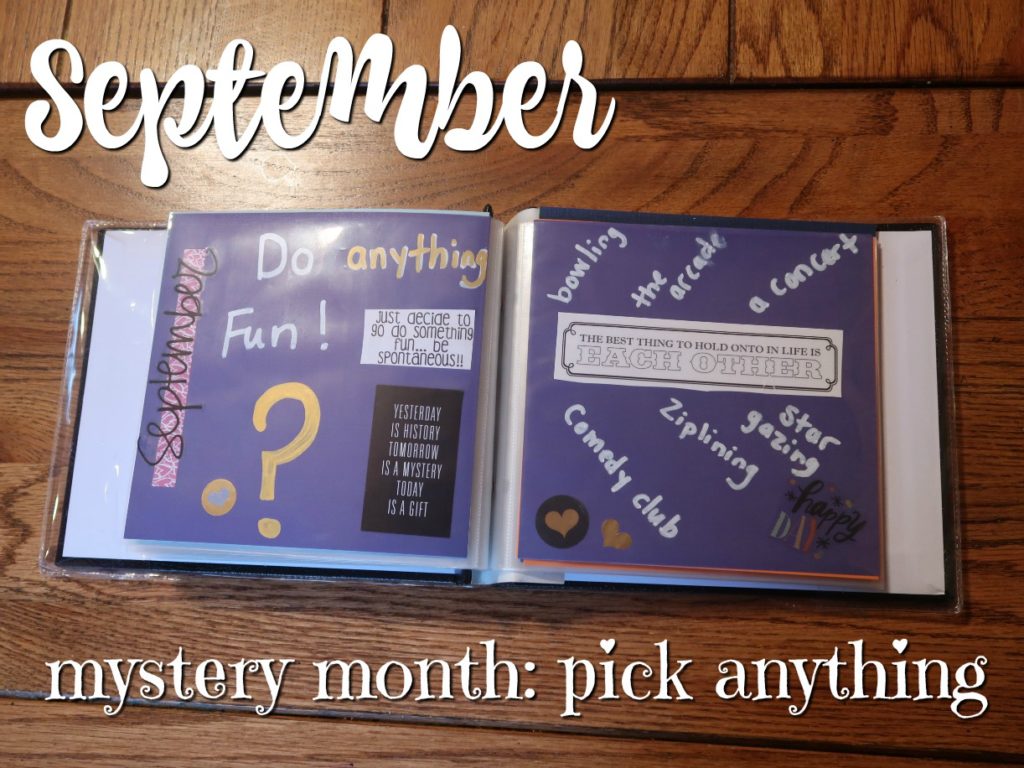
With all that in mind, I knew I wanted to make dating my husband more of a priority than I had in 2018. I LOVE this man! So I decided it would be best to pull out the ‘Year of Dates” idea and create a special book for my husband. I gave this to him for Christmas and I am SOOO excited to have these all planned out and (mostly) paid for so there is NO excuse. (all I have to do is find a babysitter!!)
So here is how I made this book (aka a scrapbook) for my husband. I purchased most of the items from hobby lobby. They were having a 50% off sale on the brand the paper studio so I purchased the 6×6 book, extra pages, stickers, month stickers and some bright colored card stock, markers and chalk markers. I searched pinterest for ideas and then came up with my own ideas.
Helpful links:
- Loads of local dates on Groupon
- Dinner + a movie gift card
- Enneagram test
- 6×6 scrapbook at hobby lobby or on amazon
- Months Stickers at hobby lobby or on amazon
- Cardstock 6×6 bright colors at hobby lobby
- Marriage pinterest board
- chalk markers
This would be a special gift for Valentine’s Day, an anniversary, birthday, Christmas or JUST BECAUSE! Feel free to make any of these ideas your own and if you decide to make one of these, share it with me on social media!
Here’s the corresponding youtube video:
The post Year of Dates || 12 Months of Pre-planned dates with your Husband appeared first on Day2Day Joys.
]]>The post Homeschool Student Planner {plus Free Printable} appeared first on Day2Day Joys.
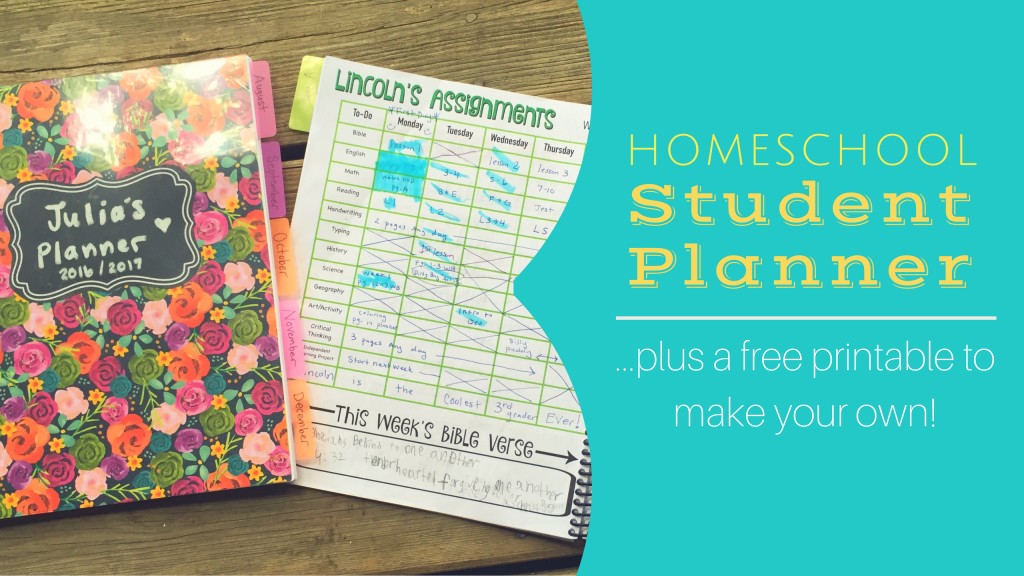
]]>This post is about helping your student to independently be in-charge of their life, at least teaching them how anyways. So I created my own homeschool planner for them.
I thought about what subjects we will be covering, what would tie in with our morning basket, what their chores and other responsibilities are and even fun things. I looked all over the internet and pinterest for ideas. I began compiling different free printables to be added to their planners.
After doing all of that I began creating the weekly pages which make up the bulk if this planner.
For the months and first page I used student planners(Click here to find them) that were offered free one month, now they aren’t free but she does offer specials and freebies each month. You can search around on the web to get other monthly printables for free too.
So this is what I did:
- Once I got everything printed, I put it all in order. I did take a LONG time, especially making sure I printed on both sides of the paper as much as possible.
- Next I looked at my year at a glance page that I had marked the numbers of weeks of school we would be doing and then added it to their planners, that way I knew how many weeks were in each month. (we are doing 36 weeks)
- Then I made the front cover. I purchased a few scrapbook pages from hobby lobby and some chalkboard paper and chalk markers. Once the whole planner was made, I took the pages to OfficeMax where I had them put on a front and back and then had it bound.
- Lastly I added sticker tabs to the months. I only did the first semester.
My kids were SOOOO excited to see this and began using it. Not only does it make my life easier, they are beginning to take charge of their life and their schedule.
Feel free to use these homeschool planner pages I have created for your student and take advantage of the free printables i found below. Or even go find some that your student likes!
**Click link below for your FREE planner pages**
- Student Planner- Green or Student Planner-Pink (editable, made on a Mac so may not work on other computers
- Student Planner-Green PDF or Student Planner-Pink PDF
Free printables I used in this planner:
- first day of school questionnaire
- bible verse coloring pages
- Starwars pages
- Starwars reading log
- princess reading log
- owl coloring page
- blank faces drawing page
- Disney coloring pages
- Easter coloring pages
- a few from this site, including the year at a glance, coloring pages, bible knowledge, piano log and christmas story
- some pages for beginning/ending of school
- some pages from a calendar notebook
- some pages from this back to school fun pack
- *calendar pages that were offered free before, they may be offered again anytime!
I hope this helps you on your journey! Happy Homeschooling!
The post Homeschool Student Planner {plus Free Printable} appeared first on Day2Day Joys.
]]>The post How to be less busy appeared first on Day2Day Joys.
]]>
Written by Lydia @ Frugal Debt Free Life, Contributing Writer
Do you ever feel like you’re long on to do and short on time? I have spent so many months, years even, feeling that way. It wasn’t until recently that I came to fully understand the amount of control I actually did have over my time and how I spent it.
In fact, it seems like that is one of the things that I do have near-complete control over. Sure, I have small children and a husband, a business, and obligations. There is a mortgage and tummies that need to be fed, diapers that need to be changed. I get all of that.
But here is the thing, how much time do I spend perusing Facebook during an afternoon lull? How many times have I let a phone call yammer on when I could have been more precise and to the point? And how many hours have I wasted binge watching Netflix?
I don’t even want to consider tallying the hours. Of course, there is nothing wrong with doing any of those things. But I can’t very well call myself “busy” if that is how I choose to spend my precious time. Because time is just that… precious.
We can’t earn more of it, once it’s gone, it’s gone. So I have had to learn how to command the most out of my days. It hasn’t always been easy, but it’s been worth it.
How to be less busy:
-
1. Determine what matters
It’s really important to determine what fulfills you and then plan your days around that. What are your priorities? It is important to figure out what your true priorities are. These are the places we seem willing to invest the most of our time and energy. If you took a good luck at how I spent my time you might see that housework was low on my list, and watching YouTube videos of people putting on makeup was high on my list.
But that’s not an accurate representation of what matters to me, so I’ve had to adjust my time accordingly. Of course, I just figured out I could stream YouTube through my television, so I just watch those videos while I clean.
Things that do matter are family time. I often say not to weekend events because I want us to spend time together as a family while my husband is home. It means less social time but more family time.
2. What provides value
Recently I had gotten sucked into a group chat on Facebook. A community function that I am a part of was using the group chat as a way to send out information. The problem was the information was getting lost in responses, thumbs up and emojis of cats eating pizza. It was both a distraction and a waste of time. And above all, it wasn’t providing a value to the group. Everyone had to sort through the responses to get to the meat of the information and there were several miscommunications as a result.
I left the group chat and suggested instead the information just be sent in a quick bullet point email. I realize that may sound abrupt on my part, but when you’re juggling a home, small children, and a business sometimes you have to be direct.
I also left several Facebook group pages that were taking up way more time than necessary and turned I down a few work opportunities because they just didn’t provide good value for my time.
3. Prioritize your to do
When I make a to-do list I like to jot down the things on my list in order of importance. I take care of the important items first. That way they are out of the way and not hanging over my head. I can better focus my time, energy and attention this way.
4. Don’t check your email.
I know this sounds counter-productive. But unless you are waiting on a very specific and important email just don’t check it until you’ve made it through your to-do list.
It’s so easy to get distracted if you jump on Gmail really quickly or your hop on Google News to scan the headlines. You can so easily get sucked into the rabbit hole that is the internet that you don’t get things done that you set out to accomplish.
5. Remove one thing
Okay, pull out your planner or your calendar app and look at your upcoming appointments? What is not necessary? What is not providing value to you? What do you dread doing?
Don’t do it. Just cancel your appointment and say no. If it’s not vital to your survival or to your family don’t do it.
I feel like in today’s society we value being busy. We glorify it and wear it like a badge of honor. And we misuse the word. I know that for me I am often not busy, I am just distracted and it’s important for me to refocus my time and energy.
The post How to be less busy appeared first on Day2Day Joys.
]]>The post Set Yourself Up to Succeed appeared first on Day2Day Joys.
]]>On the heels of New Year’s come the New Year resolutions that we all make.
Whatever the goals or resolutions: healthier way of eating, weight loss, financial goals, marriage goals and/or spiritual goals they all can be accomplished if we set ourselves up to succeed.
I prayfully chose a word and a Bible verse to focus on throughout this year.
Now that a theme word, goal or resolution has been chosen, what’s next? How do we make sure we are setting ourselves up to succeed? We do this by having a plan.

Tips to set yourself up to succeed
1. Pray
Every morning spend time praying over your resolution. Seeking God about your goals will help you stay focused and aligned with God’s will for your life. Ask God to help you succeed! Just like Eliezer did in Psalm 145:18
2. Plan your day
Make the time to plan your day, week, month and year out. Write down your goals and the plans you have to accomplish. Thinking ahead will help you achieve your goals. For example, are you trying to eat healthier? Plan out and prepare what you will eat for the next day or week. Stock the fridge and pantry with healthy foods and snacks. Plan what exercises you will get done and when you will do them.
3. Don’t procrastinate
Look at your goals and the plan you have set into place to help you achieve your goals. Now get on it! Do not procrastinate. If you’re trying to save money and pay off debt; don’t wait till the next paycheck or the next month to start on that stricter budget. Start today! Start now!
4. Get help
Bringing other people in your life that will encourage, motivate and hold you accountable while you are working on your resolutions is a huge help in succeeding. Accountability holds you responsible to your goals, plans and actions as you work on your resolutions.
5. Stay flexible
Bumps in the road happen to all of us. Be flexible enough in your plans by allowing bumps in the road to happen and not throw you off course. Be clear about your goals, but flexible in the process of achieving them. Remember life happens and that is OK.
6. Stay positive
Stay positive about your goals and resolutions. Even if you have had a bad day, week or month; you can still bounce back, refocus and accomplish your goals. Stop those negative thoughts in their tracks. Philippians 4:8 reminds us of what God wants us to think about.
What steps have you put in place to assure that you accomplish your goals? What are you doing to set yourself up to succeed?
The post Set Yourself Up to Succeed appeared first on Day2Day Joys.
]]>The post Christmas Wreath Card Display appeared first on Day2Day Joys.
]]>
Written by Kari, Contributing Writer
I know there are hundreds of ways to display those beautiful Christmas cards we get each year. I’ve done most of them over the course of my beautiful life. Everything form hanging them from decorative ribbon to placing them in a crystal bowl. A couple years ago I was reading Living Magazine and found a quick and inexpensive way to display cards. I needed a change and this was perfect.
A simple wooden wreath.
Well, more like an embroidery hoop with mini-clothespins, but like I said, a simple wooden wreath. It worked perfect.
What does this have to do with health, which is what I usually write about? Nothing. Not only am I passionate about teaching and educating people on health – I enjoy being crafty too! So, this is just a look at another side of me!
It cost less than $10 for the supplies and didn’t take long at all to make. The glue drying is the most time consuming part of it all. This is when you get to play with your kids, watch Netflix or eat cookies. Or all three. You can choose the size and number of hoops you’ll need depending on how many cards you usually get. I did one large and two medium. They really look beautiful once they fill up and make it so easy for everyone to scan and look at the cards when they are visiting your home.
Now, wouldn’t you say that these simple wooden wreaths make your own Christmas scene look so much better? I thought so! Now go make one for you!

Christmas Wreath Card Display
What You’ll Need:
- a couple needlework/embroidery hoops – I did one large and 2 medium sizes
- a couple packages of mini-clothespins
- craft glue
- ribbon for hanging
What You’ll Need To Do
- I glued the mini clothespins every two inches around the hoop. I alternated the pins – one facing out, one facing in.
- let them dry overnight (simply because I got side tracked and didn’t get back to it the same day).
- Once dry, I attached the ribbon and hung it on display.
Like I said, when they are completely filled, they look really pretty – like a big wheel of cards. It’s nice to be able to see them all and be reminded how blessed we are to know so many wonderful and loving people – which always makes my heart happy.
What is your favorite way to display your Christmas cards?
The post Christmas Wreath Card Display appeared first on Day2Day Joys.
]]>The post DIY Crocheted Wreath Ornament/Gift Tag appeared first on Day2Day Joys.
]]>
Written by Karen @To Work With My Hands, Contributing Writer
When I was pregnant with our second son, I had a lot of time on my hands. Our oldest son was in public school at the time, my husband was at work, and I was home alone all day.
When the Christmas season arrived that year, I was in the midst of the second trimester – past the yucky first, and not yet into the bulky last. I finally felt better and was eager to get my hands into something.
It was during those few weeks between Thanksgiving and Christmas break that I came up with these fun little crocheted wreaths. I made more than a few of them, and 22 years later, we still have some hanging around in our Christmas decor boxes.
Now I want to share the simple tutorial with you!
This project requires only 2 basic stitches. If you don’t know how to crochet, check out this site for instructions on how to get started and for the stitches that are used in this project.
For this project you will need:
- 1 crochet hook, size G
- Dark Green Yarn (or color of your choice)
- 17″ length of 1/8″ red satin ribbon (or color of your choice)
- small bell, Christmas ball, or decorative sprig
- scissors
Instructions:
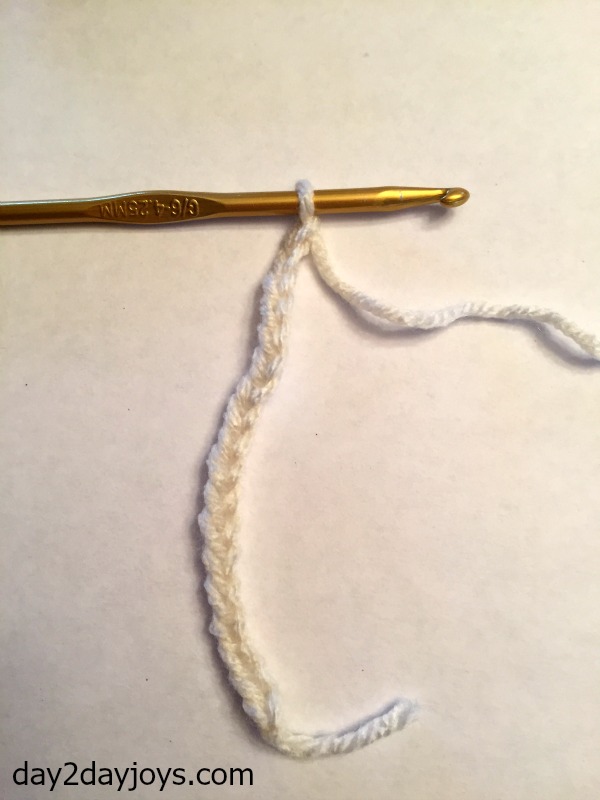
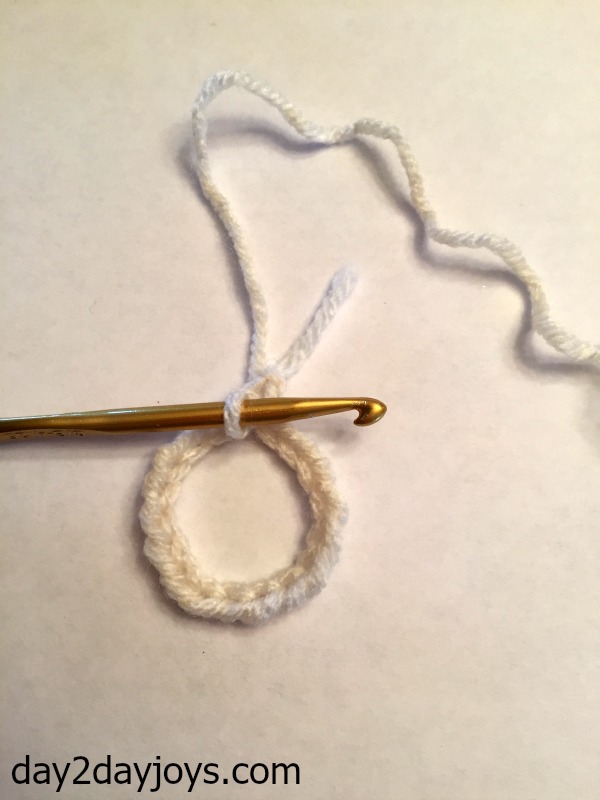
Begin by creating a slip knot and chaining 18.
Slip stitch to the beginning chain to create a loop.
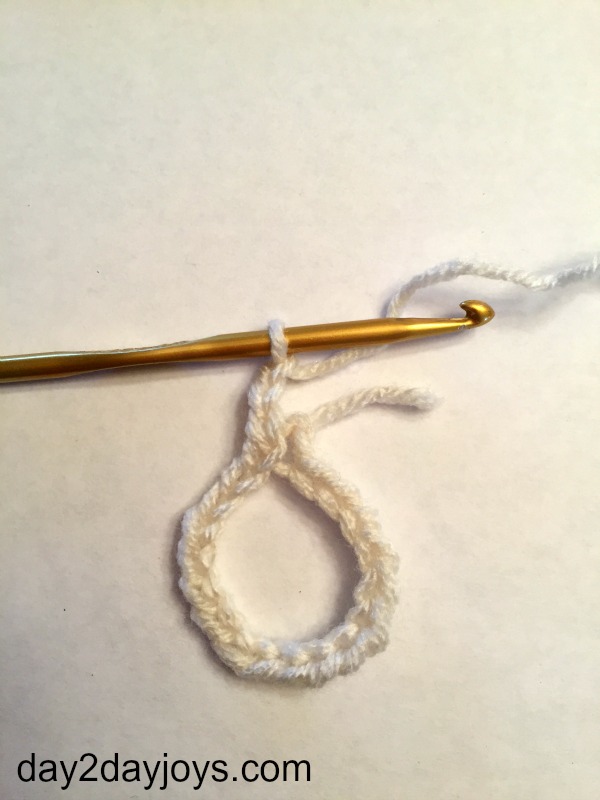
Chain 3.
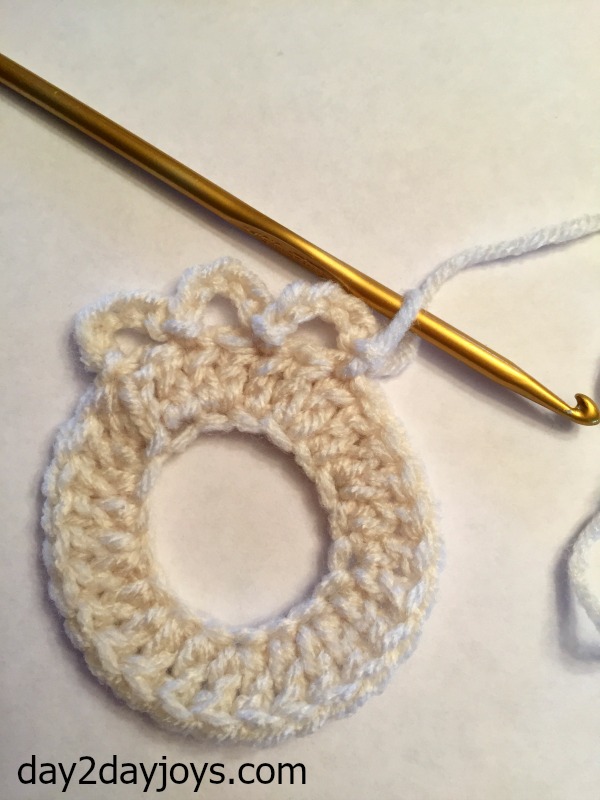
Make a double stitch in the first chain, and 2 double stitches in the second chain. Repeat, alternating between one and two double stitches in each chain, all the way around, weaving the end piece into the work as you go. Join with a slip stitch to the beginning double stitch: 28 double stitches.
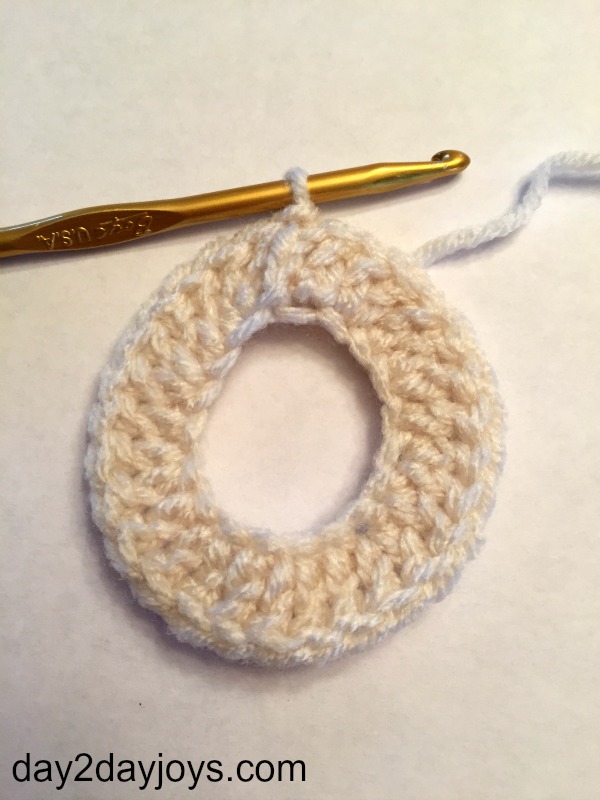
Chain 5.
Skip the next double stitch, and slip stitch in the top of the following double stitch.
Repeat all of the way around: 14 loops.
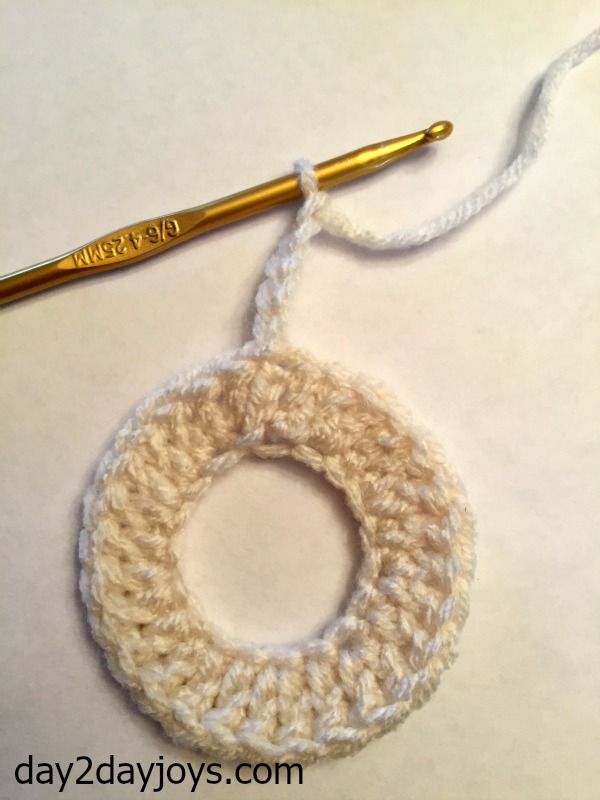
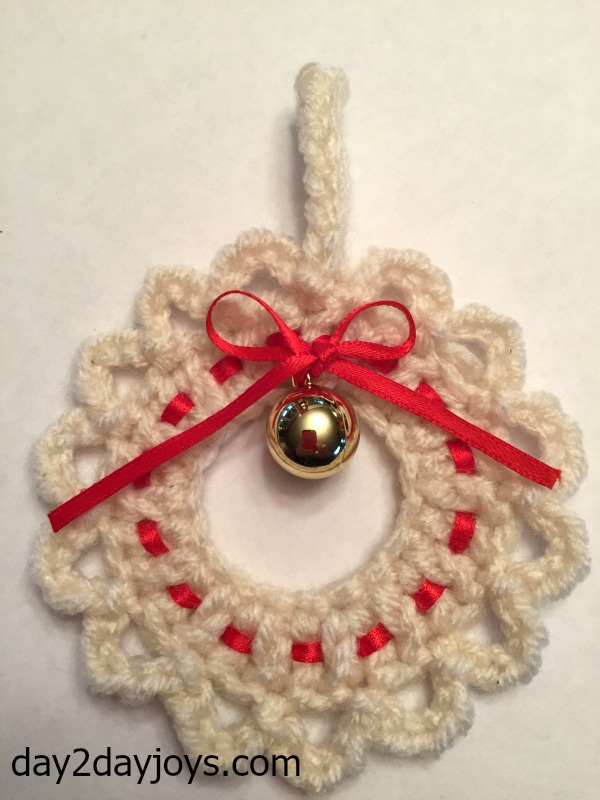
Chain 15.
Turn the wreath over and attach the chain to the base using a slip stitch. Clip the yarn and weave the raw edge into the back of the work.
Using the crochet hook, weave the ribbon through the double stitches, beginning and ending at the top. Tie into a bow and add a small Christmas ball, greenery sprig, or other small decoration, if you like.
These are great for using as tree ornaments, accents to gift tags, or you could do what my kids do and put them on every doorknob in the house! I like the classic dark green for gift tags and decorating, but you might like to make them in varying colors for ornaments as the dark green tends to blend right in with the tree.
I hope you’ll enjoy making these quick and easy crocheted wreaths! They add a warm, personal touch to Christmas gifts and decor.
What’s your favorite Christmas decor to make?
The post DIY Crocheted Wreath Ornament/Gift Tag appeared first on Day2Day Joys.
]]>The post All Purpose Citrus Cleaner appeared first on Day2Day Joys.
]]>Cleaning.
We all have to do it and if you think about it, this is a constant activity in our lives. Whether we are personally the ones cleaning our homes or someone else is, the fact is, you have to use cleaners.
Unfortunately, the cleaners most people have in their home are extremely toxic and dangerous to our health. If you think about how often cleaners are used in our home, you can get a good picture of how many chemicals you have floating around, embedded in the carpet, bedding, towels and clothes.
Our homes are letting off chemical vapors every second of the day. For instance, chemicals from paint, new carpet, furniture and all the cleaning products, air fresheners and perfumes we use – just to name a few.
 That’s a lot of foreign substance going into our body every single day. Thankfully our bodies were wonderfully created to be able to keep us from being badly affected by these kinds of toxins. Unfortunately, we are in a state of toxic overload in this generation and our bodies are having a harder time keeping these chemicals from harming us.
Research shows how these chemical-laden products can cause issues in the central nervous system, in the lungs, neurologically and so much more. I don’t know about you, but I don’t want any part of my body harmed by the stuff I clean with.
 One of the best ways we can lessen the impact of toxic chemical exposure is by making your own cleaning products. It’s easy, simple and extremely inexpensive. Recipes bombard the Google search pages and so many contain 5 ingredients or less.
Our home has been commercial cleaning product free for about 8 years now and I’ll never go back to using that toxic stuff. My house gets just as clean, if not cleaner, by using simple, homemade cleaners using ingredients such as baking soda, borax, lemon juice, olive oil, vinegar, liquid soap and essential oils. The recipe I am sharing today is for an all purpose cleaner and it might be one of the simplest recipes to make. It uses white vinegar and grapefruit (with some added oranges, lemons and limes if I have any). That’s it. I appreciate that the natural elements of the grapefruit contain wonderful cleaning and sanitizing agents. The citrus scent also beats any commercial product out there! There is probably a lingering scent of the vinegar, although I’m so use to using it, i don’t notice it. If so, and you don’t like that, you can add a high quality grade essential oil that will help with the scent as well as the antimicrobial properties of the cleanser.
All Purpose Citrus Cleaner:
What You Need:
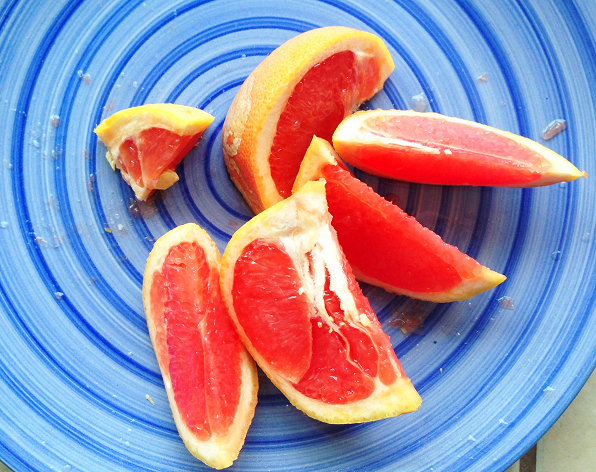
- 2 organic grapefruits (and any organic oranges or lemons peels/flesh you may have)
- white vinegar (approximately 3+ cups)
- you can also just use the peels so you don’t have to waste those every time you eat citrus fruit
What You Do:
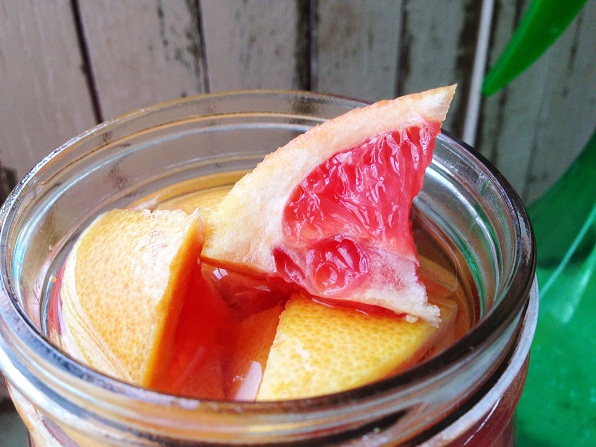
- Slice the grapefruit or oranges.
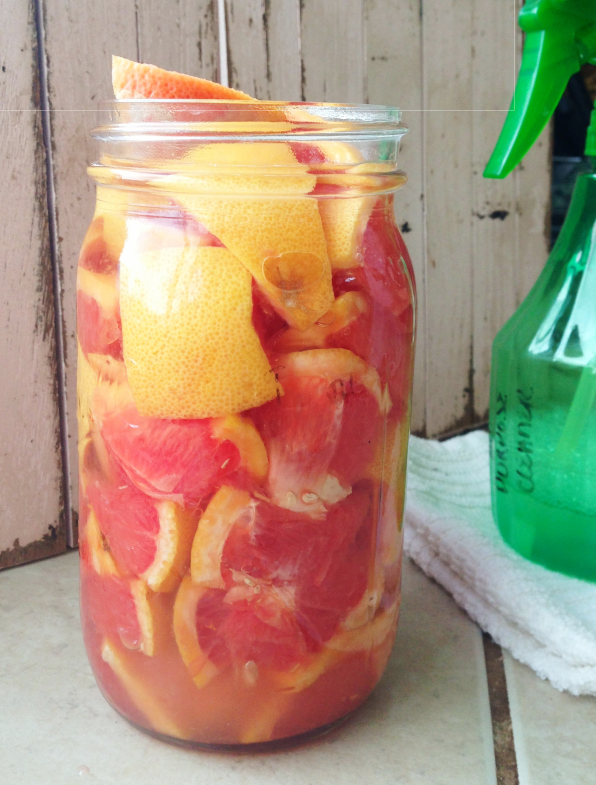
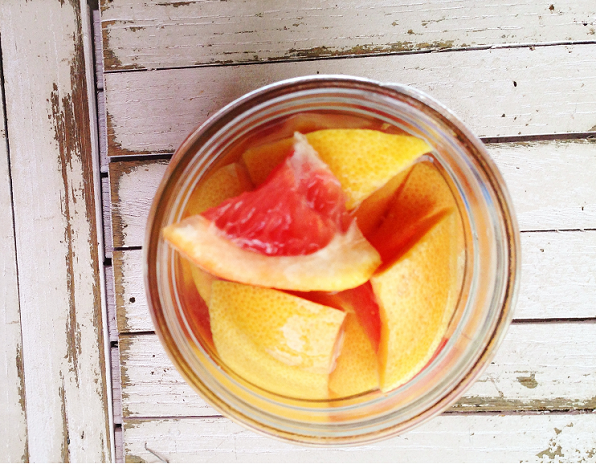
- Place all of them in a 1 quart glass jar. If you’re like me and want bulk, use a larger jar, fill it with the citrus fruits then fill with vinegar.
- Fill the jar with white vinegar, leaving about 1” at the top.
- Set jar in a windowsill for at least 2 weeks to allow the vinegar to pull out all the good stuff from the citrus fruit. If you are using just the peels, allow it to steep a week or two longer.
- Once it’s ready, strain the vinegar and then squeeze the grapefruit (while in the strainer) to get all the juice out.
- Use as a concentrate. I like to use a 1:2 ratio water to citrus liquid. Pour into a spray bottle and store any extra in a glass jar in a cool, dark place.
- Use as an all purpose cleaner on counter tops, porcelain fixtures in the bathroom, tile, walls, etc. If you are unsure about finish on your walls or furniture, test a small area first before using. I do not use it on mirrors – the oils in it will cause streaking.
- Breathe in. Ahhhhh.
There you have it. A simple, easy, yummy-smelling citrus all purpose cleaner! I promise you – once you switch over to making your own products, you’ll love the results. Not only in your home, but in your pocketbook as well! The best benefit will be the fact that you aren’t harming your family’s health every time you clean. It makes cleaning worth while!
Do you make your own safe cleaning products? What is your favorite?
The post All Purpose Citrus Cleaner appeared first on Day2Day Joys.
]]>The post How To Attract Butterflies and Birds To Your Yard appeared first on Day2Day Joys.
]]>
Written by Karen @ To Work With My Hands, Contributing Writer
I love spring! It’s my favorite season of all.
When the dull gold-green grass brightens to vibrant, fresh green and the tender leaves begin sprouting on trees and bushes, I get eager to turn my attention outdoors.
The garden calls, and I’m ready to clean out dead leaves that have littered the beds, repot plants that need larger homes, and bring some fresh new color to the garden and yard.
And on the days I spend many hours outdoors getting the garden and yard spruced up for spring, I’m not alone. The birds are excitedly chirping and singing, arriving from their winter homes, either by flight or simply by coming from the brush and woods to celebrate the warmer and brighter days.
Having butterflies and birds in the backyard is just as welcome as the tender green shoots coming up in the garden, and if you don’t have a large population of them each year, there are ways you can attract them to add even more interest and beauty to your surroundings.
Butterflies:
The most attractive element that you can supply for butterflies is the right kinds of flowering plants. Butterflies are drawn by scents, and when you have plenty of fragrant blooms in your garden, they are naturally attracted.
Here are some of their favorites:
- butterfly bush
- zinnia
- salvia
- milkweed
- German chamomile
- cosmos
- verbena
- petunia
- yarrow
- dianthus (sweet william)
- echinacea (coneflower)
- bee balm (lemon mint)
- phlox
- lupine
- lantana
- black-eyed susan
Try adding just a few to your garden or yard, and add more each season, as you are able. It won’t take long for your yard to become a favorite haunt of these gorgeous insects.
Also, remember to consider the life cycle of butterflies. Not only should you provide for the adults, but also consider the egg, larvae, and pupa stages:
Milkweed is the nursery of choice for the monarch butterfly.
Parsley, dill, and fennel are all favorites of black swallowtails.
To make sure butterflies feel totally at home in your garden, be sure to provide water, basking areas, and a selection of overripe fruit.
If you’d like to make your very own butterfly feeder, these instructions are simple and a great project to include your children in. (I recommend skipping the red dye for both butterflies and hummingbirds.)
Birds:
While birds in general (with the exception of hummingbirds) aren’t as attracted by flowers am much as butterflies, there are still some that they are attracted to, especially those that produce abundant seeds or berries.
Sunflowers, echinacea, and beautyberry are special favorites of song birds, and many of the same flowers that attract butterflies, will also attract hummingbirds:
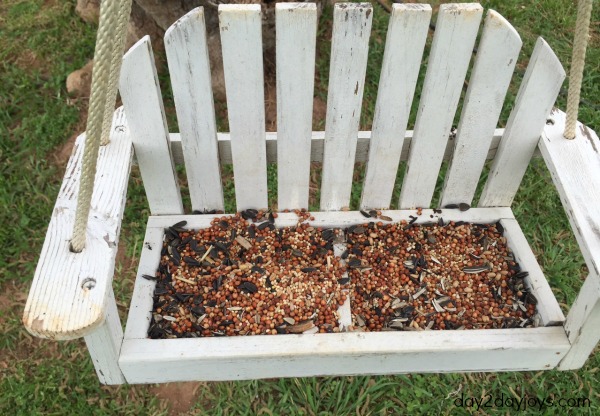 In addition to natural food sources, you can also provide for birds with feeders. Commercial feeders are available in a large range of designs and even specific for the type of birds you want to attract.
Or, if you are ambitious, you can make your own. When my children saw me getting the feeders ready for spring, they were inspired to make a few of their own using empty water bottles and coffee canisters. I think the birds will be just as happy.
Hummingbird feeders are a sure way to attract these gorgeous birds to your yard, and making your own nectar is easy. Simply mix one part sugar with 4 parts water and bring to a boil. Allow to cool, and fill your feeder.
Make sure your feeder has a red element (which hummers are highly attracted to) and skip the red dye in your nectar.
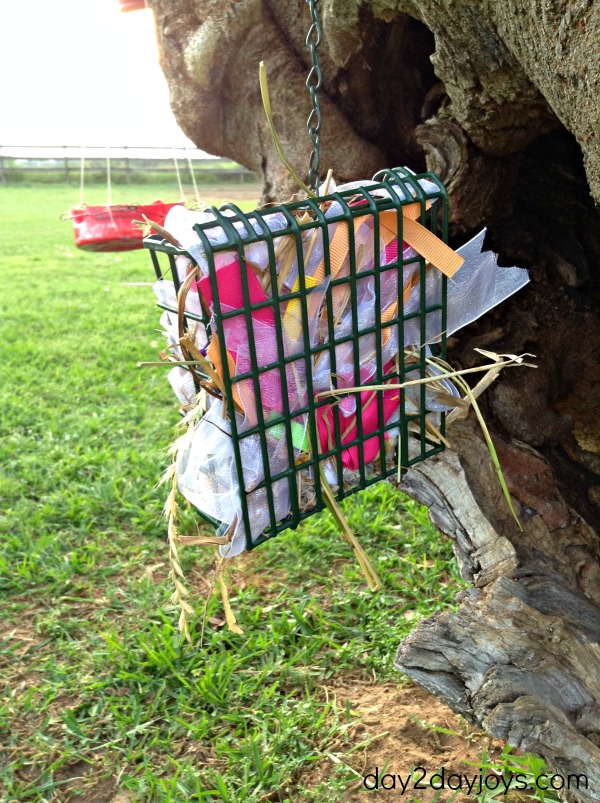
A nesting box buffet is also a great way to encourage birds to visit your yard. Birds are preparing nests this time of year, and supplying them with a basket of building materials that they can choose from is sure to entice them near.
Simply fill a suet feeder with colorful strips of material, string, yarn, or sturdy dried grasses. In the cooler times of the year, you can use the feeder to hold your homemade suet mixture which will be a great boost of energy for the birds in the leaner times when food is not as plentiful.
As with butterflies, make sure you have a water source available for the birds. And, if you have an overgrown hedge or brush area, consider leaving it in place. Birds love these areas for nesting, and escaping the weather or predators.
Make sure you get your children involved in attracting wildlife to your backyard! Not only is it a great way to enjoy the fresh spring weather, but it’s also an excellent way to teach an appreciation for nature and an opportunity to spark an interest that just might become a life-long journey.
Above all, start small, and have fun. Attracting wildlife to your property takes time, and although you may be surprised by how quickly you get visitors, you’ll be amazed over time by just how popular your space becomes. And if you watch carefully, you may just find that you have some repeat visitors year after year.
How do you attract wildlife to your yard?
The post How To Attract Butterflies and Birds To Your Yard appeared first on Day2Day Joys.
]]>The post What It’s Like to Afford Fresh Organic Produce and How You Can Do It Too appeared first on Day2Day Joys.
]]>**Please meet Reelika, a new contributor… she would love to hear from you! -Rachel
You are a great mommy. You want the best for your kids and family. It is the hope of many families to be able to provide organic veggies, fruits and berries to their family and especially to the kids. Unfortunately the downside of organic produce is the cost. But what if I told you there are ways that you can still provide the best organic produce to your kiddos without breaking your budget?
As a mom to an allergic toddler and having been diagnosed with hypothyroidism myself, I have done lots of research about the benefits of organic food. I am not a health care advisor, but I can share what has worked for our family and how you can do it too.

Organic produce has been very beneficial for our family. Since my toddler is allergic to many things, I provide him with several organic veggies, fruits and berries. He loves this delicious organic produce and is not a picky eater anymore. He used to be very hyperactive, but since switching to organic food, we don’t seem to have much of a problem with it anymore.
We cut back on other things, but invest into our health, so it keeps us away from pharmacies, doctor’s office and hospitals. Being healthy means also being more productive and happy at preschool, home and work.
Top 3 Tips on How to Afford Organic Produce
Tip # 1 – Organic Produce as an Investment
Don’t look at the price tag of the organic produce as a number; instead, see it as an investment. Compare it to the costs of medications, health care and doctor’s visits.
Chances are you have heard that non-organic food can contain pesticides and cancer-causing hormones or even GMOs. Research shows that pesticides can cause not only cancer, but also allergies, skin and neurological issues, ADHD, birth defects and much more.
Children are especially sensitive to pesticides due to their development and growth. You can either pay the farmer or the pharmaceutical business.
It is time to invest into your and your family’s health. The truth is, many people don’t think about it until they have some kind of health problem. I have to admit, I am completely guilty as I was one of them.
I never felt the need for organic food, until I was diagnosed with hypothyroidism during pregnancy. Since then I have invested into my health instead of the medications I had to use. In fact, medications were more expensive than my investment in organic produce, and I am so much healthier now.

Tip # 2 – Prioritizing Organic Produce
Take a look at what other monthly expenses you have – a new iPhone, expensive jewelry, eating out several times per week, new fancy toys, etc. If you can afford any of them, you can also afford organic produce. Find ways to cut back on monthly payments and use the money instead for quality organic produce.
I am always looking for ways to cut back on our monthly expenses. Saving water and lowering heating costs increases our grocery budget. A monthly budget gives you a crystal-clear overview of your highest expenses so you can make your own choices of where to cut back.
Tip # 3 – Making the Right Choices
It can save you big bucks if you are making the right choices. Be aware of when and which organic produce to buy.
Here is what to keep in mind while choosing fresh organic produce:
- If you bought expensive organic veggies yesterday, then find less expensive produce to buy next time you do groceries. It keeps your budget in balance.
- Meal plan and create a grocery shopping list. Buy the amount of veggies you are planning to eat so you won’t be wasteful.
- Be creative with organic veggies that are close to expiring. You can use them for smoothies, baking, or soup.
- Buy what is on sale or close to its expiry date. It can save huge bucks when the expiration date is close by. Just make sure you use it as soon as possible.
- Buy local. Any organic local veggie is always cheaper than an imported one.
- Prefer seasonal. Prioritize what is in season as it tends to be cheaper, and you can also freeze these for the non-seasonal time.
- Don’t buy pre-washed and packaged food, as these cost much more.
- Prefer healthy veggies and berries for snacks. Leaving chocolate, cookies and chips out of your grocery list saves you money for organic veggies, fruit and berries.
- Frozen organic veggies are great choices as well. Buy them in bulk and while on sale.
- Grow your own organic herbs that you can use for meals. You don’t need a yard to grow your own green leafs. All you need is a small space in kitchen or on a balcony to have your own organic herb section. I also have mini-tomatoes growing in my kitchen.
- Wash the produce just before using it so it will last longer.
- Citrus produce can last at least a week longer when stored in the fridge.
- Don’t forget coupons! Find the best deals and use them.
- Negotiate if possible. When buying directly from a farmer, use your negotiation skills. Offer to buy in bulk and don’t be afraid to ask for a discount. Most likely the farmer will be more than happy to offer you a discounted price when selling more. You can freeze the extra for later and will have saved big bucks.

Fresh organic veggies, fruits and berries are always going to be expensive, but investing into our family’s health and cutting back on our monthly expenses has made a difference for our well-being. Making the right choices keeps us on budget and provides a quality lifestyle. You can do it too!
Did I miss anything? How do you make organic produce affordable for your family?
The post What It’s Like to Afford Fresh Organic Produce and How You Can Do It Too appeared first on Day2Day Joys.
]]>The post Jammin Strawberry Jam appeared first on Day2Day Joys.
]]>
Are you guys getting overwhelmed with fresh, ripe, delicious, sugary, fruit? My goodness, spring and summer are just the best eating!!
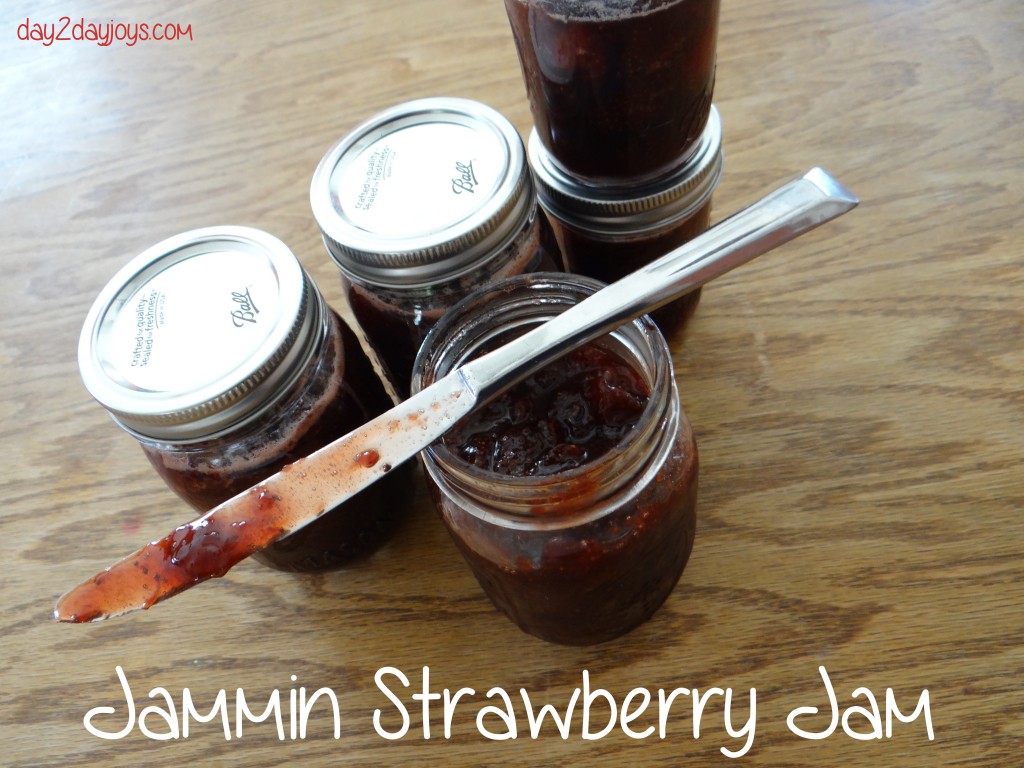
My kiddos and I love to go picking. We pick anything we can get our hands on (in Massachusetts… strawberries, cherries, blueberries, peaches, apples, etc). Last year I canned tomatoes and applesauce… this year I wanted to try jam. We LOVED the results of this jammin jam!
How to make Jammin Starwberry Jam:
What you need:
- 10 cups of cleaned, de-topped, mashed, strawberries
- Zest of 2 lemons
- 4 cups of sugar
- 4 cups of honey
* I think all honey would be fine, it makes your jam a little more runny – but then it can double as ice cream topping. (see below…)
What to do:
- If you’re going to can your jam – get all your supplies ready – get your pot boiling, jars sterilizing, tops and rings hot and clean.
- In the meantime put all of your strawberries, sugar and honey into a pot (I used a big dutch oven type pot). You need time and patience people.
- Stand by the pot of strawberries, boiling away and skim skim skim! Be careful not to let the mixture burn to the bottom (I am still pot scrubbing!).
- The boiling berries produce this foam. You need to remove it (as much as you can).
- Get yourself a big bowl and put it right next to you, and a big, flatish spoon, and skim!
- After about half an hour (or whenever the foaming dies down), you’re ready to add your zest, and fill up your jars and process them for 10 minutes, and then set them aside to cool and pop!
- Enjoy!
Do you jam? Can? What’s your favorite summer item to preserve?
The post Jammin Strawberry Jam appeared first on Day2Day Joys.
]]>


