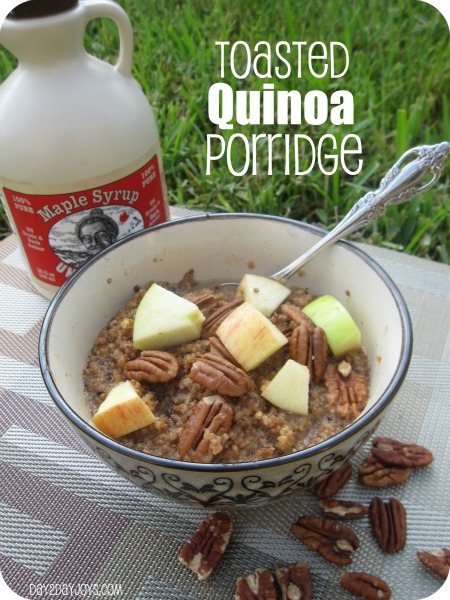
The post 7 Easy Healthy Kid-Approved Snack Swaps appeared first on Day2Day Joys.
]]>Breaking old habits is hard and if you didn’t start your kids out eating healthfully, it’s hard to get them to enjoy doing so. To avoid fighting a battle at every meal and snack time, I usually change things out slowly, making swaps: changing an unhealthy food for a new healthier alternative. Here are my favorites.
7 Easy, Healthy, Kid-Approved Snack Swaps
100% Organic juice with no additives for regular juice
The main idea here is to get rid of all those additives. If you ever flip over a bottle of juice and read the ingredients, you’ll usually find a ton of added sugars, flavors and dyes. Last time I checked, fruit was pretty sweet on its own and didn’t need all that stuff, so why give it to children? What you want to find is a juice that 100% juice or at least 100% natural with no added sugar. Some people don’t like to purchase juice from concentrate, but if your budget, like mine, limits you to that, it’s okay. Making small changes is better than making no changes. If possible, buy organic, especially when purchasing a juice made from one of the dirty dozen foods, like grapes.
While these juices are a bit pricier, their popularity is causing a lot of grocery chains to offer their own versions that don’t break the bank. My grocery store tends to charge a bit more than a dollar extra for store brand organic juices, which makes it easier not to break the bank. Also, since these juices are so sweet on their own, they’re incredibly easy to dilute with a little water, which can stretch your money a little farther.
Almond Butter for Peanut Butter
The first time I tried almond butter, it was grainy and awful. But I mentioned it to a friend who had made the switch and she said “oh, that brand? That brand is gross. There are way better ones out there.” A few years later, I did try again after reading various reviews of other brands. She was right. There are a number of almond butters that are amazing. So amazing, in fact, I don’t think our family will ever go back to peanut butter.
Our family’s favorite is the MaraNatha brand. There are quite a few choices and though the Creamy No-Stir one isn’t the healthiest of them all, it is our family’s stand out favorite. It’s creamy and sweet and delicious. If you’re a bit hungry or just craving sweets, a small teaspoon of it is completely satisfying.
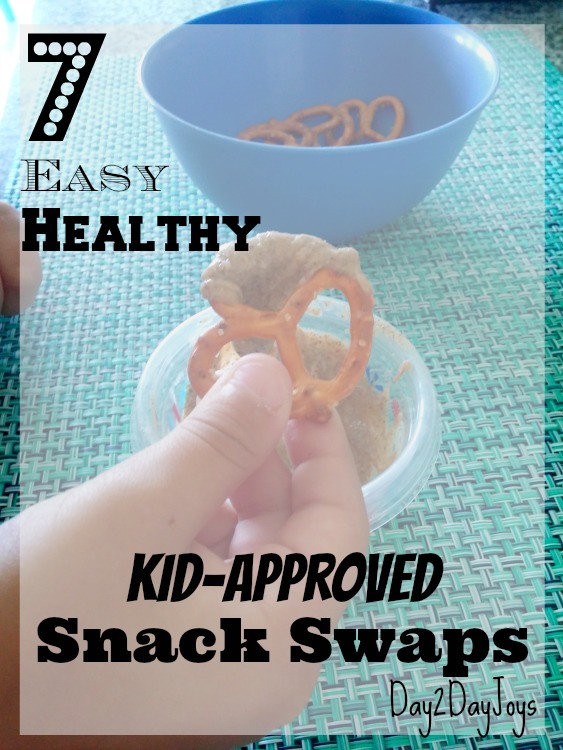
Almond butter goes great with sliced apples, celery and my 9-year-old’s favorite: pretzels. If your family likes almond butter and you want to try another nut butter, I’ve heard great things about cashew butter and hazelnut butter (not Nutella). These two can be much harder to find though and typically have to be ordered online or purchased at a specialty shop.
Roasted Seaweed instead of Chips
If your kid is a bit daring and willing to try new things, you’ve got to give them some roasted seaweed. These snack packs are found in the chip aisle and also with International foods and come in a variety of flavors. You can get them plain, salted, sweet or spicy and the crispy texture combined with choice of flavor makes a great substitute for chips. It’s roasted, not fried an entire pack is usually only about 60 calories.
“Simple” yogurts instead of regular or kid-branded ones
Have you ever read the label of a kid’s yogurt? There’s a ton of frightening stuff in there: chemicals you can’t pronounce and tons of dyes because kid’s won’t eat it if it’s not a circus color, right? Flip over a “simple” yogurt and you’ll find exactly what should be there: the same fruits listed on the front of the package, milk and maybe some other natural, easy to pronounce stuff. It’s a no-brainer. Not only that, but neither of my kids ever noticed when I made the switch to the simple yogurts: The flavor is still great without all that added junk.
Organic mac n cheese instead of store brand
I’ll admit that Kraft is getting better about this and I hope this is a trend we’ll keep seeing with big companies. While we haven’t tried the new Kraft macs yet, we have been buying organic mac from a couple of other companies for a while and my mac-addicted kiddos claim the organic stuff is way more delicious. The two favorites in my house are Annies and Back to Nature. Both are amazing and both can be purchased at warehouse stores (Annies at Costco and Back to Nature at Sam’s), so the cost of them becomes about the same as buying a name brand, non-organic variety.
Hummus instead of ranch dip
While ranch dip is delicious and you can purchase low-calorie or low-fat varieties, hummus is all natural. Not only that, but hummus is a great source of iron. This is really important if your child doesn’t eat a lot of meat or has an iron deficiency (My own daughter is both). There are some delicious varieties of hummus at the grocery store or for even more health benefits, you can make your own. It’s super simple and comes out delicious (and it’s great at parties). Pair it with pita bread, crackers or veggies. And for more iron-packed goodness, serve it with orange juice: it will increase iron absorption.
Home made chips instead of store bought
I know this one looks a little scary, but it’s not too tough. Store bought chips are usually fried and are covered in who knows what kind of flavorings. For an amazingly delicious and easy to make alternative, you can pick up one of this Top Chips Maker for around $15. Simply slice your potato, sweet potato, squash, etc. and place on the ring. Then cook it in the microwave and you’ve got instant, fresh chips. My pickiest eater loves these more than anything he’s had store bought, and from him, that’s a huge endorsement.
So what are some healthier swaps you make for your kids snacks?
The post 7 Easy Healthy Kid-Approved Snack Swaps appeared first on Day2Day Joys.
]]>The post Tropical Delight Smoothie appeared first on Day2Day Joys.
]]>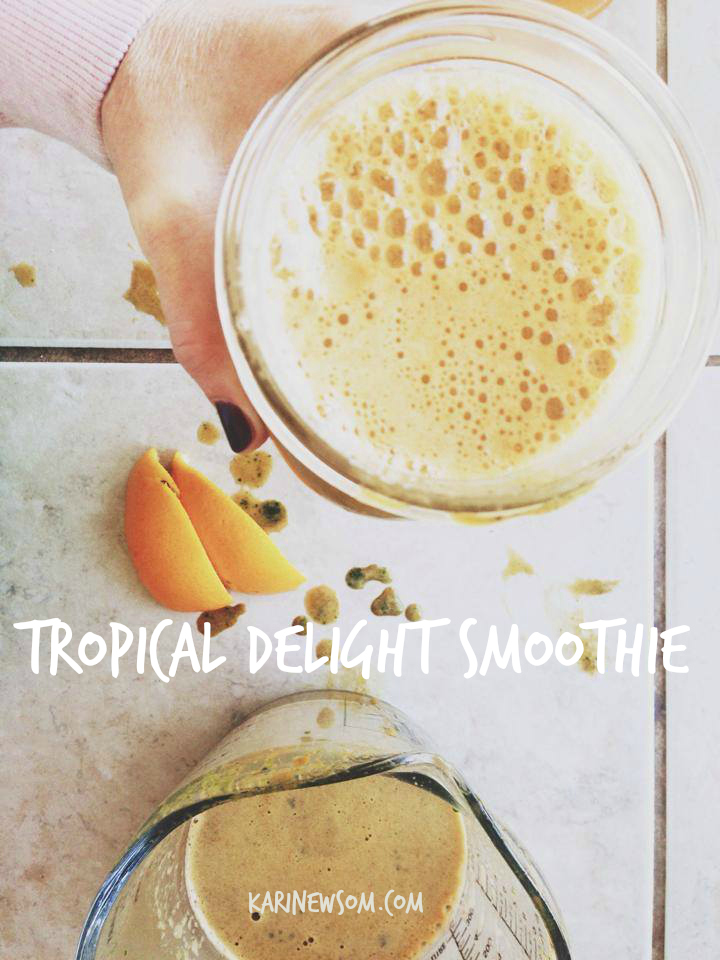
Tropical Delight Smoothie
What you need:
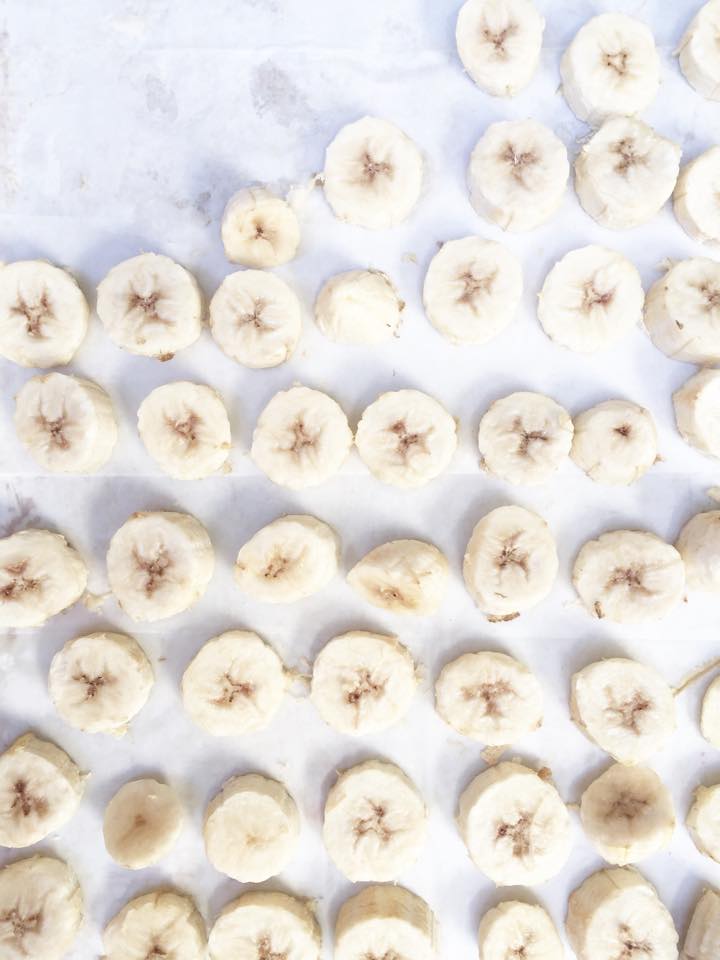
1 banana, sliced (either fresh or frozen)
1/2 cup pineapple, fresh or frozen
1/2 cup ice (this is optional and typically used when the fruit you are using isn’t frozen, if you are using frozen fruit, it usually is plenty cold and you won’t need the ice)
What to do:
What is your family’s favorite smoothie?
The post Tropical Delight Smoothie appeared first on Day2Day Joys.
]]>The post Lemon Meringue Pie for Spring appeared first on Day2Day Joys.
]]>Around Easter-time, we always look for simplicity, quality family time and enjoying special treats. As a total baking fanatic, I love to bake something delicious that entire family can enjoy.

Lemon Meringue Pie for Spring
There are several lemon meringue recipes available, but my absolute favorite is the one I am sharing with you today.


- 250 ml measuring cup
- 20 ml tablespoon
- 9 inch (23 cm) diameter pie dish
- 1 large egg
- 120 g cold butter (cut in small pieces)
- 70 g (1/2 cup) self-raising flour
- 130 g (3/4 cup and 1 tablespoon) plain flour
- 30 g (1 tablespoon and 3 teaspoons) caster sugar
- 56 g (4 tablespoons and 3 teaspoons) cornflour
- 170 g (3/4 cup) golden caster sugar
- 180 ml (2/3 cup and 2 teaspoons) fresh lemon juice (approximately 3 lemons)
- 230 ml (2/3 cup and 1/4 cup) water
- 60 g butter (cut in small pieces)
- 3 large egg yolks
- 3 large egg whites
- 170g (3/4 cup) golden caster sugar
- Put the flours, caster sugar and butter in a food processor. Process until the mix resembles fine fresh breadcrumbs. Add egg and process on medium speed for about 20 seconds, until the mix clumps together.
- Next, form dough into a flattened round. Put it in a freezer bag (or wrap in plastic wrap). Put it into the fridge and refrigerate it for at least an hour (or overnight).
- Combine sugar, cornflour, lemon juice and water in medium saucepan. Use medium-high heat and stir constantly until the mix starts to boil. Reduce heat to low and continue stirring until the mix becomes transparent and smooth. Remove saucepan from heat and stir in both butter and egg yolks. Stir until entire butter has melted and the mix is smooth. Pour filling into a small bowl or container with a cover and put it into the fridge. Keep it in your fridge until it is cold.
- Set the oven to 180 degrees Celsius and roll out pastry on a lightly floured board. Put it into pie plate and gently press into dish. Place a sheet of baking paper on the pastry and fill it with pastry weights. Bake at 180 degrees Celsius for 10 minutes. Remove weights with baking paper and continue baking for 10-15 minutes. Let the pastry cool completely.
- Preheat oven to 200 degrees Celsius.
- Place egg whites in a bowl. Use electric mixer on high speed until at soft peak stage. Start adding the sugar gradually on the same time beating well until the sugar has dissolved and the mix is thick. There shouldn’t be any sugar crystals.
- Spoon lemon filling on cooled pastry and spread meringue to cover filling. Form peaks in the meringue with a spoon. Bake it approximately 7-10 minutes.
- Allow the lemon pie to cool to room temperature, cover it and put it to the fridge. Serve it cold for instance with ice cream.
What’s your favorite pie for Spring?
The post Lemon Meringue Pie for Spring appeared first on Day2Day Joys.
]]>The post Protein Packed Nut Butter Bites appeared first on Day2Day Joys.
]]>
Written by Contributing Writer, Kari at Living Strong, Health & Wellness
Snack time!
Personally, I’m not a big “snacker”. I can go meal to meal without needing any extra food to keep me going. Although, having a family, I need to have a plan on hand for our meals and snacks and then I need to make sure they are ready and available to eat!
My kids, on the other hand, seem to need a snack every 30 minutes. I can understand why since they are on the go, non-stop, active kids. This can present a problem when you are wanting to feed your family healthy foods that nourish the body. Unfortunately, the quick and convenient, grab and go processed options you find on the grocery store shelves don’t make the cut for me. It’s hard enough to make sure they have nourishing and healthy lunches everyday – then to add in snacks to mix, that means more creative ideas are needed!
I know it would be easier to go this route, but I’ve spent too many years building a strong foundation of health in my family, this is one area I don’t want to skimp on. This means I need to be creative in the kitchen when it comes to snacks.
I have a long list of snacks that we rely on, but one of our favorites are these Nut Butter Bites! The kids love helping with them as well – which I think makes them even more enjoyable. Kids love helping and being a part of creating the food they eat.
These amazingly healthy bites are a great snack for my active kids and only a couple are needed for them to feel satisfied. Packed with protein from the nut butter, a healthy source of energy from raw honey, good and healthy fat from the coconut and extremely low in sodium – you can ‘t go wrong with these delicious treats! They are more like a dessert than a snack. That’s always a plus!
To top off these already great nut butter bites, roll them in sucanat (unrefined cane sugar), shredded coconut, cocoa powder or mini chocolate chips (we like Enjoy Life! allergen-free brand). Hands down, these are healthier than any overly processed and refined ‘snack’ you can get off a shelf.
Sure, there’s a few minutes of time involved, but isn’t your family worth it? Of course they are!
Along with many other healthy snacks, appetizers, beverages, main dishes and desserts, this recipe can be found in my cookbook, Real Food. Real Kitchen. So Good! I hope you and your family enjoy these as much as we do!
- ½ cup organic natural peanut butter (no added ingredients, just peanuts) or nut butter of choice
- ½ cup organic raw honey
- ½ – 1 cup organic unsweetened coconut, finely shredded
- ⅓ cup organic mini dark chocolate chips, soy-free (we like Enjoy Life! brand, allergen-free)
- sucanat (unrefined sugar) for rolling the bites (other options: you can roll them in coconut, chocolate chips or cocoa powder)
- In a medium size bowl, mix the peanut butter and honey until combined thoroughly.
- Add the chocolate chips. You can add more or less according to your taste (I always add the larger amount).
- Add the coconut in ¼ cup amounts until the consistency reaches a thick, yet semi-sticky state.
- You don’t want it so sticky that you can’t roll it, but you don’t want it so dry that it wont hold together. Find the happy medium.
- Once you are able to roll them and they still have some stickiness to them, roll into balls and then roll in the sucanat.
- Place on wax or parchment paper on a baking sheet or plate.
- Refrigerate for a while so they can harden up a bit, transfer to a glass jar and keep in the fridge.
What is your favorite healthy snack?
The post Protein Packed Nut Butter Bites appeared first on Day2Day Joys.
]]>The post Chocolate Avocado Popsicles appeared first on Day2Day Joys.
]]>
The middle of summer means a lot of heat, sun and hopefully fun.
In the midst of summer business of swim lessons, vacation Bible school, and staying up later, we love to have fun outside. We go to splash pads to keep cool, play in the back yard with the hose and often go for bike rides in the evening as the sun is setting.
Always remember to use a good sunscreen or cover up in the sun to prevent skin damage.
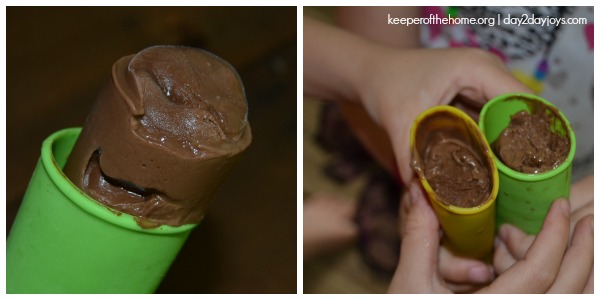
Another thing we love is a delicious, healthy popsicle. If you’re wanting a healthy choice, you don’t have to get ones from the grocery store full of unhealthy sweeteners and the bright colors. You can easily make your own!
If you purchase some molds you can make your own popsicles over and over again. We’ve had our molds for about three years. I like the silicone push pop molds because they help with the dripping that popsicles often do in the summer months. However, if you don’t have any molds handy, you can easily make these in ice cube trays with popsicle sticks.
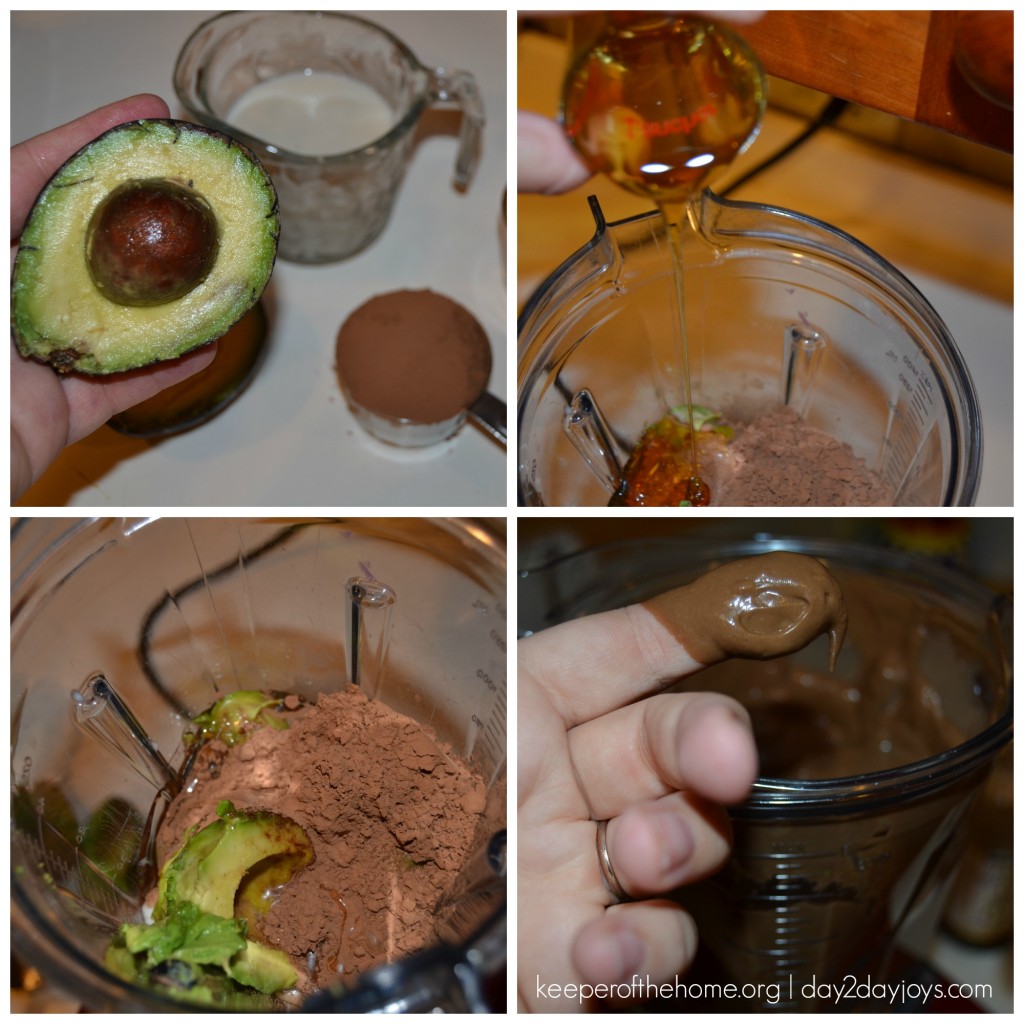
Today, I ‘d like to share with you this recipe, you can find it over at Keeper of the Home.
Do you ever make your own popsicles? What are your favorite recipes?
The post Chocolate Avocado Popsicles appeared first on Day2Day Joys.
]]>The post Easy Summer Appetizer {Plus 10 Other Recipes} appeared first on Day2Day Joys.
]]>
A couple months ago we went to my friend Melissa’s house. She and her sweet family are friends of ours whom we often celebrate some holidays with since we don’t have family near by.
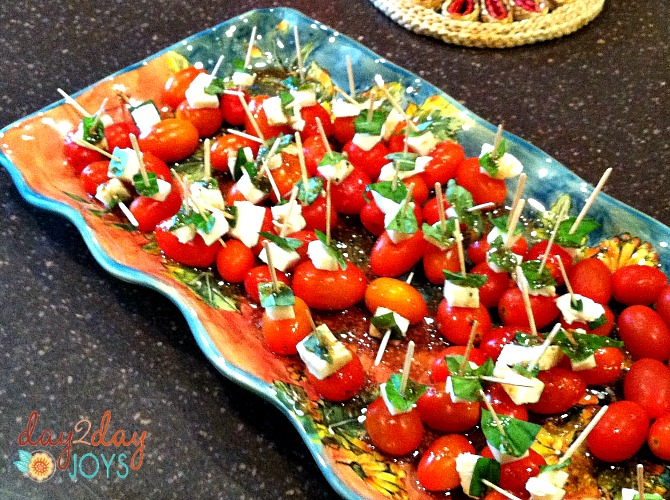
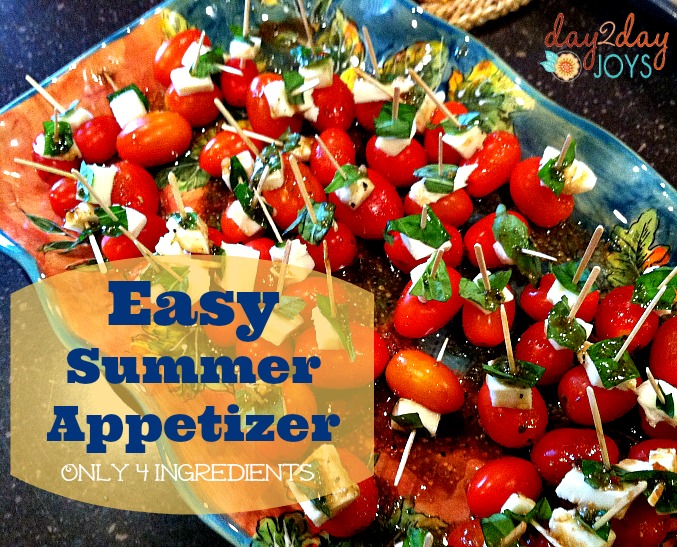
This time we were celebrating Mother’s Day and her birthday. When we arrived she had some appetizers out and one of them was this Easy Summer Appetizer!

Here is a picture of us on Halloween one year
She said this appetizer was her hubby’s idea but I’ll give her the credit here. 
Melissa’s Easy Summer Appetizer
What you need:
- grape tomatoes
- fresh mozzarella, cut into small squares
- fresh basil, chopped
- balsamic vinaigrette
What to do:
We hope you love this EASY recipe!
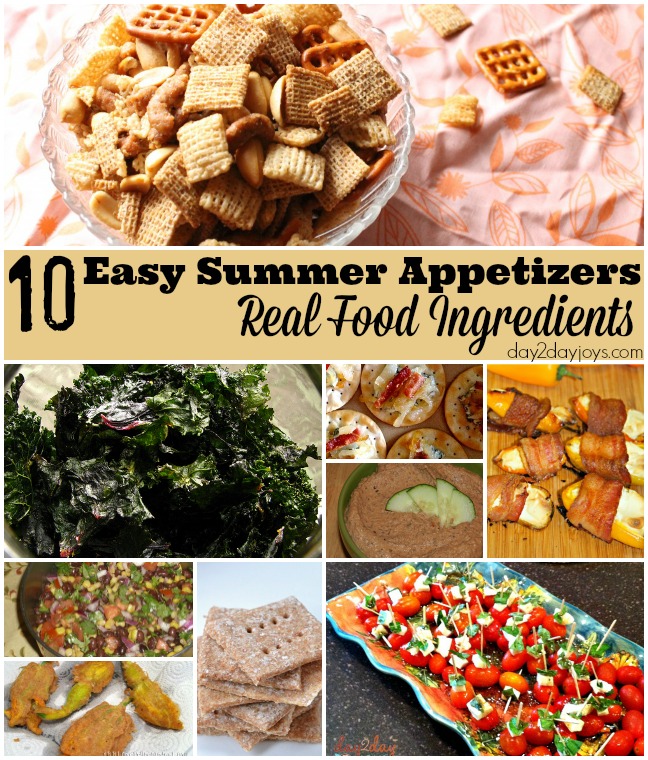
Here are 10 other recipes that would be great for summer too:
- Slow Cooker Chex Mix
- Sombrero Dip
- Black Bean Corn Salsa
- Bacon Wrapped Pepper Poppers
- Olive Sun Dried Tomato Hummus
- Not Your Average Guacamole
- Homemade Crackers
- Delicious Kale Chips
- Cheese Stuffed Fried Squash Blossoms
- Crostinis
*Linked to Wellness Wednesdays, Titus Tuesdays, Works for Me
What are your favorite summer appetizers? Do you like to use summer veggies?
The post Easy Summer Appetizer {Plus 10 Other Recipes} appeared first on Day2Day Joys.
]]>The post Not Your Average Guacamole appeared first on Day2Day Joys.
]]>
Written by KT @ One Organic Mama, Contributing Writer
There are lots of reasons to LOVE avocados… and I’m no dietitian… but here are my top ten!
Why Avocados ROCK:
10. They are delicious
9. They are a kid pleaser
8. They are an easy, soft, first food for your toddler
7. From what hear they are a “good” fat (still seems like an oxymoron to me though)
6. They are high in potassium (great if you are a runner or worker outer… which I don’t know much about…)
5. They are high in fiber
4. They are a fruit with protein!
3. It is easy to tell if it is ripe or not (should be not too squishy, not hard, if there is a stem flick it out – if what you see is green – you’re good to go!)
2. They make everything better (salad, tacos, pizza, pancakes, chocolate pudding – for real pinterest it– you name it)
1. They are the main ingredient in guacamole!!
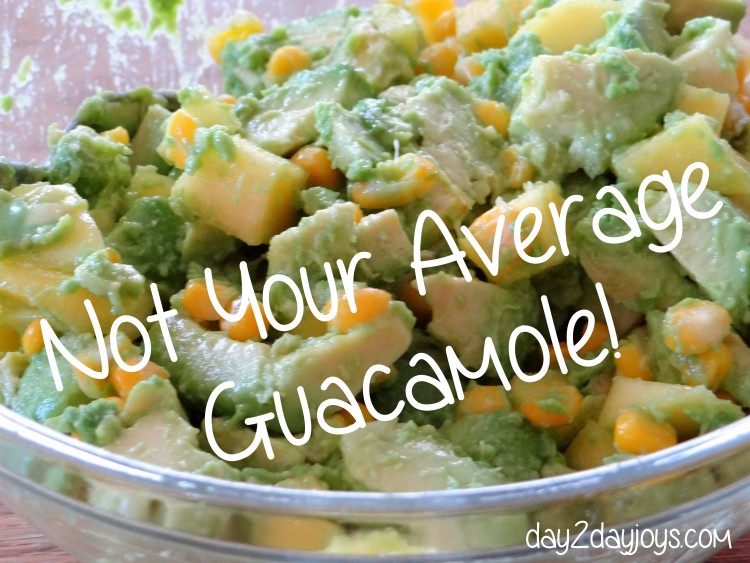
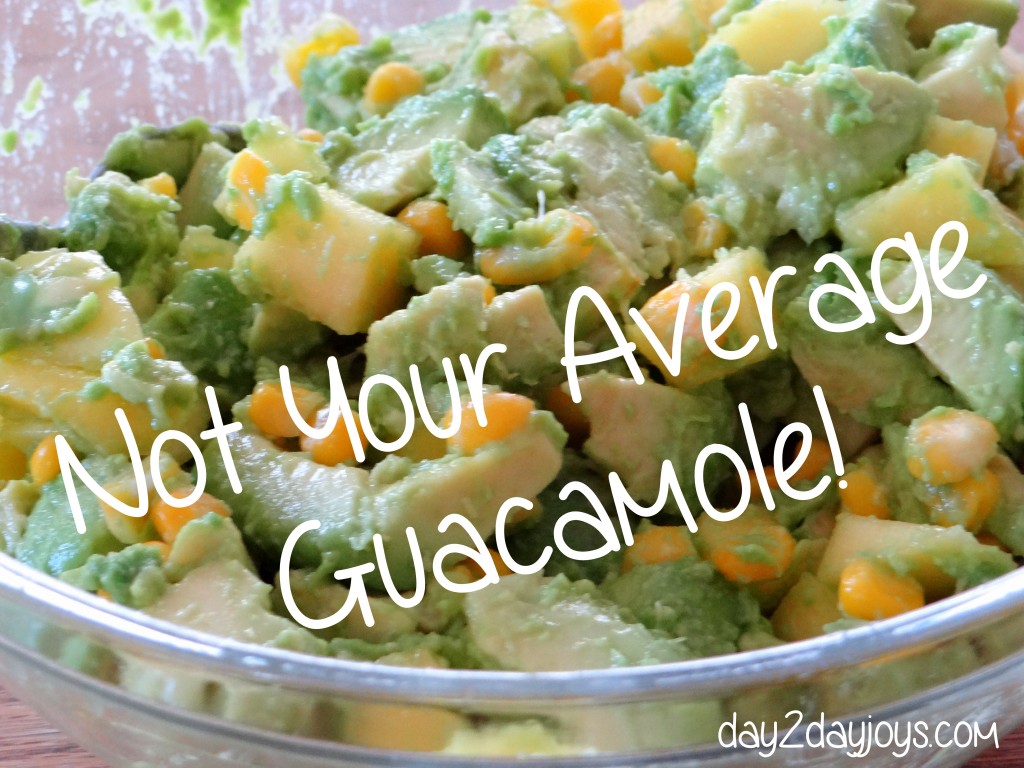
Which brings me to my next point, some NOT YOUR AVERAGE guacamole. I started messing around with guacamole, honestly because I am not a huge fan of a typical ingredient in there, cilantro. You either love it or you hate it and I don’t love it… So I started adding lots of things to it… fruit, veggies, and this combination is one of my favorites!
The Recipe – Not Your Average Guacamole:
What you need:
- 3 avocados
- 2 peeled and diced mangoes (I have also used peaches, SO good too, use what’s in season)
- 1 cup of fresh, off the cob, corn (it’s the season!! just hold the corn upright and cut the corn off, you’re ready to go!)
- 3 limes, the zest and the juice
- (optional: 1 diced Spanish onion)
- Salt and Pepper
What to do:
Cut avocados around, remove the pit. I find it’s easier to cut them up while they are still in the skin, and then use a spoon to scoop out the already cut fruit. Once it is all in a bowl, gently mash it to your desired consistency. Honestly sometimes we eat this like fruit salad – so we leave it a little chunky. Dice up your mangoes and add them in with your corn. Add zest and lime juice, salt and pepper. Stir and enjoy with chips or just as a meal on its own. We LOVE it and I hope you do too!! We served it as an appetizer at a party and it was a huge hit!
Do you like to mess with tradition or are you a guacamole purist? I love adding tomatoes, peaches, pineapples, whatever is in season and in my fridge… what do you add?
The post Not Your Average Guacamole appeared first on Day2Day Joys.
]]>The post Jazz Up Your Summer BBQ Menu With Real Food Recipes appeared first on Day2Day Joys.
]]>
Written by Kari @ Living Strong, Health and Wellness, Contributing Writer
With summer in full swing and the Fourth of July right around the corner, we all know that this means a lot of picnics, bbq’s and get togethers are on the calendar. This also means that this will involve a lot of, you guessed it, food!
Is it possible to eat healthy during all these summer festivities? Yes, yes and yes! Eating healthy doesn’t mean that these celebrations have to be boring! In fact, I believe that you can have even better tasting food when you choose real foods prepared properly and with love! Nothing off the grocery store shelf can hold a candle to the greatness of real food!
A couple months ago I released my first cookbook that addresses the reality and simplicity of delicious and healthy food! On my journey to live a healthier lifestyle, I was finding that eating healthy usually meant bland, boring and just plain not good! My family felt the same! I knew that real food could taste amazing, be nourishing and keep you satisfied, so I went to work creating, experimenting and indulging.
Below are two wonderful recipes that can be found in my cookbook that you can incorporate into your summer celebrations! Kari’s Restaurant Style Salsa – to go with those big bowls of tortilla chips and Easy Peasy Peanut Butter Drops for a protein packed sweet treat. I know you will enjoy these real food treats and feel good knowing that you are feeding your family foods that will not harm them.
What You’ll Need:
- 1 can (28 ounce) whole tomatoes, with juice (I use Muir Glen Organic Fire Roasted Tomatoes
)
- 1 can (28 ounce) diced tomatoes with green chilies
- 1/4 cup yellow onion, chopped
- 2 to 3 cloves of garlic
- 1 teaspoon, unrefined sugar (cane, sucanat, coconut) or honey
- 1/2 teaspoon sea salt
- 1/2 teaspoon ground cumin
- 1 cup fresh cilantro
- 2 to 3 tablespoons lime juice (from the actual lime is best, if they aren’t in season, use lime juice)
- 2 small cans diced chilies (hot if you like the zing, otherwise use mild)
- 1 tablespoon diced jalapenos (add these very last to make the salsa more hot) (optional)
- 1/2 to 1 smoked chili pepper (optional – these add zing too)
What You’ll Do:
- Pour one can of the tomatoes in the blender, add the onion, garlic, sugar, sea salt and cumin.
- Blend until smooth.
- Pour this into a large mixing bowl.
- Now, pour the other can of tomatoes in the blender and add the cilantro, lime juice, diced chilies and jalapenos.
- Blend until smooth.
- Add this into the bowl with the other half of the salsa.
- Mix well with a bamboo spoon until combined thoroughly.
- Now it’s taste testing time. Grab some chips and and test it out. Does it need more heat? Add the smoked chili pepper. A little more cumin? Lime juice? This is your time to get creative and create a taste that you and your whole family will love.
- If you need to add more ingredients, scoop a couple cups of salsa back into the blender, add the extra ingredients, blend and pour back into the bowl. Mix again and test again.
- Store in glass jars – this typically makes 2 quarts of salsa.
- Refrigerate. Over the course of a couple days, the flavors will have time to mesh together and you’ll get a wonderful, amazing and fresh salsa!
Easy Peasy Peanut Butter Drops
(Packed with Protein and Energy)
What You’ll Need:
- 1/2 cup natural peanut butter (or another nut butter of choice)
- 1/2 cup raw honey
- 1/2-1 cup unsweetened, finely shredded coconut
- 1/4 –1/3 cup mini dark chocolate chips
- Sucanat (unrefined sugar) for rolling the drops
What You’ll Do:
- In a medium size bowl, mix the peanut butter and honey until combined thoroughly.
- Add the chocolate chips. You can add more or less according to your taste (I always add the larger amount).
- Add the coconut in 1/4 cup amounts until the consistency reaches a thick, yet semi-sticky state.
- You don’t want it so sticky that you can’t roll it, but you don’t want it so dry that it wont hold together. Find the happy medium.
- Once you are able to roll them and they still have some stickiness to them, roll into balls and then roll in the sucanat.
- Place on wax or parchment paper on a baking sheet or plate.
- Refrigerate for a while so they can harden up a bit, transfer to a glass jar and keep in the fridge.
I hope you have a wonderful and amazing summer, making time to enjoy family, friends and delicious food. Take time to cherish these moments and be thankful for the many blessings that God has poured out upon our lives!
**note from Rachel: Make sure you check out Kari’s new cookbook Real Food. Real Kitchen. So Good.: Health Made Easy. It’s actually on sale on amazon right now!

What is your favorite summer dish that brings a smile to your face and everyone who tries it?
The post Jazz Up Your Summer BBQ Menu With Real Food Recipes appeared first on Day2Day Joys.
]]>The post Best of 2013 {Snacks} appeared first on Day2Day Joys.
]]>But before I even got pregnant, almost a year ago I shared with you about an Easy To-Go Healthy Snack Mix. We had been working on snacks in our family and still are somewhat. We want our kiddos to be eating their meal at mealtime so we have slowed down on the snacking in between meals.
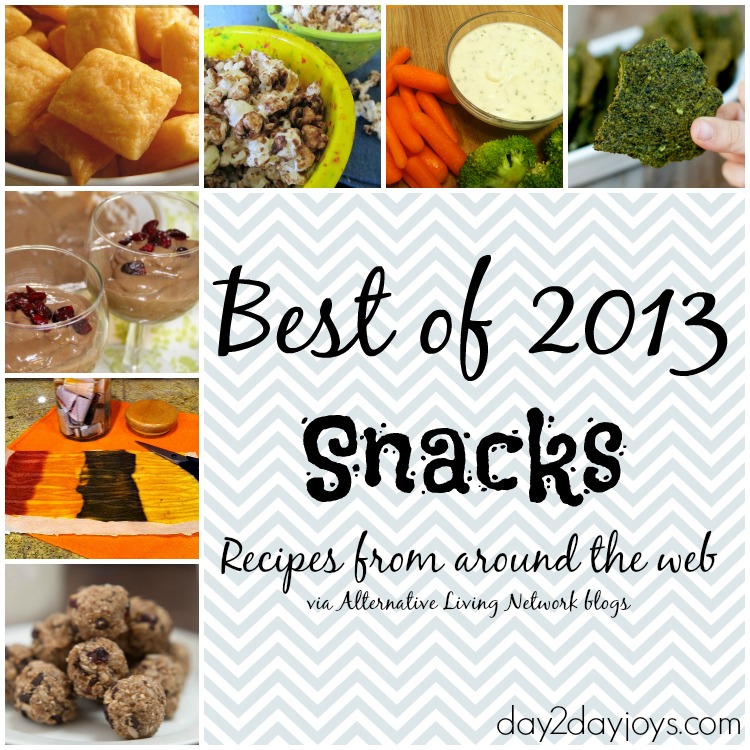
Even if you are in the same boat, wanting to cut back or limit snacks there are still some healthy choices to choose as snacks. Take a look at this list compiled from Mama’s from the Alternative Living Network.
2013 Best Snacks from Natural Mama’s:
Sweet Snacks
Oatmeal Chocolate Cookie Bites
Fruit Sweetened Chocolate Popcorn
Crackers & Chips
Fruits & Veggies

Find this Easy To-Go Snack Mix here!
Another recipe you might like is an oldy but goody from 2012: Homemade Ranch. Great with some veggies for an afternoon snack.
Check out all the other ‘Best of 2013’ posts:
Best Homemade Beauty Recipes on Your Thriving Family
Best Pregnancy and Birth Tips on Growing Slower
Best Pregnancy, Postpartum and Breastfeeding Tips on Feed Me Mama
Best Salads on Richly Rooted
Best Soups on Your Thriving Family
Best Homemade Bread Recipes on The Entwife’s Journal
Best Main Dishes on Whole Intentions
Cultured Food and Beverages on Nourishing Faith and Family
What was the BEST healthy recipe you tried in 2013?
The post Best of 2013 {Snacks} appeared first on Day2Day Joys.
]]>The post How to Make a Green Smoothie appeared first on Day2Day Joys.
]]>
Written by Liz, Contributing Writer
Leafy greens are an important part of a balanced diet. They are a strong source of vital nutrients including iron, calcium, potassium, vitamin K, and beta-carotene. They are especially important for women, because we are more susceptible to anemia and osteoporosis – diseases resulting from iron deficiency and calcium deficiency, respectively.
The USDA recommends we all get at least 3 cups of leafy greens per week…and I don’t know about you, but they aren’t my favorite things to eat…so I struggle to do that! (source)
One easy way to get your green goodness in is to make green smoothies. Before you get all grossed out, I promise they are YUMMY! I have them in the morning and sometimes for snacks, and believe me, I wouldn’t drink them if I didn’t like them! They are easy to make and easy to drink – a win-win situation, right?
At a nutritional seminar I attended about a year ago, the speaker said, “If you want to change your life tomorrow, drink green smoothies (source).” I have been making them ever since then and she was right – I feel so much better!
There are a few main components to a green smoothie, and a couple optional ones. They are very versatile, and you can put in whatever you want to suit your taste buds.
Here is what you need:
Greens:
You’ll want a heaping handful or two of leafy greens like kale, spinach, or chard. I usually use kale because it’s a superfood and I don’t like to eat, but I like to drink it.
Fruit:
This is what makes the smoothie naturally sweet and delicious. Really anything goes here – an apple, a half a mango and a banana, a pear, a handful of blueberries or even an avocado – whatever! Just don’t put in too much fruit at one time to avoid sugar overload – a little goes a long way!
Liquid:
You can use juice, milk, water, tea, or even whey. Throw in anywhere from a half a cup to two cups, depending on how thick or watery you want it to be.
Optional probiotics:
Kefir and yogurt are great additions to any smoothie. Probiotics are also a beneficial part of a healthy diet because they colonize your body with good bacteria, and this may be a good way for you to get them in too. A half a cup of either one is good.
Optional extras:
There are so many extras you can throw in, like coconut oil, bee pollen, spirulina, chia seeds, organic protein powder, raw honey, nuts/nut butter, ice, or whatever else your brain can conjure up. The sky is the limit, girl!
The instructions are easy: blend until smooth!
Ladies, feed these things to your kids and hubby, because they will like them too, and they need those nutrients. Your little ones will have no idea it’s good for them!
**Note from Rachel: Don’t forget to subscribe via email to get your free copy of Spring into Smoothies all Summer Long, where you’ll find lots of great smoothie recipes!
Have you ever made a green smoothie? What is your favorite recipe?
The post How to Make a Green Smoothie appeared first on Day2Day Joys.
]]>
