The post Christmas Wreath Card Display appeared first on Day2Day Joys.
]]>
Written by Kari, Contributing Writer
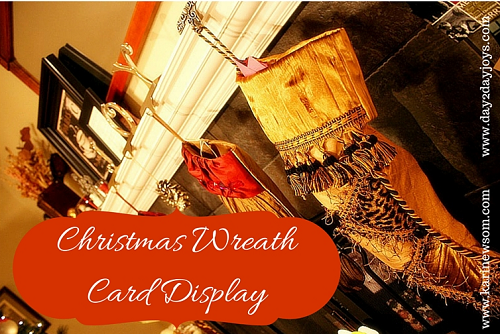
I know there are hundreds of ways to display those beautiful Christmas cards we get each year. I’ve done most of them over the course of my beautiful life. Everything form hanging them from decorative ribbon to placing them in a crystal bowl. A couple years ago I was reading Living Magazine and found a quick and inexpensive way to display cards. I needed a change and this was perfect.
A simple wooden wreath.
Well, more like an embroidery hoop with mini-clothespins, but like I said, a simple wooden wreath. It worked perfect.
What does this have to do with health, which is what I usually write about? Nothing. Not only am I passionate about teaching and educating people on health – I enjoy being crafty too! So, this is just a look at another side of me!
It cost less than $10 for the supplies and didn’t take long at all to make. The glue drying is the most time consuming part of it all. This is when you get to play with your kids, watch Netflix or eat cookies. Or all three. You can choose the size and number of hoops you’ll need depending on how many cards you usually get. I did one large and two medium. They really look beautiful once they fill up and make it so easy for everyone to scan and look at the cards when they are visiting your home.
Now, wouldn’t you say that these simple wooden wreaths make your own Christmas scene look so much better? I thought so! Now go make one for you!

Christmas Wreath Card Display
What You’ll Need:
- a couple needlework/embroidery hoops – I did one large and 2 medium sizes
- a couple packages of mini-clothespins
- craft glue
- ribbon for hanging
What You’ll Need To Do
- I glued the mini clothespins every two inches around the hoop. I alternated the pins – one facing out, one facing in.
- let them dry overnight (simply because I got side tracked and didn’t get back to it the same day).
- Once dry, I attached the ribbon and hung it on display.
Like I said, when they are completely filled, they look really pretty – like a big wheel of cards. It’s nice to be able to see them all and be reminded how blessed we are to know so many wonderful and loving people – which always makes my heart happy.
What is your favorite way to display your Christmas cards?
The post Christmas Wreath Card Display appeared first on Day2Day Joys.
]]>The post 1st Birthday Canvas appeared first on Day2Day Joys.
]]>
I absolutely love getting crafty.
Between part-time homeschooling, activities, and the regular day to day tasks I feel as though getting crafty has been put on the back burner. I have been more focused on getting the chores done, working around naptime, and so much more that I have forgotten to have a little fun.
So my mission as we enter Spring and on into Summer, is to have more fun!
And getting crafty is so much fun to me and my kids love it as well. So I wanted to introduce getting a little (age-appropriate) crafty with my newly one year old daughter London.
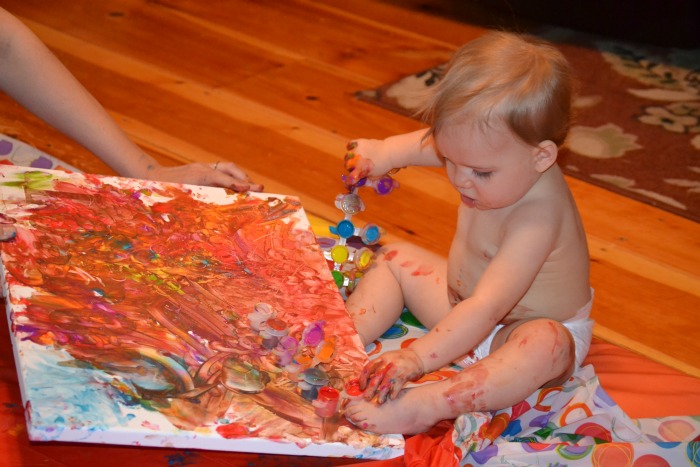
We had a Rainbow themed birthday party and she painted this canvas at her celebration while older kids got to paint a much smaller canvas of their own. There are all kinds of ways to have fun with canvases!
DIY 1st Birthday Canvas:
What you need:
- a canvas size of your choice (we used 12″x16″)
- non-toxic paint
- sticker letters like these
, I got them from Hobby Lobby with the 40% off coupon
- iridescent paint
used as a top coat
- sponge paint brush
What to do:
- Gather supplies
- Adhere name using letter stickers
- Depending on where your baby is going to paint, put a disposable table cloth or garbage bag down.
- Put baby on table cloth stripped down to diaper only, unless you don’t mind the mess
- Put dabs of paint all over the canvas and rub baby’s hand so she knows what to do
- Have lots of fun watching while taking lots of pictures
- Give baby a bath and let canvas dry overnight
- Remove letters
- Use the sponge brush to paint a light coating of the iridescent paint
to add a nice shimmer, let dry
- Display in room as a fun reminder of baby’s 1st birthday!
I cannot believe our baby girl is one, time goes by so fast doesn’t it? This 1st birthday canvas is going to be something we’ll cherish for a long time and we’ll get to tell her that she made it at her 1st birthday one day… I think she’ll love that!
*This post contains affiliate links
What kinds of things do you (or did you) do to make your baby’s 1st birthday memorable?
The post 1st Birthday Canvas appeared first on Day2Day Joys.
]]>The post A Magical Frozen Birthday Party {Tips and Ideas} appeared first on Day2Day Joys.
]]>I guess it’s because of the catchy “Let it Go” song in combination of a story about sisters that caught her heart. So I have been collecting ideas for a while now but of course didn’t have anything ready until less than a week before the party. (Let the procrastinators band together)
 But really, it doesn’t have to be extremely elaborate or cost a lot to have a fun FROZEN party.
My tip: DO NOT try to reinvent the wheel, there are soooooo many ideas out there, and that’s exactly what they are for, for you me to USE!! 
I thought I’d share with you what we used to make our daughter Julia’s 6th birthday party magical!
The Invitation
I have always loved online invites.
I usually use evite but this time I used punchbowl since they had a Frozen themed invite. It’s really easy to use, just type in the info you want. And it’s free and easy to keep up with all the RSVP’s. Plus you can email right through the site to all the attendees for any updates or even reminders.
The Schedule
I always write up a tentative itinerary to use as a guide, it usually doesn’t go exactly in the order I initially come up with, but it helps me to remember everything we need to do.
The plan went a little something like this:
- 2:30- When guests arrive, I had planed to do this little scavenger hunt (but before the party started, I ran out of time getting everything ready). Instead, kids ate some snacks, hung out and started on the craft.
- 3:00- The special guests arrive, meet & greet, a story, games and photo ops. (you’ll read more under other sections below)
- 4:00- Serve the cake and open presents, enjoy time together
- 4:30- Birthday party is over, clean up
The Decorations
I think simple is better AND a lot cheaper. When I was searching, I thought easy ideas like paper chains and coffee filter snow flakes would be the way to go.
The night before the party, my kids had fun making some of the snowflakes.
To save time, I bought one 2-pack of white streamers to use instead of paper chains. And I got a few frozen- themed balloons! 
I used blue plastic table clothes, metallic tissue paper, and snowflake doilies for table decor. Believe it or not, I spent about $20 on all of it and got all the decorations from the dollar store (yes, even the frozen balloons), which included the tableware supplies for eating.
The exception, the silver fringe curtain some photo ops. (From Oriental Trading)
The Craft
I have always loved to include making a craft instead of giving away a party favor- which quite honestly just gets lost or goes in the trash soon after.
At least a craft can be kept for a little while with special memories of making it.
I found these snowflake necklaces on Oriental Trading and I thought all the kids would love to make their own. We had a station set up and a couple different times during the party, two kids at a time got to make them.
My husband and another dad helped in the beginning then later Elsa and Anna. I think the kids thought it was neat to work with the queen and princess.
The Food
At kids’ parties, I think it’s important to have some food, whether it’s a full meal or snacks- that’s up to you. We served chili at my son’s Lego party, and everyone loved it. This time, since the party was in the afternoon, I decided a few snacks would be perfect.
There are so many free printables offered on several sites to create fun food scape. I didn’t have any card stock so I just printed the ones I chose out, then, laminated them. (I use my laminator for certain things we do for homeschool, so I quickly pulled it out and used it, it only took about 5 minutes)
There are a kazillion different food ideas to choose from but here’s what we had:
- Olaf noses- carrots with homemade ranch
- Arendelle ginger cookies
- Coronation celery and peanut butter
- Sven’s popcorn
- Kristoff’s pretzels
- Frozen Hearts- white chocolate covered strawberries
- Olaf’s summer lemonade
**I used these Frozen labels from Posh Tart Parties. All of the containers either came from the dollar store or came from my kitchen cabinets.
The Fun
What would a party be without fun?
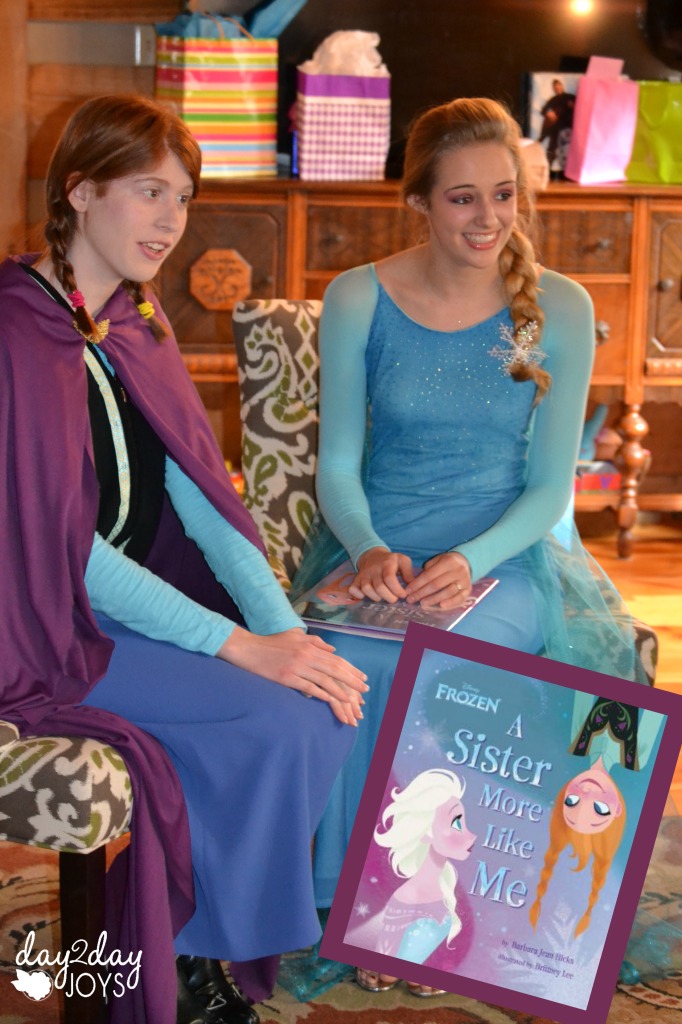
Besides all the decorations, the craft, the food and games, there was an even BETTER idea! Two high school gals dressed up as Elsa & Anna…… score!!!
I had seen a post on one of the local garage sale groups on facebook from a mom whose daughter and her friend were earning money by coming as the characters and participating in all the fun. I didn’t know what to expect but it ending up being absolutely fabulous!
The plan kind of unfolded as the party got started but everything went smoothly. I’ll tell ya a little bit about it:
When all of Julia’s friends arrived, they got their snack and a couple kids started on the craft. I had asked a mom to let me know when the special guests arrived. Once they did, I had the kids finish up their snacks.
Elsa and Anna rang the door bell and I told Julia to go see who is was. When she looked out the door, she was in shock. She waved her hand for me to come. I went over and said excitingly , “Wow, Elsa and Anna have come to see you and celebrate your birthday!” The gals came in and ALL the kids were in amazement.
Queen Elsa and princess Anna read the Frozen inspired book A Sister more like Me. Each gal read her part. A few of us moms couldn’t believe how quiet all the kids were.
Once the book was read, the gals talked with the kids, then it was time for some photo ops. It was funny because when I asked who wants to take a picture with the princesses, one of the little boys raised his hand and he was first in line lol.
After it was time for the games (you can read in games section) then finishing up the craft. And of course you can’t have a frozen party without singing “Let it Go”.
Lastly, we sang Happy Birthday to my princess Julia, enjoyed cupcakes and then she opened her gifts. Before we knew it, it was time for Queen Elsa and Anna to go. We walked them out and waved goodbye. It was so, soooo much fun.
And I’ll take it as a huge compliment, when Elsa’s mom, who accompanied the teen girls told me before heading out, “this was the most organized party I have ever been to.” If you know me personally, you know I am last minute type of person, so that was such a nice compliment to me.
The Games
We played two games. Limbo and Toilet Paper Olaf.
For limbo, I simply unscrewed the broom from the stick and tied on yellow streamers. Elsa and Anna held the stick, the music played was “In Summer” from the Frozen soundtrack and went until there was a winner.
Next we played Toilet Paper Olaf.
Toilet Paper Olaf Game
Supplies:
For each pair or team, you’ll need a bin with a roll of toilet paper, a scarf, a cap or hat and 3 paper buttons with tape already attached, taped to bin. *Optional- paper carrot, also with tape on backside.
How to Play:
- Line up kids, tell every other kid to come on one side, then to find a partner. (You can choose teams how ever you would like to, that’s what I did)
- Then explain to the kids they are to make a toilet paper snowman/Olaf and must use things provided, be sure to show the supplies (I would not recommend telling them they have to use the whole roll of toilet paper)
- Choose a judge
- Give them a time limit. I played “Do you want to build a Snowman” from the Frozen soundtrack twice
- Once song is over, the judge can choose a winning team
- Have fun!
Both games were fun and easy. I had purchased a few $1 items from Target for the winners.
The Cake
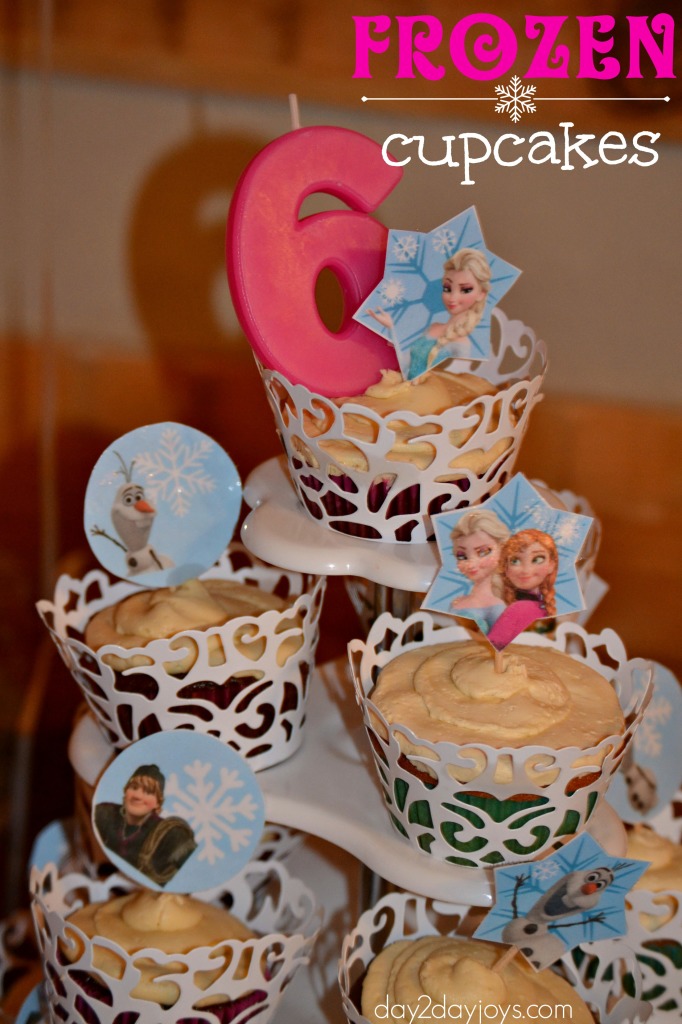
As always, the cake, or shall I say cupcakes? Y’all, cupcakes are so easy. And I have used the same cupcake stand I got at hobby lobby with the 40% off coupon for years and years.
I ordered the pictured white cupcake wraps from Oriental Trading and used these and these free printables for the toppers. (I printed them out, laminated them and taped them to toothpicks)
I used this natural cake mix (in the chocolate and vanilla flavors) and my friend made a delicious vanilla butter cream frosting made with Kerrygold Pure Butter… YUM!
.

Side note: I am ever thankful for my awesome friend Christina who came to help me out!! She is SUCH a blessing and has such a servant’s heart!!
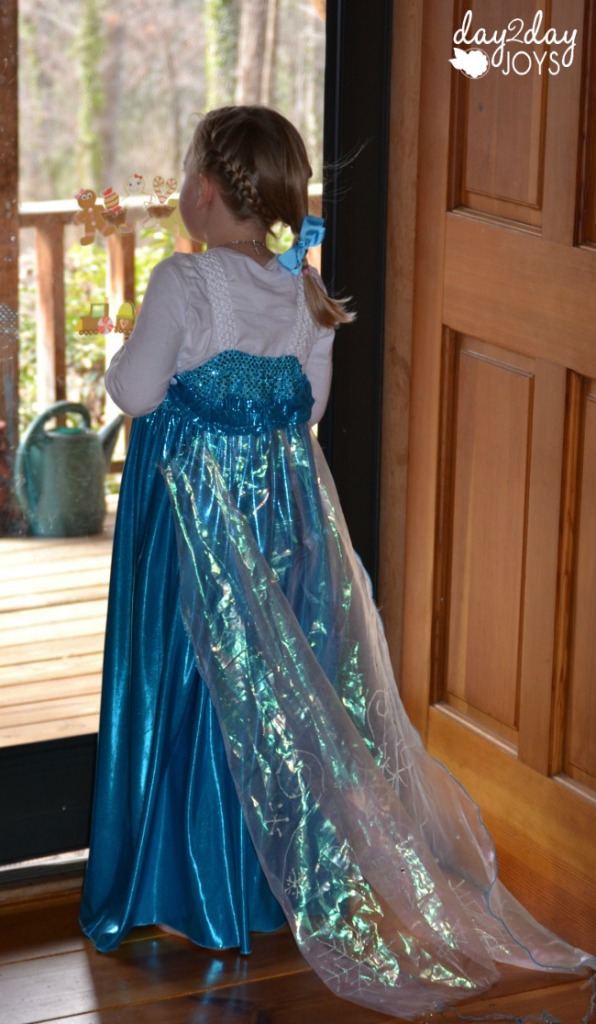
The Elsa Dress
On the invitation email, I had invited all the friends to come dressed as a princess (or superhero for the boys) and a lot of the girls did come dressed in you guessed it, Elsa.
And of course Julia wanted an Elsa dress too.
My mom made this beautiful one and she sells them on her Etsy shop.
To end this Magical Frozen Birthday party post I have a question for you… Would you like to win an Elsa dress for your little girl?!? You have a chance to win one because she is actually doing a giveaway. Go here for all the details!
It was a MAGICAL party! Julia absolutely loved it!
Some more resources:
- For some extra fun, check out this Frozen Slime recipe
- These Popsicle sticks snowflakes are a fun decoration
- Here are some fun Frozen photo booth props
- I mentioned Oriental trading a few times, they always offer Free Shipping on Orders Over $49! Use Code: OTC757
- Amazon has tons of Frozen party supplies
and Frozen gift ideas
*post contains affiliate links, see disclosure here
What are your best birthday party tips? Do you have a Frozen fan in your house?
The post A Magical Frozen Birthday Party {Tips and Ideas} appeared first on Day2Day Joys.
]]>The post Keeping the Holidays Simple appeared first on Day2Day Joys.
]]>
Written by Christy from Fresh Mix Momma, Contributing Writer
December is a busy time of year for everyone!
Thanksgiving just ended, Christmas is coming up and New Years is just around the corner.
With everything going on, it’s very easy to get caught up in all the hustle and bustle and lose sight of the fun and meaning of the Holidays.
Sometimes it’s just nice to be more low key and simple with Christmas to really enjoy the Holidays.
If you are looking for a more simple Christmas, try out a few of these ideas:
Make some homemade decorations
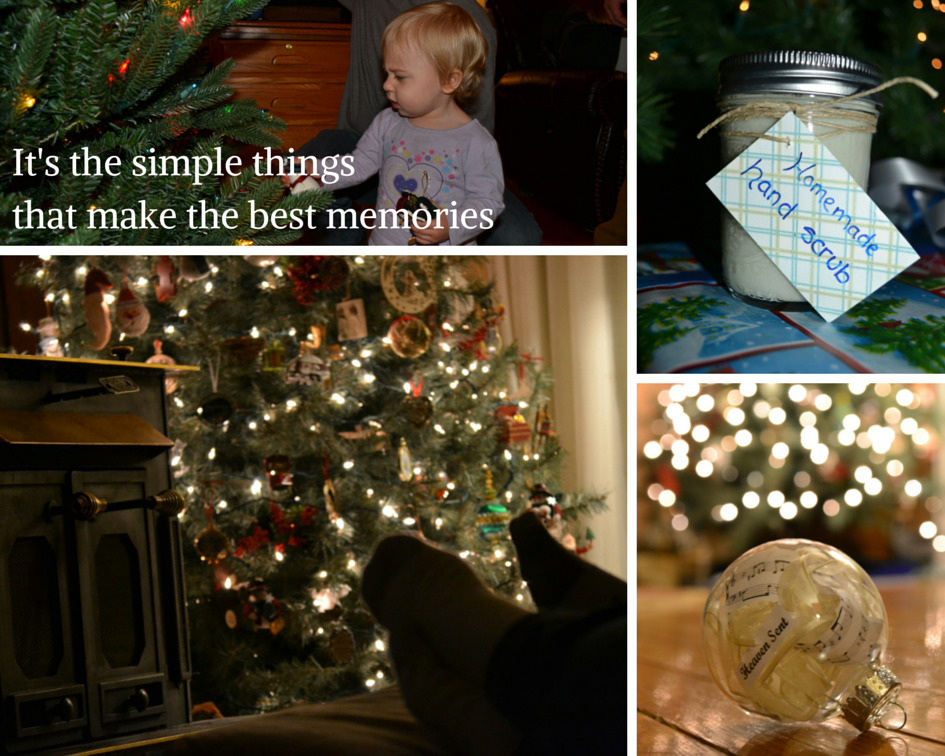
- Homemade ornaments
- Popcorn Garland
- Christmas Paintings
- Christmas Wreath
Have family nights
- Christmas movie theme night (example: give your kids a “train ticket” to watch “Polar Express” while having hot chocolate)
- Read Christmas stories next to the tree
- Pile in the car and check out neighborhood Christmas lights
- Cook dinner as a family
Make Homemade gifts
- Hand scrubs
- Custom sign
- Jewelry
- Meal in a jar
Start making your own traditions
- Yearly Christmas family photo
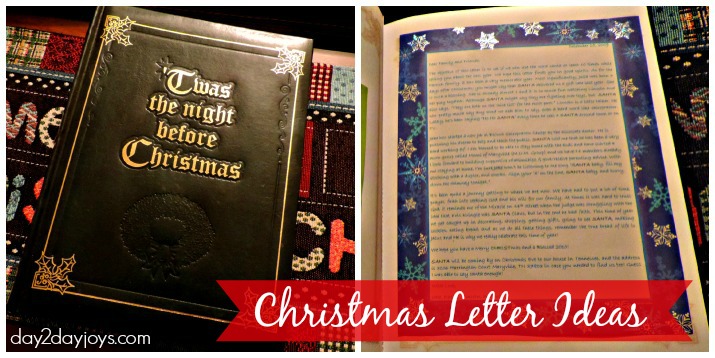
- Christmas Letter
- Thankful Jar
- Family dinner with game (like white elephant gifts)
- Cookie and Hot Chocolate Party
Remember that the Holidays don’t have to be packed full of so much stuff that it quickly passes you by. Slow down, take time to make memories and enjoy keeping the Holidays simple!
Do you have any family tradition for Christmas?
The post Keeping the Holidays Simple appeared first on Day2Day Joys.
]]>The post Eating Real Food on (Really Long) Road Trips appeared first on Day2Day Joys.
]]>
Written by Jenn @ A Simple Haven, Contributing Writer
This summer, my little family and I took a two and a half week road trip through Canada and Maine. We made several stops along the way; either in a hotel or a friend’s house for a night or for several days in a rental house.
We travel pretty regularly as a family but this was by far the longest we’ve been away from home and all of the conveniences home affords–especially in the kids and food departments.
Adventures in traveling with kids is a story for another day. Today’s topic is attempting to feed your family real food on the road.
Having spent a week in a beach house last year, I had learned a little about how to feed my fam decent stuff away from home. This year’s trip was way more challenging:
I had a kitchen to do some meal prep in, but not until about week into the trip. A few days were spent entirely on the road in rural Canada with few convenience meal prospects (the words “can we at least find a Taco Bell?” actually escaped my mouth). Other days were spent in cities eating out for every meal, the cost of which I was trying to offset with homemade stuff where I could.
The bottom line? Pack strategically and (outside of food sensitivities) lower your standards. And enjoy the ride.
Eating Real Food on the Road
1. Plan Ahead
I’m pretty plan-oriented in general, but trips and Christmastime are where my MBTI “J” comes out most. Make some lists, friend.
A month or two before your trip, start writing down all the food you think you’ll want to bring, buy, or make for the road.
My lists were divided into stuff for the car, perishables I’d want to cook with I had a kitchen, and non-perishables.
2. Buy Ahead
For me, one of the unforeseen costs of travel is always the snacky stuff for kids that I don’t usually buy. My kids’ fav are those organic baby food pouches. I know. They’re two and four and way beyond baby food. But they suck them down and I’m happy because they’re getting a modicum of veggies.
Downside? They ain’t cheap. So I hit up Costco before our trip and bought a bunch in bulk.
3. Pack Strategically
Depending on the length of your trip and the grocery situation at your destination, you’ll want to bring basics that might be hard to find (or crazy expensive) when you arrive.
For me, these were quality meats, cheese, milk/milk alternatives, good oils, and random favorites like real maple syrup and Ezekiel cinnamon raisin bread. I also packed stuff that would be annoying to have to buy/find at our destinations: a few spices and good coffee & tea.
The non-perishables all fit in a large canvas bag, no problem. The perishables required more attention; if I wanted the beef to last through our first week in hotels, I had to be diligent about keeping the cooler full of ice.
4. Make Ahead
One of the best ways to cut costs on the road–and eat decent stuff–is to make your own snacks. Some of my favorite road trip snacks to make are granola bars, homemade Larabars, muffins, and popcorn. Throw in some fruit or veggie sticks and a loaf of bread, a favorite nut butter, and raw honey to make sandwiches and you’re set.
5. Lower Your Standards
If you’re not the Type A type, forget I said anything. If the thought of feeding your kids Taco Bell makes you spasm, read on.
Barring food allergies or sensitivities, just relax. Yes, you want to feed your kids real food. But you also want to enjoy your vacation–so compromises will be necessary.
Over the course of our trip, my usually easy-going toddler started (publicly) screaming “yucky!!” to old stand-bys. In light of his sleep-deprivation and car-seat imprisonment, I decided not to die on the hill of food: he ate at least two meals consisting of little more than fries and ice cream.
I cringed, gave him an extra dose of cod liver oil, and reminded myself that we were in survival mode, not creating childhood habits.
What are your best tips for cooking/eating well while on vacation?
The post Eating Real Food on (Really Long) Road Trips appeared first on Day2Day Joys.
]]>The post 7 {Non- Sweet} Easter Basket Ideas appeared first on Day2Day Joys.
]]>
Each and every Easter we enjoy filling our kids’ baskets with goodies. We try to avoid sweets since they get plenty of those from school parties and family, and we just focus on non-sweet things. We already have some things on this list but I still think they are great ideas if you don’t have them yet.
7 {non- sweet} Easter Basket Ideas
1. The Jesus Calling Bible Storybook
We read a couple stories from the kids’ bible together almost every night. We have a couple different bibles since reading through them only takes about 4-6 weeks but our absolute favorite is the Jesus Calling Bible Storybook.
It has beautiful illustrations and each story ends with a scripture and a short narrative written as if Jesus is speaking directly to us.
2. A Kid’s Devotional
If you want to spend one on one time with your child or even time learning about God with all of your children, a kid’s devotional is the way to go.
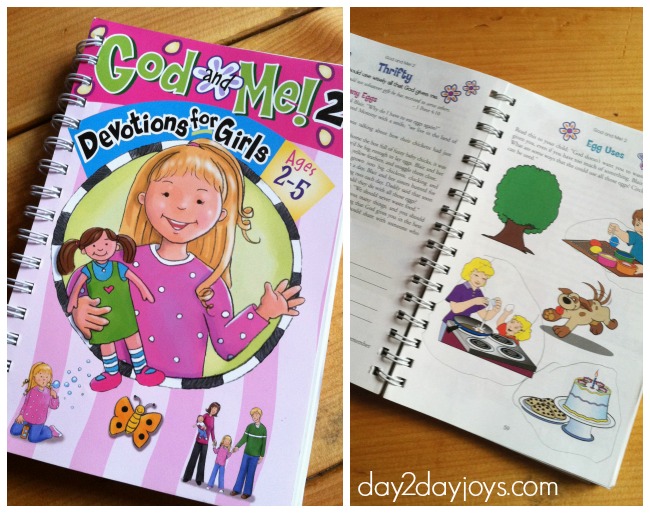
Seeing your kids grow closer to God helps us as parents as much as it does them. A great devotional I recently discovered is GOD AND ME, which has tons of activities to teach the word of God, that you do together. (You can search for different ages) Another great daily devotion is the 365 Devotions For Kids
.
3. A What’s in the Bible DVD
I have always loved kids videos that help teach bible stories at a level they can understand. The What’s in the Bible collection helps get kids involved. This series helps them to think critically and use song and comedy to help with memorization & learning stories.
4. A Personalized Gift
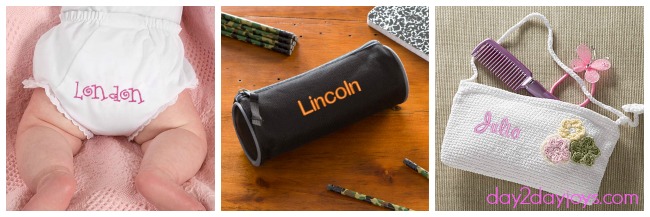
No matter what age you are, I think it’s always fun to give or even receive a personalized gift. Personalized gifts could mean all sorts of things but the ones I am talking about are ones that have a name, monogram or something specifically about the person on the item. This year I got each one of my kiddos a gift with their name embroidered on it.
Each of these Personalized Easter Basket Stuffers were under $20! and there are tons to choose from! They have a fast turnaround so you still have time to get your gifts to fill your Easter baskets, and they offer 100% satisfaction guarantee.
5. An Easter Book
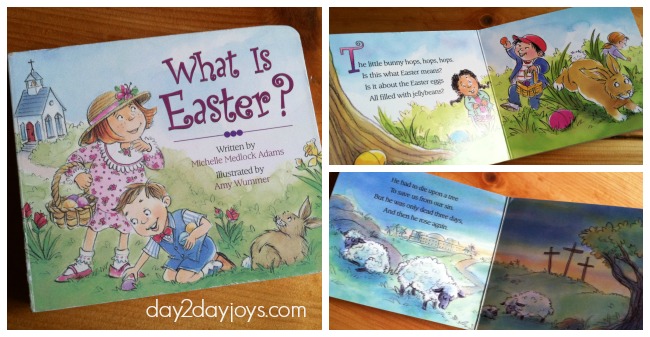
Teaching very young kids the true meaning of Easter can be hard, especially if you have an inquisitive child like my son. He wants to know every detail and now that he’s a little older I can go into further detail but when you have toddlers their understanding is limited so I suggest the What Is Easter? book.
This book is age-appropriate for teaching littles about Easter. A book for elementary aged kids I suggest is The Tale of Three Trees.
6. Knick Knacks from the $1 Store
All the items I’ve listed so far can be pricey, in fact the only ones we are getting this year are numbers 2 and 4, we already have compiled the other things throughout the years, on birthdays and for holiday gifts. You can find some great inexpensive things at your local dollar store.
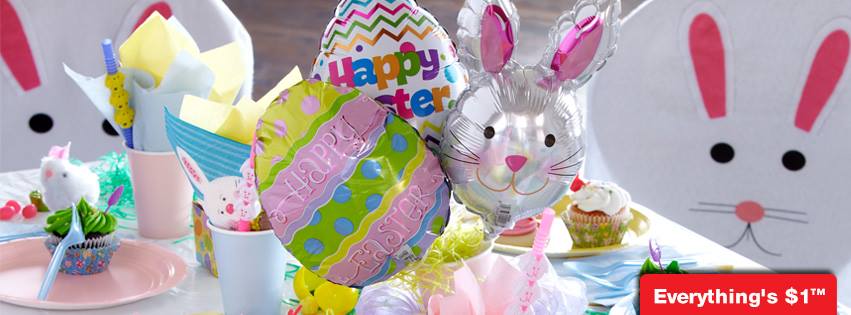
Here are some ideas:
- stuffed bunnies
- bubbles
- chalk
- stickers
- kid-sized garden tools
- tooth brushes
- hair bows
- coloring books
- puzzles
- …and so much more!
7. A Natural Lotion, Soap or Lip Balm
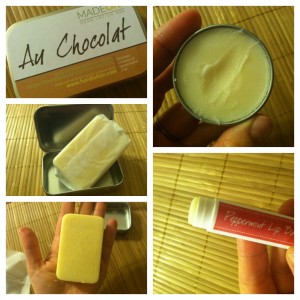 There are tons of brands to choose from but one of my favorites that is practically mess free is Made On skin care products. All of the products are in solid bar form that come in little tins- which is great for little kids (lip balms are in tubes).
The ingredients are so pure that you can eat em’ (if you really wanted to). Another great brand that I highly recommend is Peace and Carrots!
These are just some ideas I think would be great for filling baskets with meaningful items! You can look here and here for some more ideas and here for some healthy sweet ideas.
What kind of ideas do you have that aren’t sweets? What is the best Easter basket item you have bought for your kids/family?
The post 7 {Non- Sweet} Easter Basket Ideas appeared first on Day2Day Joys.
]]>
