


Written by Lisa @ This Pilgrim Life, Contributing Writer
Every fall we do the traditional things like go pick pumpkins, ooh and ahh over the leaves, read books about Johnny Appleseed, and (one of my personal favorites) make homemade apple cider.
Sure, it’s easy enough to simply purchase the glass jugs of cider from the grocery store. And we do that too.
But making cider at home is both easy and fun.
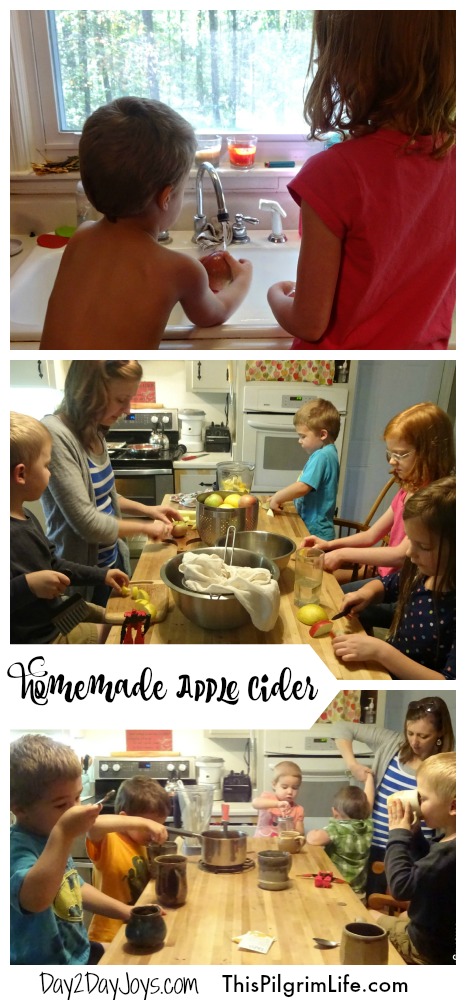
Last week one of my closest friends and her four children joined us for a day, no plans in particular other than catching up and enjoying each other’s company.
We all spent the day playing LEGOS, picnicking in the backyard, introducing friends to our mud kitchen, and gathering around the kitchen island to make apple cider. Oh, and talking all day the way you can only do with a kindred spirit.
The kids, ages 8 to 3, all pitched in to make the cider. They washed the apples, cut them into small chunks, and put them in the Vitamix. I added a small amount of water and then blended the apples on high for a minute. After straining the blended mixture to separate the juice from the pulp, the cider was done.
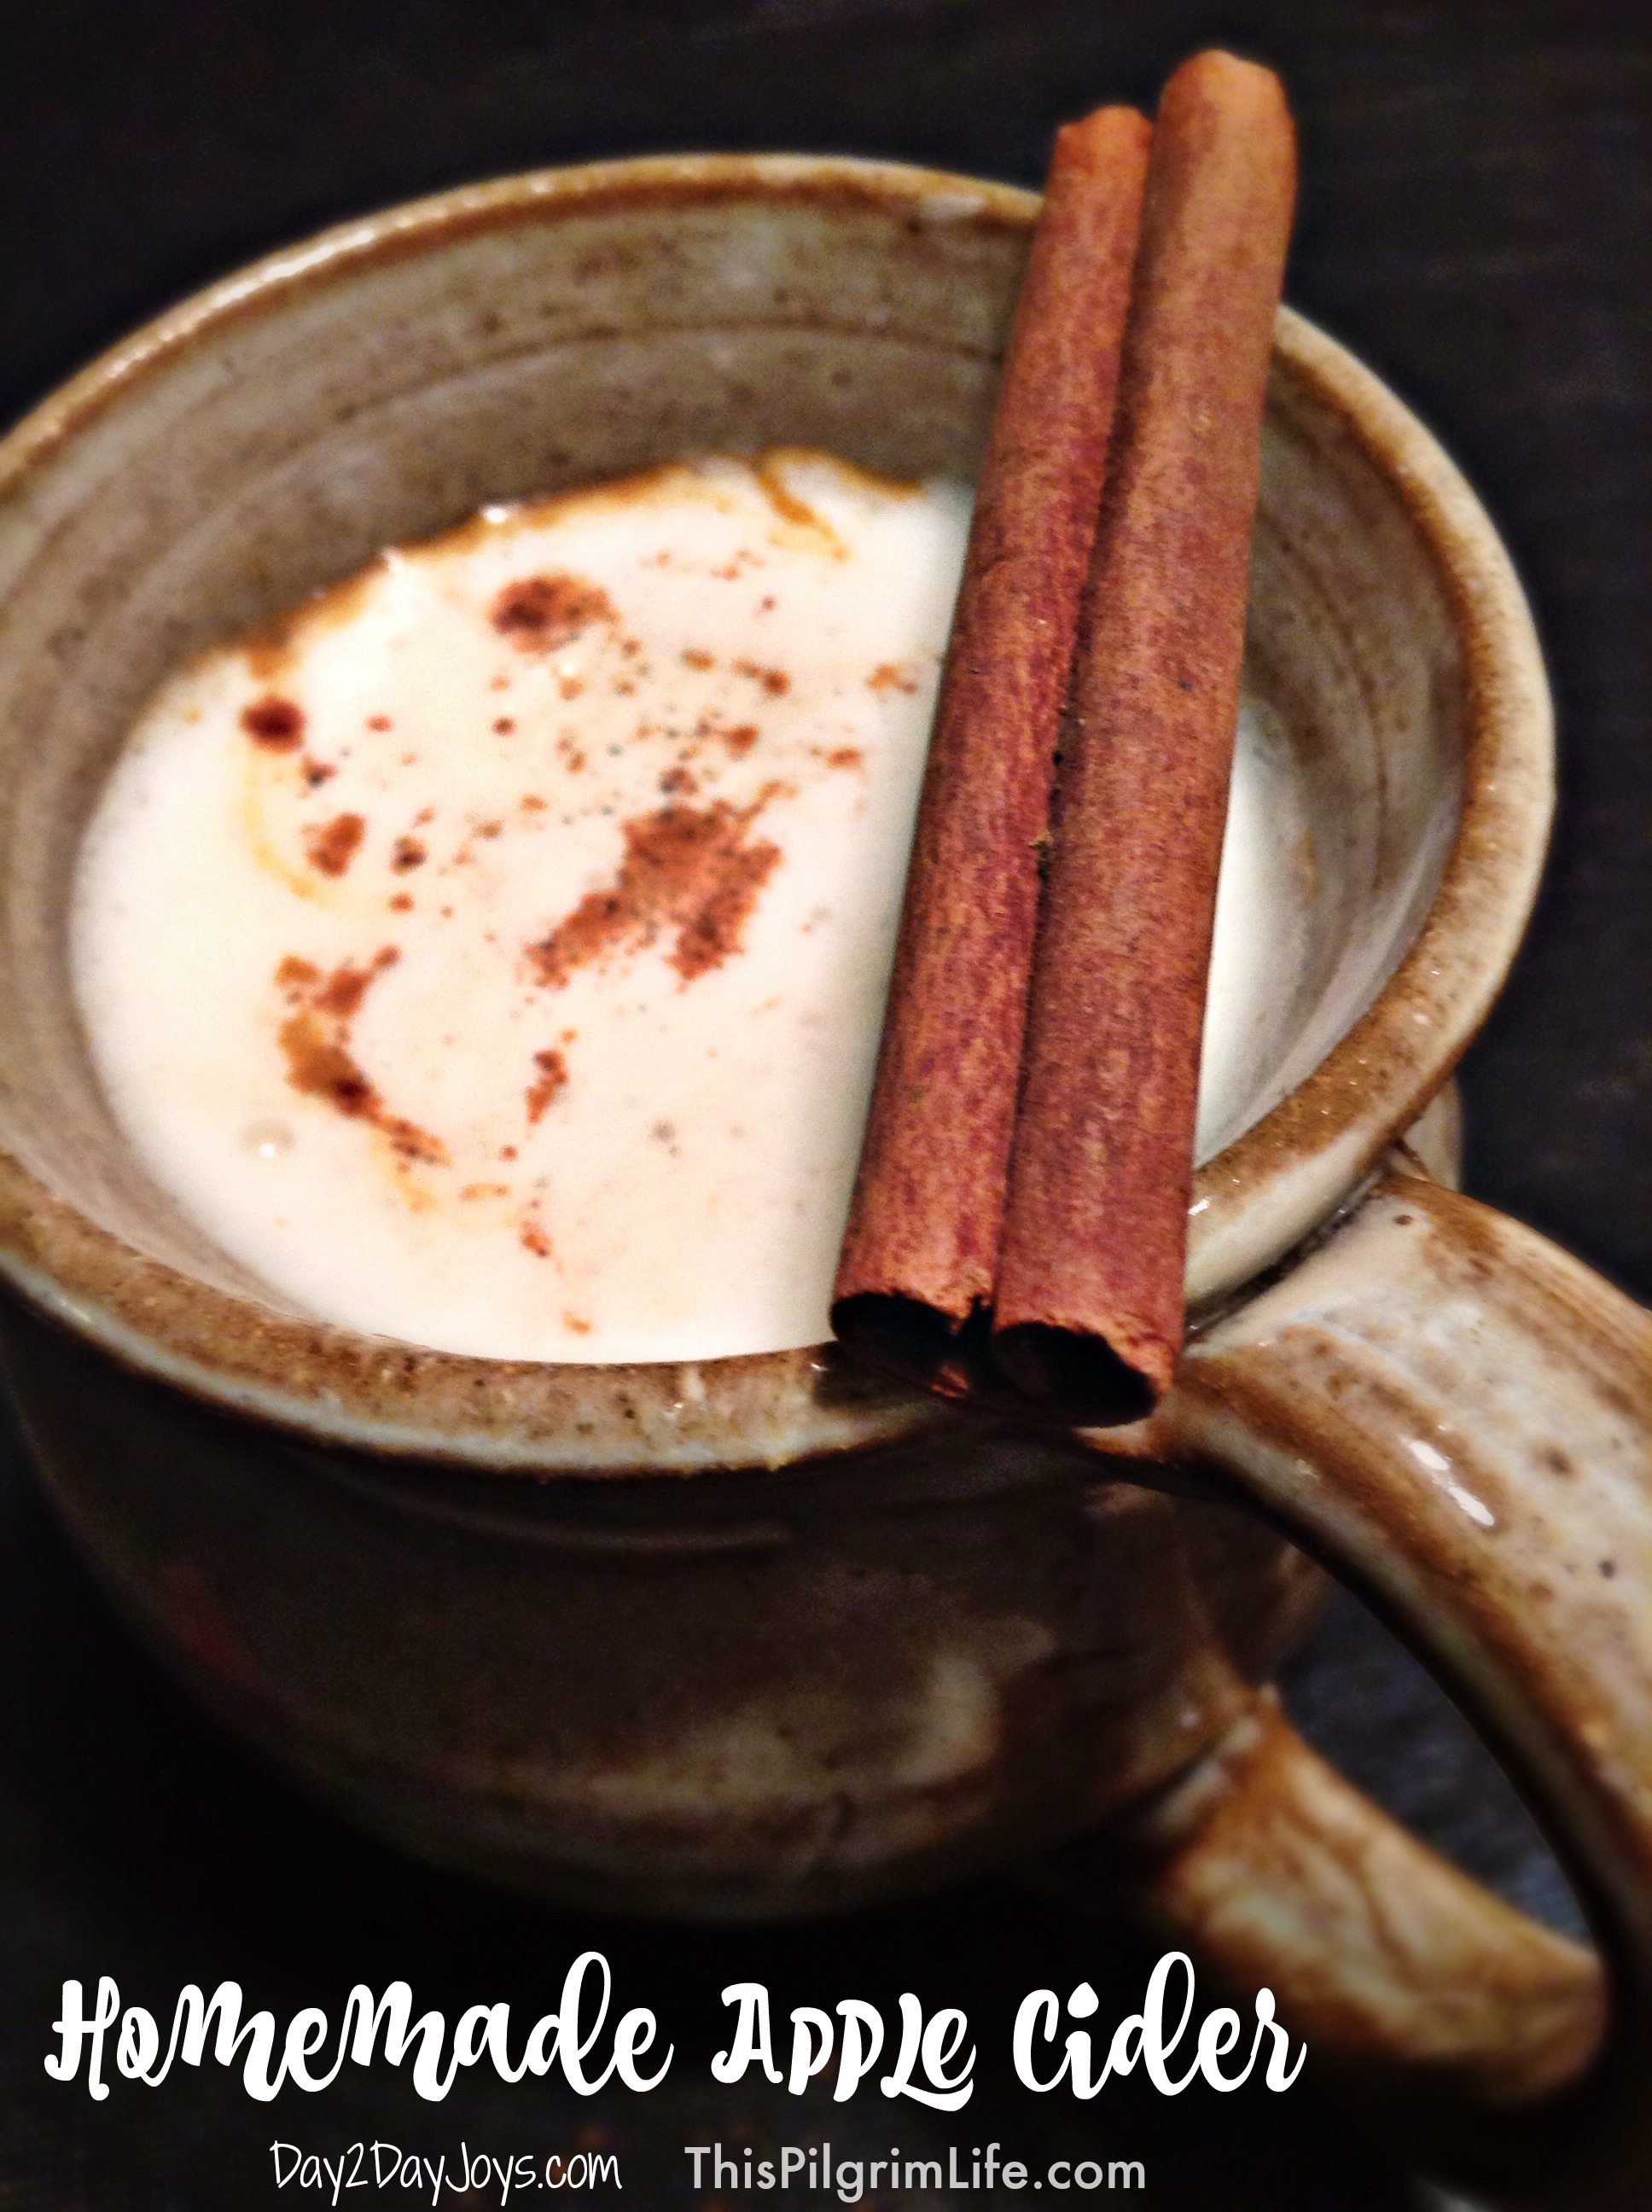
We put it to the kids whether they wanted to enjoy the apple cider chilled or warmed. They unanimously agreed– warm with whipped cream.
Traditions are one of my favorite things about the changing of the seasons. With each new season, there are new memories to be made and old memories to recall together. Even better when the traditions taste great and can be shared with friends!
Homemade Apple Cider in 5 Easy Steps
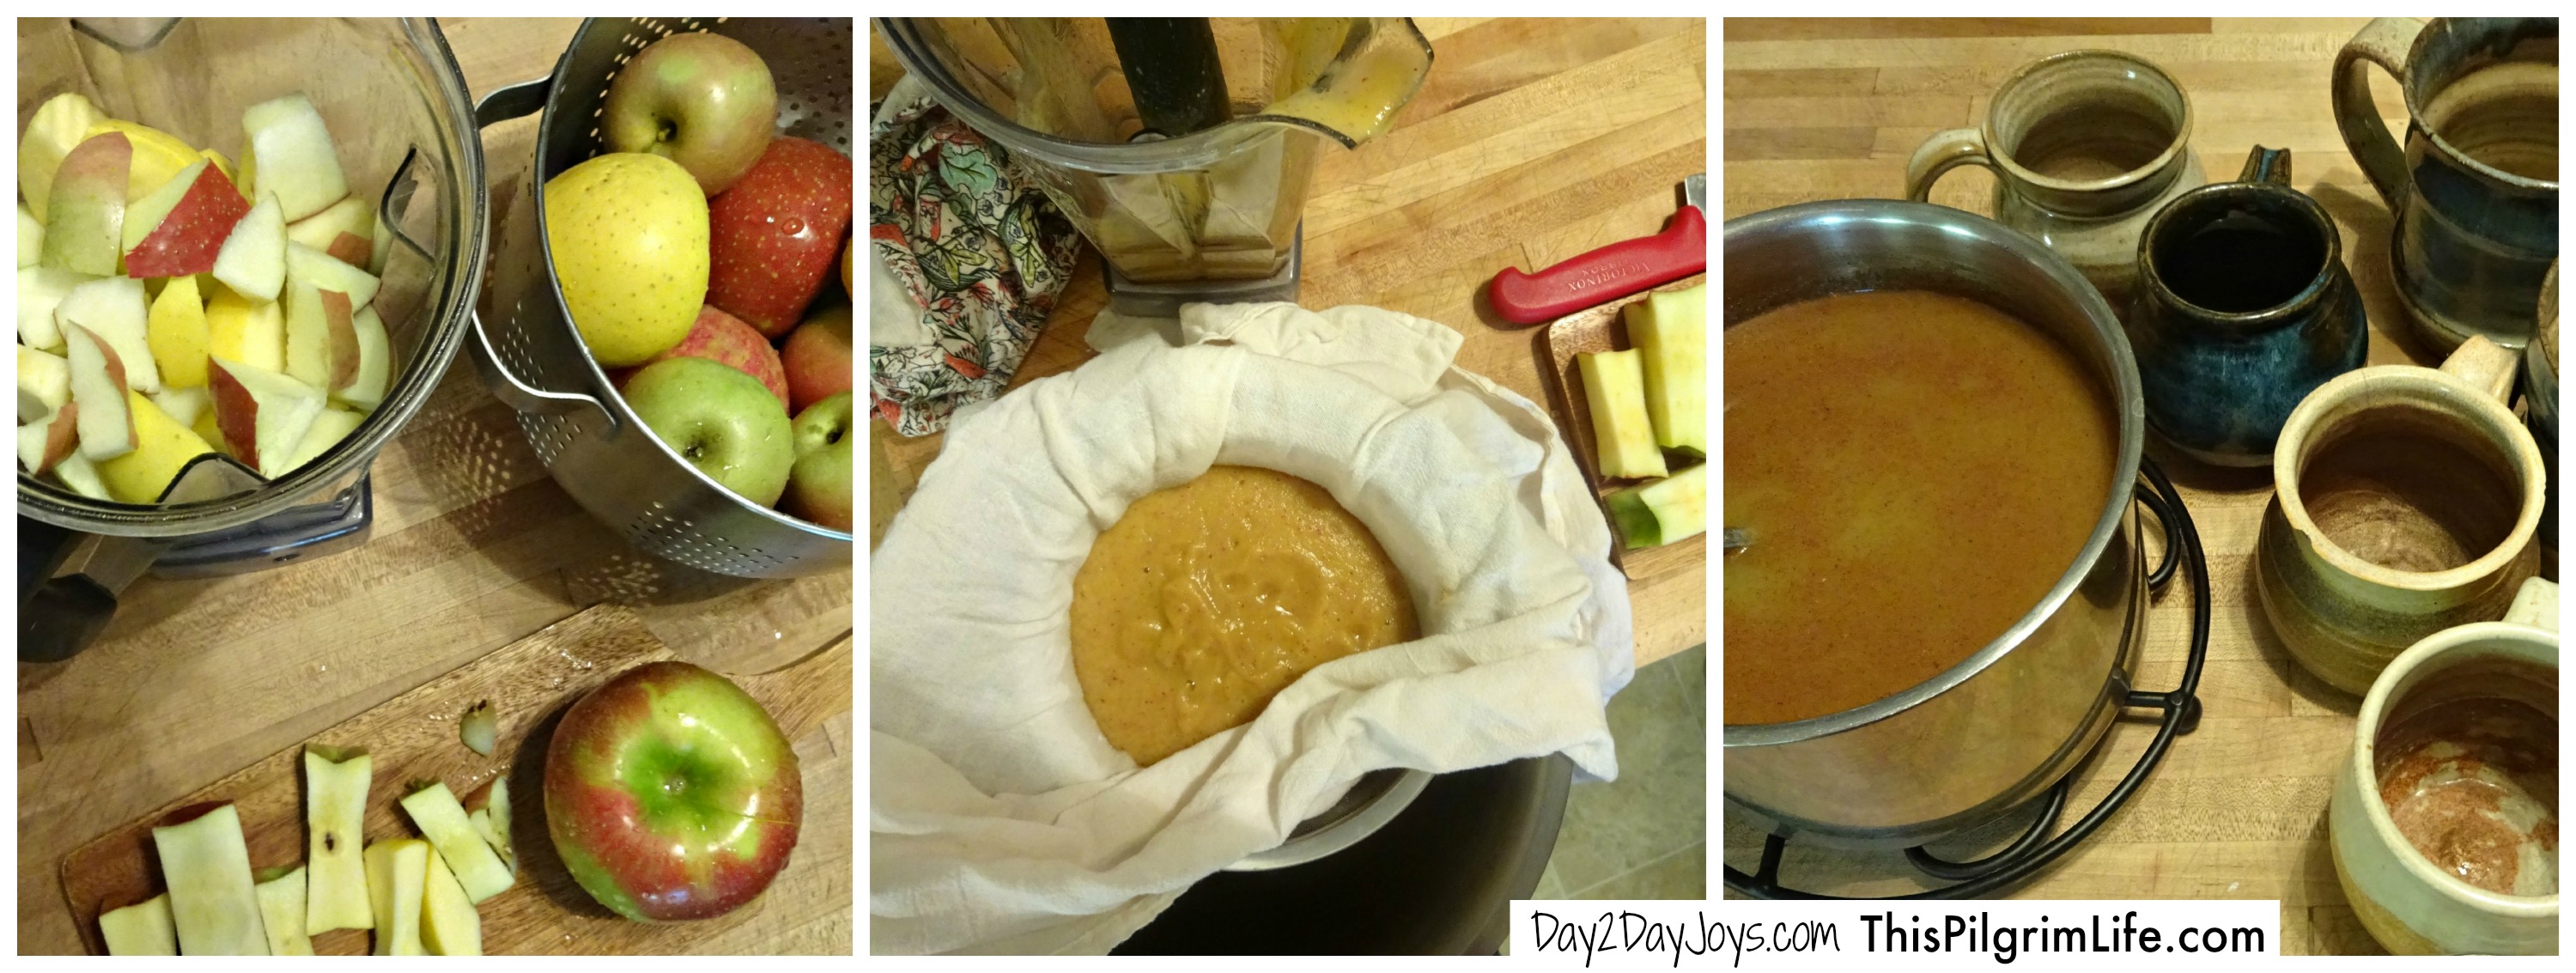
- Wash the apples. Cut into 1-inch chunks and add to high-powered blender. Add about 1/2 cup of water to help blend.
- Blend the apples on high for about 1 minute, or until all the apples are smooth.
- Set a metal strainer over a large bowl. Drape a tea towel over the strainer and pour in the blended apples. Squeeze and twist the tea towel to separate the juice from the pulp. Save the pulp for “applesauce” to use in muffins or oatmeal.
- Enjoy the apple cider warm with spices (cinnamon, nutmeg, etc) and fresh whipped cream. Or drink it chilled.
- Keep extra cider in the refrigerator up to a week.
This month, I am writing all about kids in the kitchen on my blog. Helping to inspire and equip you to create habits of health and hospitality in your kids. You can find all the series posts here.
What food traditions do you have in your family?


That looks like such a fun thing to do with the family! My girls are grown now and I truly miss being able to bring them into the kitchen and do fun things like this! And to have homemade cider in the end is wonderful!
Gosh! I could really go for some hot apple cider right about now! I’m freezing! haha 🙂 Thanks for sharing such a great recipe! Can’t wait to try it!
So simple, I love it!
Its simplicity is one of my favorite parts!
This is too easy! I didn’t know it was that simple! Very cool! I’m drooling over that mug in the first photo 🙂
We (especially my husband) LOVE handmade mugs! Many of our favorites were made by friends in college. This one was found at a craft sale a few years ago. It’s my personal favorite.