The post Christmas Wreath Card Display appeared first on Day2Day Joys.
]]>
Written by Kari, Contributing Writer
I know there are hundreds of ways to display those beautiful Christmas cards we get each year. I’ve done most of them over the course of my beautiful life. Everything form hanging them from decorative ribbon to placing them in a crystal bowl. A couple years ago I was reading Living Magazine and found a quick and inexpensive way to display cards. I needed a change and this was perfect.
A simple wooden wreath.
Well, more like an embroidery hoop with mini-clothespins, but like I said, a simple wooden wreath. It worked perfect.
What does this have to do with health, which is what I usually write about? Nothing. Not only am I passionate about teaching and educating people on health – I enjoy being crafty too! So, this is just a look at another side of me!
It cost less than $10 for the supplies and didn’t take long at all to make. The glue drying is the most time consuming part of it all. This is when you get to play with your kids, watch Netflix or eat cookies. Or all three. You can choose the size and number of hoops you’ll need depending on how many cards you usually get. I did one large and two medium. They really look beautiful once they fill up and make it so easy for everyone to scan and look at the cards when they are visiting your home.
Now, wouldn’t you say that these simple wooden wreaths make your own Christmas scene look so much better? I thought so! Now go make one for you!

Christmas Wreath Card Display
What You’ll Need:
- a couple needlework/embroidery hoops – I did one large and 2 medium sizes
- a couple packages of mini-clothespins
- craft glue
- ribbon for hanging
What You’ll Need To Do
- I glued the mini clothespins every two inches around the hoop. I alternated the pins – one facing out, one facing in.
- let them dry overnight (simply because I got side tracked and didn’t get back to it the same day).
- Once dry, I attached the ribbon and hung it on display.
Like I said, when they are completely filled, they look really pretty – like a big wheel of cards. It’s nice to be able to see them all and be reminded how blessed we are to know so many wonderful and loving people – which always makes my heart happy.
What is your favorite way to display your Christmas cards?
The post Christmas Wreath Card Display appeared first on Day2Day Joys.
]]>The post Make Your Own Leaf Press appeared first on Day2Day Joys.
]]>
Written by Karen @ To Work With My Hands, Contributing Writer
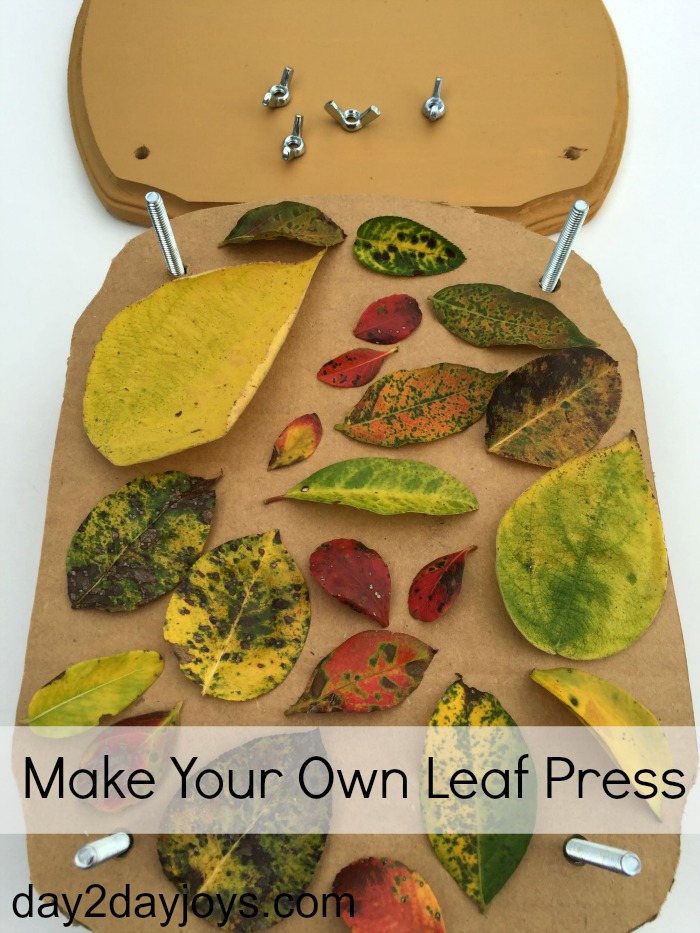
Fall is here and soon the ground will be adorned with the gorgeous array of rich-colored leaves.
Every year my children collect the prettiest leaves they can find, bring them inside, and it sometimes looks as if there must be a tree growing somewhere inside our house! They simply love the beautiful, showy leaves of fall, and so do I.
Quite a few years ago, when our oldest boys were still pretty small, my husband helped me make our own leaf press. For years we’ve used it and untold numbers of leaves have been preserved in its layers.
This year, I decided it was time to add a second press to our collection. The leaves are already making their way indoors, and I want to be able to preserve as many as we can for fun fall crafts, and just for the joy of experiencing their beauty a bit longer.
The supplies are few and inexpensive, and the press will last for years – long after your leaf-collectors are grown and probably have their own little ones.
If you have easy access to a table saw and scrap lumber, you can make one even more economically. Although I do have access to both, our busy fall schedule kept me from having easy access to the people who could operate the saw :), so I chose the craft store route this time instead.
You can make your press any size you like, but keep in mind that a very large press will be more difficult to manage or take with you on nature outings. We like the size and portability of a press that is one square foot or less in size.
Make Your Own Leaf Press
Here’s what you need:
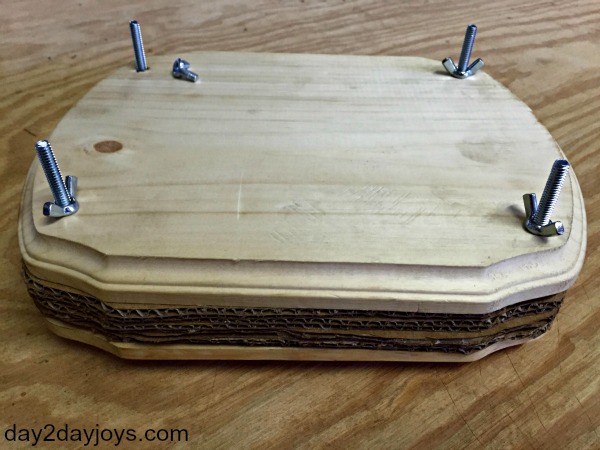
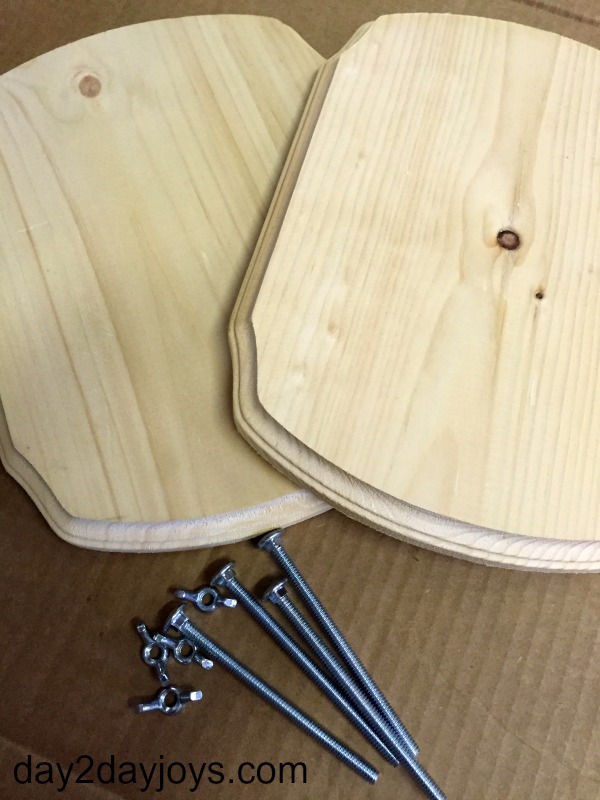
- 2 pieces of wood, 1/2-inch thick
- 4 stainless steel bolts (we used 4″)
- 4 wing nuts to fit the bolts
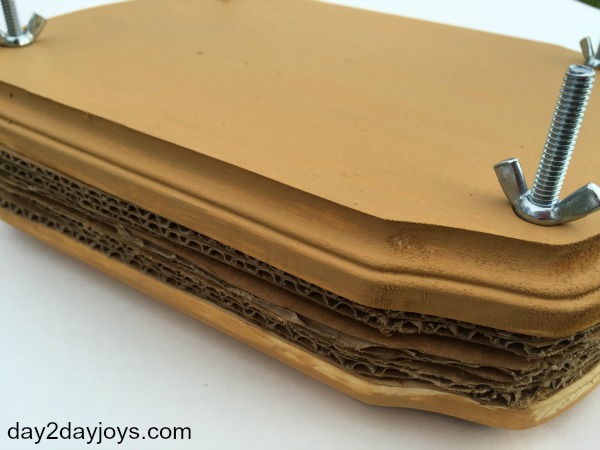
- 8-10 pieces of cardboard cut to fit the wood
- craft paint (optional)
- drill press or electric hand drill
- clamps
-
Here’s what you do:
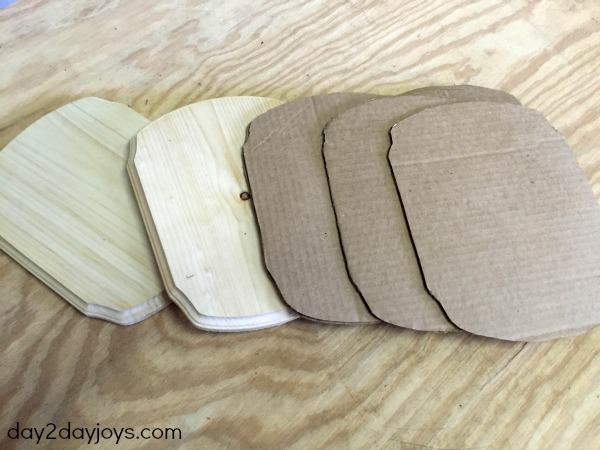
If you use lumber, such as plywood, cut two pieces in the size you want, creating a rectangle or square. Our first press was an 8-inch square and worked great for little hands.
Alternatively, you can purchase pre-cut and routed unfinished plaques at craft stores. The ones I used in this press were purchased at Michael’s for $3.49 each. (If you have their app on your phone, you can use their mobile coupons too. They typically have a 40% off any regularly-priced item every week just like Hobby Lobby does.)
Next, Cut as many pieces of cardboard as you would like for your press – I cut 8 for ours. Lay one of your pieces of wood onto an opened cardboard box and trace around it. Using a craft knife, cut the pattern out. Repeat until you have as many layers as you like.
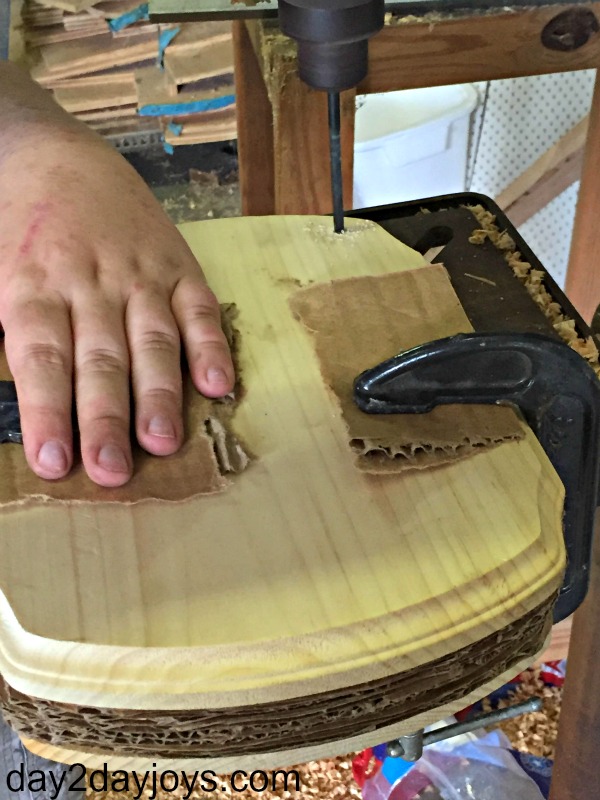
Stack the cardboard layers between the two wood layers and clamp to hold them steady while you drill the holes. To prevent the clamps from marring the wood, slide an extra piece of cardboard between the wood and clamp before tightening.
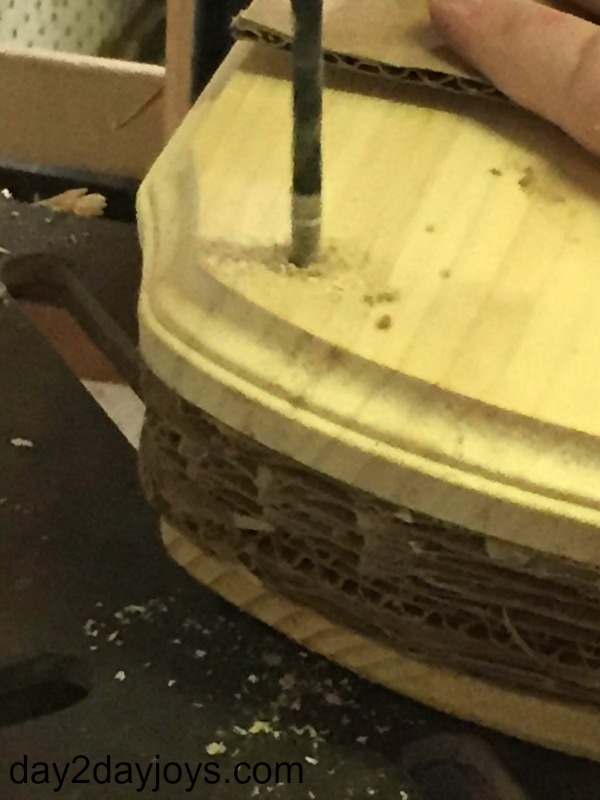
With the layers secure, you can now drill the holes. We chose 1/4″ bolts and used a 5/16″ drill bit (This is where I was stunned by how much my 11-year old knows about using a drill press and choosing and changing bits. My husband has done a fantastic job of teaching our boys to do the shop things, and I’m so grateful!)
If you don’t have a drill press, you can also use an electric hand drill.
Once the holes are drilled, check the fit of your bolts before removing the clamps. Screw the wing nuts onto the bolts, and remove the clamps.
Your leaf press is finished!
If you want to dress your press up a bit, you can give the top and bottom a few coats of craft paint. We left our first press natural and after so many years of use, it has become quite dirty.
You could also decorate it with pressed leaves using Modge-Podge, or hand-paint a beautiful scene. Use your imagination and have fun.
Using the press:
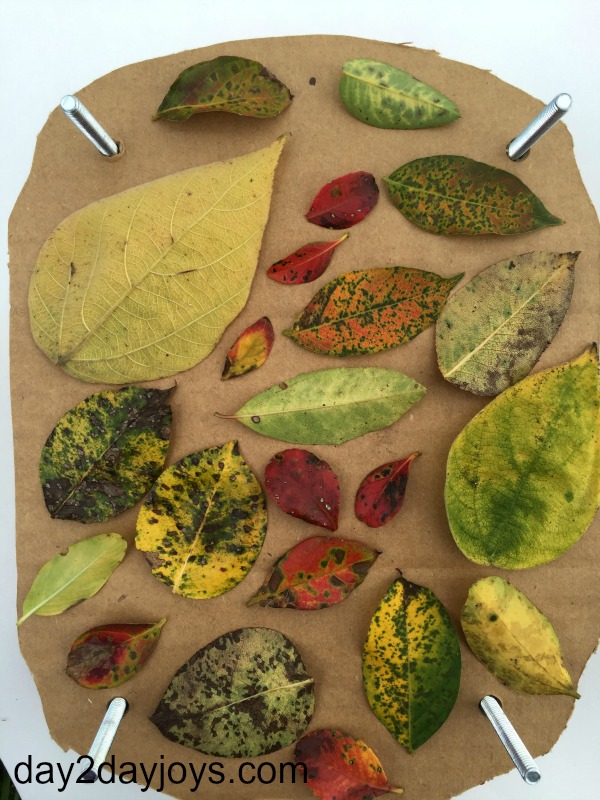
After collecting your leaves, lay them in single layers on the bottom piece of wood, taking care not to overlap leaves even slightly.
When there’s no room left, place a piece of cardboard on top of the leaves, carefully sliding it down the bolts. Repeat until you have as many layers as you need.
Place the top piece of wood on last, and screw down the wing nuts as tightly as you can.
Check the leaves after a week. If they aren’t completely dry, screw the nuts down again and give them a few more days.
When the leaves are dry, carefully remove them from the cardboard layers. Some may be quite brittle, so take care to remove them gently.
Making your own leaf press is fun and easy and a great way to get your kids involved one step further in the process of enjoying fall leaves.
Your press isn’t just for fall, however! You can use it in the spring and summer to press beautiful grasses and flowers too. It’s a wonderful way to expand nature study and preserve specimens that are otherwise short-lived.
One of our favorite pressed leaf projects has been using this book to create nature scenes with our leaves. Look What I Did With a Leaf! is filled with inspiring and creative scenes made exclusively with pressed leaves.
Tip: It’s a good idea to put a small mark on the correct side of the top or bottom of each piece of cardboard. Likely the holes are not totally interchangeable, and unless they are in the same position as when you drilled them, you may have some binding.
Do your children collect fall leaves? How do you enjoy the beautiful, yet short-lived colors of fall?
The post Make Your Own Leaf Press appeared first on Day2Day Joys.
]]>The post Whipped Naked Magnesium Butter appeared first on Day2Day Joys.
]]>
Written by Kari @ Living Strong Wellness, Contributing Writer
It seems these days that good, restful sleep is hard to come by. Not only with adults, but children as well. As this is not an exciting fact, it is a reality and I believe we have a wonderful variety of natural options to help us.
For instance, there are herbal teas, essential oils, supplements and something I want to share with you today – magnesium butter.
Ahhh, this stuff is amazing. Why do I love it so much? Because it provides our body something that is lacking so severely in today’s generation – magnesium.
There are many benefits of healthy magnesium levels. To mention just a few:
- Magnesium helps muscle and nerve function. Serving as calcium’s vital partner, magnesium will allow calcium to do it’s job to build muscle growth.
- Magnesium plays an important role in gut health. Without good levels of magnesium aid in the absorption of copper, potassium, vitamin D and zinc. It also helps regulate blood sugar levels, which will lessen the risk for diabetes.
- Magnesium can help lower blood pressure or keep blood pressure low by allowing your muscles to relax, contract and push blood through the arteries and veins without force.
- Magnesium helps melatonin (the sleep regulating hormone) stay balanced, which allows for more peaceful sleep.
- Magnesium can help balance stress hormones, eliminating stress and tension and allowing for a more relaxed state of being (which in return will help with rest as well).
The list goes on and on, but those five points alone should get people’s attention when it comes to supplementing with safe sources of magnesium. Data from 2012 stated that 48% of the American population, 79% over the age of 55, were deficient in magnesium. This isn’t good, especially when it is such a vital mineral and nutrient for our bodies.
Along with taking a liquid mineral supplement, we use magnesium butter every evening before we go to bed. We just spread a thin layer either behind our knees or on our inner arm (where the skin in thin) and that’s it! I have made this for several family members and friends and they all love it and can tell a huge difference in their quality of sleep (especially the adults…go figure)!
The recipe is simple and last a long time on the shelf! We always use it, so we go through a 4 ounce container in about 3-4 months (three of us use it). Since the recipe doesn’t contain water, it would probably last a good 6-8 months if kept clean (wash hands before using the butter) and can always be extended to 12-18 months or longer if refrigerated!
You can make this recipe ‘naked’, meaning adding no essential oils, or you can add your favorite calming and sleep inducing oils such as lavender, cedarwood, vetiver, ylang ylang or sandalwood! If you are using therapeutic grade essential oils, only use a total of 40 drops of oils combined for this amount, which is one cup.
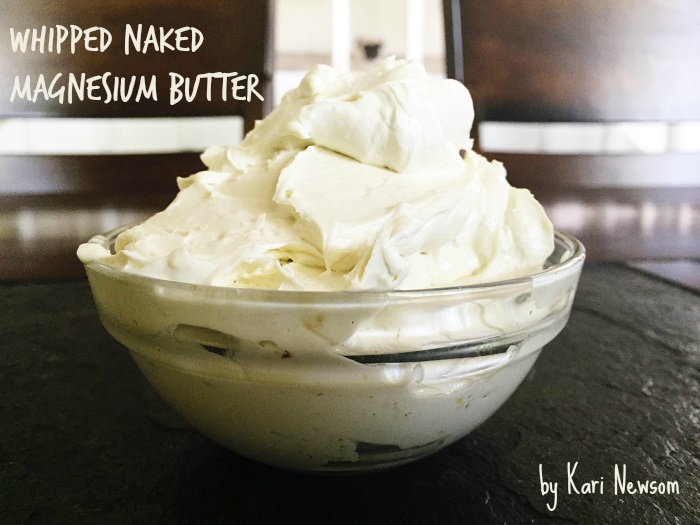
The end result with the color will vary depending on the type of shea butter you use. We use a raw shea butter that has a deep, deep yellow tone and rich scent and amazing benefits that trump refined and bleached shea butters.
Whipped Naked Magnesium Butter
What You’ll Need:
- 3/8 cups virgin coconut oil
- 3/8 cups raw shea butter
- ¼ cup magnesium oil (how to make it yourself)
- ¼ cup almond or jojoba oil
What You’ll Do:
- Melt the virgin coconut oil and raw shea butter over low heat just until it’s all liquid.
- Add the almond or jojoba oil, pour into a medium glass bowl and allow to cool to room temp. You can leave on the counter for an hour or so or you can stick it in the fridge to speed up the process. I like the fridge :o)
- Using a hand mixer or immersion blender, take your room temp oil mix, turn on the blender and slowly add the room temp magnesium oil.
- Mix or blend this until it is creamy. You can’t have any separation, which means, no water droplets anywhere. This can take a few minutes if the oils are room temp. If they are too warm, it will take longer.
- Place the bowl in the fridge for around 30 minutes. You want to see it starting to harden and solidify.
- Once it’s solidifying, remove the bowl and using the mixer or blender with a whisk attachment, whip the mixture until light and fluffy! If you are adding essential oils, do it during this step.
- Store in a glass jar or container and place in a cool, dark place.
I hope you enjoy the wonderful benefits of this magnesium butter that is safe for you and your entire family!
What is your favorite natural solution for calming and peaceful sleep?
The post Whipped Naked Magnesium Butter appeared first on Day2Day Joys.
]]>The post Tropical Delight Smoothie appeared first on Day2Day Joys.
]]>
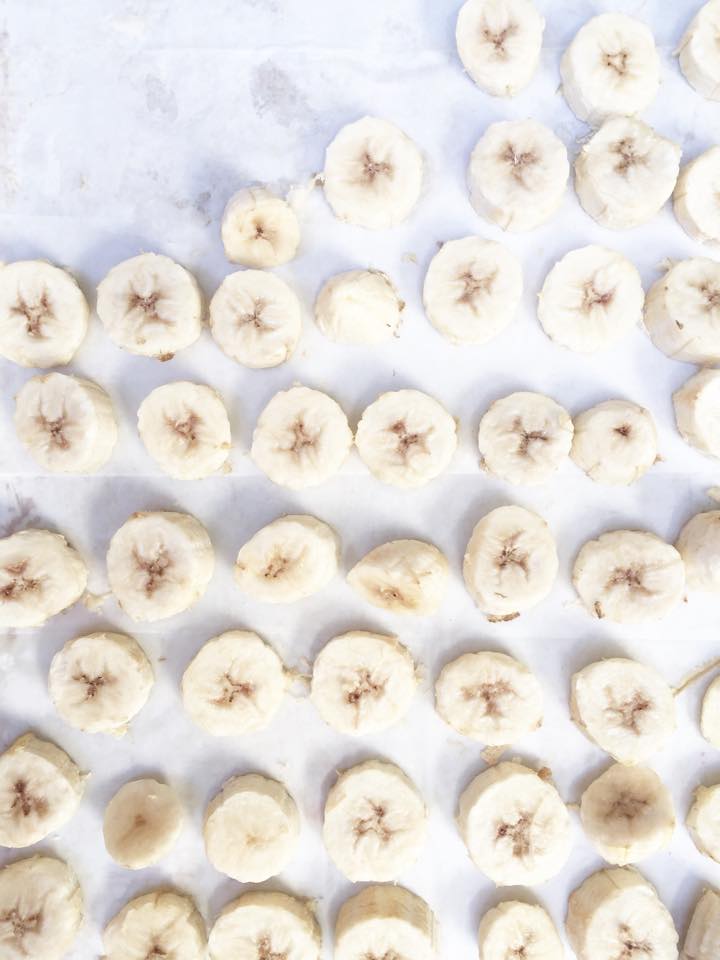
Tropical Delight Smoothie
What you need:
1 banana, sliced (either fresh or frozen)
1/2 cup pineapple, fresh or frozen
1/2 cup ice (this is optional and typically used when the fruit you are using isn’t frozen, if you are using frozen fruit, it usually is plenty cold and you won’t need the ice)
What to do:
What is your family’s favorite smoothie?
The post Tropical Delight Smoothie appeared first on Day2Day Joys.
]]>The post 20 Home Remedies for Outdoor Fun appeared first on Day2Day Joys.
]]>Rather than spraying or lathering on chemicals that could be harmful to our bodies, especially after so much repeated use over the summer, here are twenty DIY remedies that can be easily made at home. Even if you are an essential oil newbie like myself, you can still find almost all the relief you need this summer from these simple remedies.
If making your own remedies is new to you or still seems overwhelming, pick two to three remedies that you will use most often to start with and go from there. Even substituting just one chemical-free remedy will get you closer to a healthier summer.

Natural Home Remedies to Keep You Safe this Summer:
Sun Protection & Burn Relief
- DIY After Sun Spray ll Firefly Fields Living
- Homemade Sunscreen ll Keeper of the Home
- Whipped Coconut Cooling Lotion ll Hip 2 Save
- Magnesium Body Butter ll Wellness Mama
- DIY Sunscreen Sticks ll MadeOn
Bug & Tick Repellants
- Natural Bug Repellants with Essential Oils ll Herbal Academy of New England
- Homemade Rosemary Lemon Bug Repellant ll My Baking Addiction
- DIY Natural Tick Repellant ll Kornerstone Farms
- Homemade Basil Mosquito Repellant ll Mommypotamus
- Natural Tick Repellant ll Primally Inspired
Itch Relief
- Homemade Itch Relief Spray ll The Frugal Farm Wife
- Homemade Calamine Lotion ll Nourishing Joy
- Poison Ivy Paste ll Earth Remedy
- Homemade Bug Bite Relief Stick ll The Prairie Homestead
- Lavender for Relief ll DIY Natural
Aches & Pain Relief
- Homemade Natural Neosporin ll Mrs. Happy Homemaker
- DIY Warming Rub for Sore Muscles ll Pop Sugar
- Pain Relief Rub ll The Paleo Mama
- Magnesium Oil Lotion ll Creative Christian Mama
- Pain Relieving Bath Salts ll The Good Thieves
Don’t forget to pin this list for future reference and check out these other posts on outdoor summer fun!
- The {Real} Magic Kingdom Series ll This Pilgrim Life
- Day Hiking with Kids ll Day 2 Day Joys
- 4 Outdoor Learning Activities with Kids ll Day 2 Day Joys
- The Risks and Benefits of Sun Exposure ll Keeper of the Home
The post 20 Home Remedies for Outdoor Fun appeared first on Day2Day Joys.
]]>The post DIY Kids’ Art Display appeared first on Day2Day Joys.
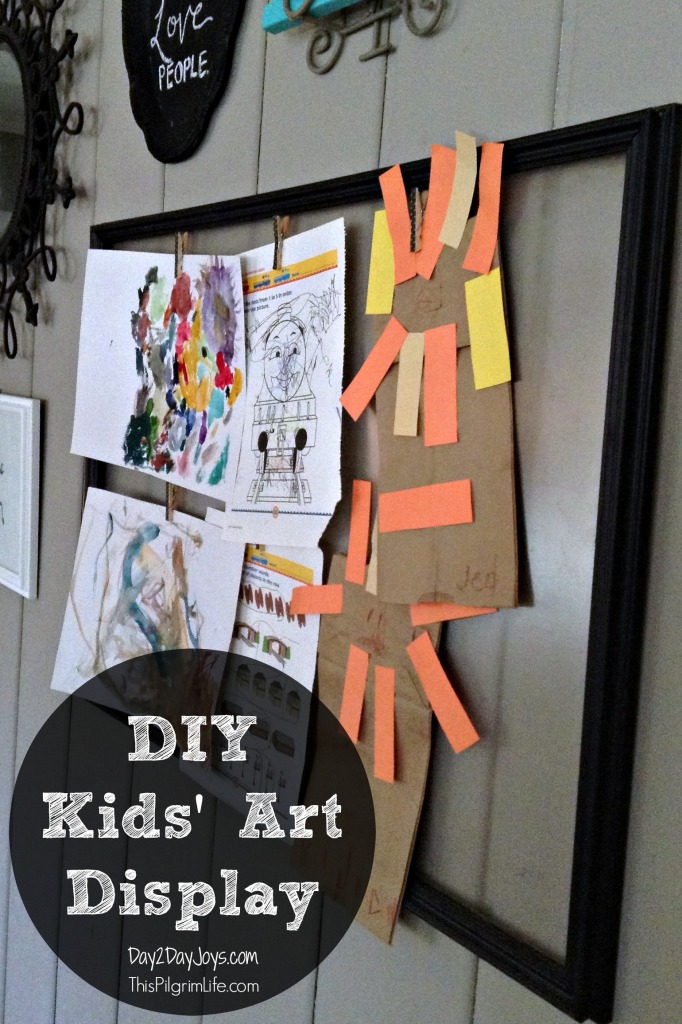
]]>A couple of years ago, my oldest child started doing art projects and I found myself needing a place to be able to display his work.
I have strong aversions to clutter and I was hoping to figure out a way to display our kids’ work that would keep our home looking tidy. Just as important, I wanted our kids to know that we valued their work and enjoyed being able to show it off.
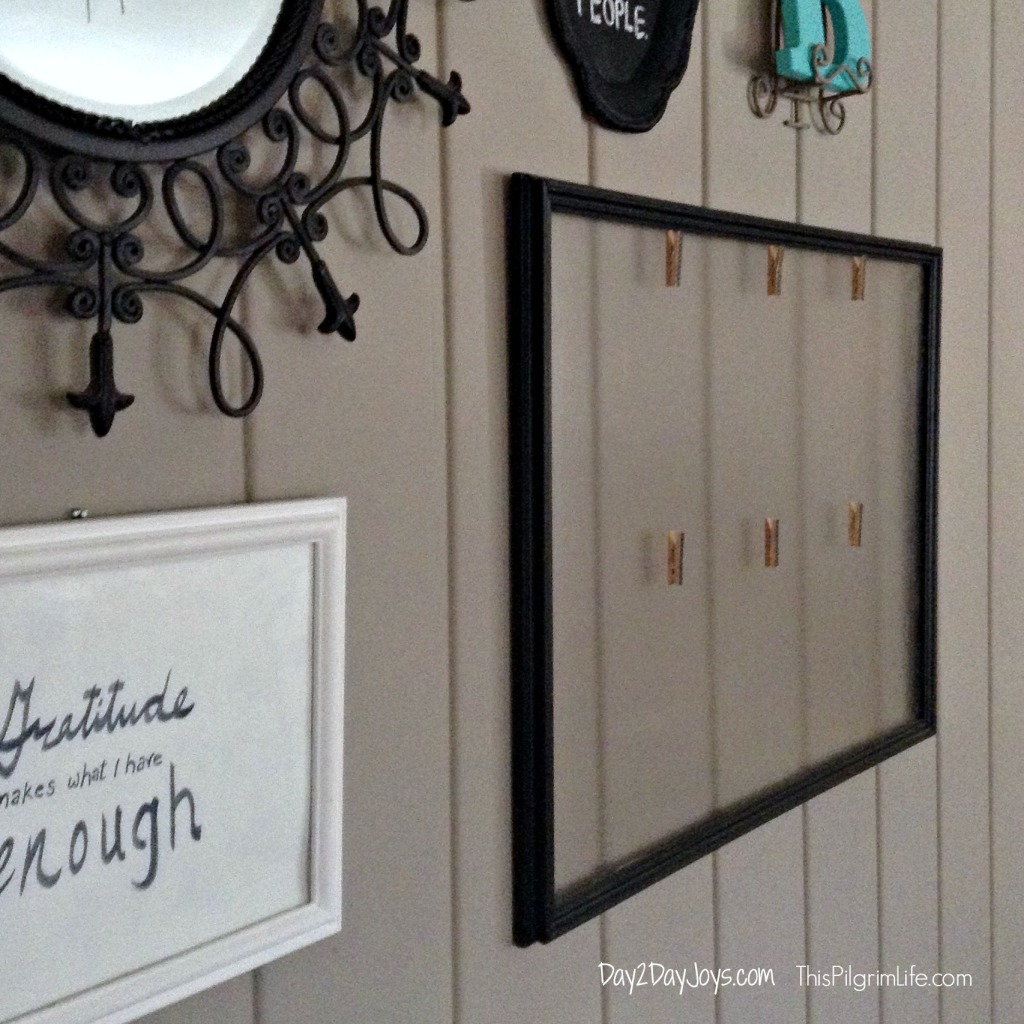
Soon after, I was perusing the aisles of one of my favorite stores (Goodwill!) and I found a large black frame with a plastic front. The picture inside wasn’t important (I discarded it later on). The frame would be perfect for displaying our kids’ art.
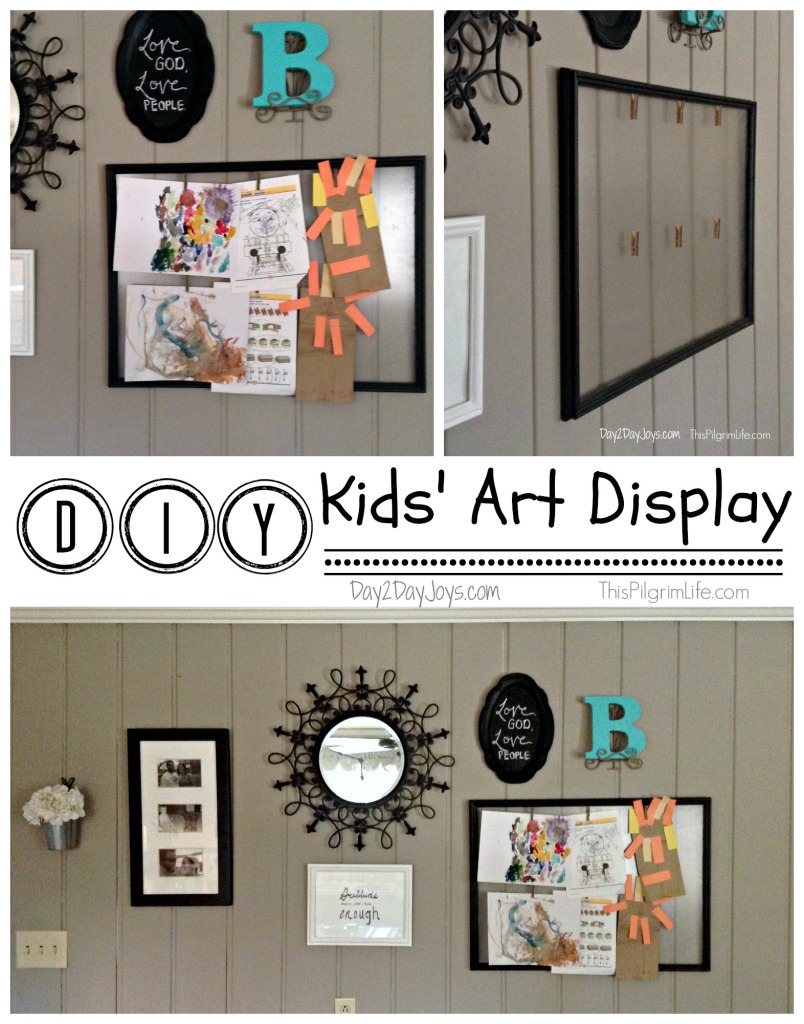 We have moved this frame around in our home over the past couple of years. For a while, it was in our hallway and we admired my kids’ letter art and finger paintings as we went from room to room.
This week, the frame has found a home in our kitchen, among other elements in a new gallery wall. I’m happy to have it front and center, in the busiest room in our house.
Two things that I love about this project are that it hangs art of various sizes and changing the art is incredibly easy. Okay, there’s one more thing I love. It just looks nice– like it belongs hung on the wall, neat and coordinated.
Want to make your own? You can do it for less than $10 and less than 30 minutes!!!
…Making Your Own Kids’ Art Display…
Supplies:
- a large picture frame
- small clothespins
Instructions:
- Check your closets or your local thrift stores for a frame in whatever size you want.
- Remove the picture and backing from the frame, leaving only the glass or plastic front.
- Use a hot glue gun to attach the small clothespins to the front of the frame.
- Hang up the frame and display your favorite little Picasso’s best work.
What kind of art do your kids like doing best?
The post DIY Kids’ Art Display appeared first on Day2Day Joys.
]]>The post Natural Oven Cleaner… Easy as 1, 2 & 3!! appeared first on Day2Day Joys.
]]>
It’s a new year, which means new goals right?
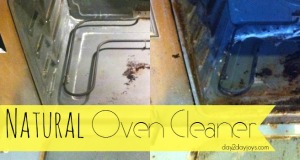
Well, a HUGE goal I’ve had for a while now was to clean my oven. Boy or boy was it yucky and I have been using it almost a year without cleaning it, yes– I did just confess that.
You see, we bought our first house, a Log-home and moved in (in January of last year), got mostly unpacked, had a homebirth, started a new school year and got on with life. Time passed and I kept telling myself I’ll do it later. Later came and went but while my parents were visiting for Christmas, my mom got it started.
I am pretty sure the oven hadn’t been cleaned in years, if not decades.
With a little elbow grease and this natural recipe, we got our oven to look (almost) as good as new, considering it is a 20 year old oven.
Natural Oven Cleaner
- baking soda
- vinegar
- *optional: lemon essential oil
- Gather ingredients, remove racks
- Before your ready to start cleaning, make a paste using 2 parts baking soda, 1 part vinegar, adding in about 10 drops of lemon essential oil if you'd like to, set aside
- Spread paste all over turn oven. Turn oven on high for about 30-40 seconds, then turn off, let sit for a minimum of 1 hour or overnight
- Get a washcloth or scrubber and begin scrubbing all over, residue should begin to come off
- Rinse washcloth or scrubber as needed, scrub and repeat using paste
- Once finished, wet a wash cloth and wipe out all remaining paste, and you should have a shiny clean oven

We got started using the recipe above. Since it’s non-toxic and all natural, I felt safe letting my kids help, after all this helps with teaching them that everyone needs to share the workload as well as teaches them responsibility. You probably can see a spot in the middle, well, we scrubbed and scrubbed but couldn’t get the 20 years of baked on residue in the middle but maybe next time, it’ll come off.
As I noted in the recipe, the Lemon essential oil is not a mandatory ingredient but I recommend it because not only does it help make your cleaning area smell wonderful, it helps to break down the grease and helps to make the surface area sparkle! 
How do you keep your oven clean?
The post Natural Oven Cleaner… Easy as 1, 2 & 3!! appeared first on Day2Day Joys.
]]>The post DIY Tiered Serving Platters appeared first on Day2Day Joys.
]]>I absolutely enjoy entertaining at my house.
Every Christmas season, Hubby and I (okay, mostly me) like to have something at our house. Now, sometimes that means a bunch of screaming little kids are over decorating my amazing sugar cookies, getting frosting all over our walls and furniture, sprinkles and colored sugar crystals become permanent flooring and faces end up stained with the frosting since most of it never makes it onto the cookie.
Fun.
Other times we might have an open house for all our family and friends for the Christmas season – because what would December be if you didn’t have 100 parties to attend? Boring, right? I always tell people, you will never come over to my house and find a lone bowl of microwaved popcorn sitting in the middle of an empty table – and that be your eating for the night.
I planned a great menu for the small party of 10! Chicken Tortilla Soup and Chili , warm sourdough bread with REAL BUTTER, seasoned and organic, stove top popcorn, veggies and dip, chips and dip, Chocolate Chip Surprise Cookies, Golly Polly Doodle Cookies, Peppermint Bark (this is the recipe I used), Ginger Ale/Ice Cream Punch, a Make Your Own Mocha station, and more! All of it home-made! 95% of healthy – I threw in some cookies and delicacies that wouldn’t be on my ‘foods you should consume everyday of your life’ list. Come on – don’t be a hater – it was a Christmas Party!
Now, my issue was the presentation of this amazing food.
Now, the fact that I’m addicted to Pinterest has really helped me out of a sticky situation or two. This was no different.
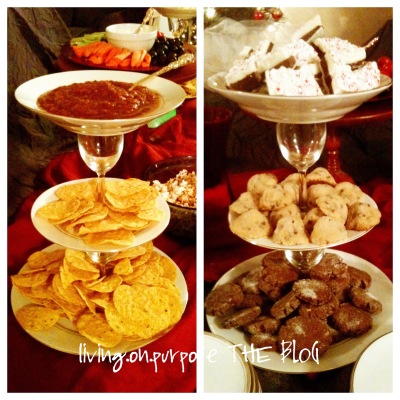
I had secretly been crushing over some tiered serving platters that I had seen on Pinterest.
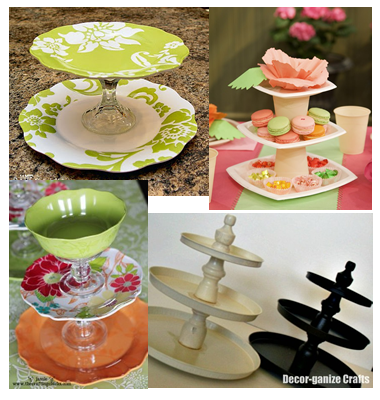 {images above taken from Pinterest}
Now, some of the tutorials I read on these used items that could be toxic (spray painting plastic dishes) and I don’t want to poison my guests. Others went out and bought new dishes and candle stands and made theirs. Now, those were all pretty, but I didn’t exactly want to spend $80 on a couple tiered serving dishes.
So, I came up with my own plan. I went consignment store shopping. We have thrift stores all over the place so I ran up to one by our house and browsed their section of dishes.
I found an entire set of china, yes, real china – each piece only 50 cents!
I grabbed all the dinner plates, salad plates and soup bowls. Then I found 2 different sets of mini wine glasses that each had 8 in the set! Those were also just 50 cents each. After I loaded up on all the china and wine glasses I took them home and sat them in a sink of hot water with lots of natural soap added. Since it’s real china, I couldn’t use boiling water, although that would have been my preference. I let them soak until the water was tepid, drained the sink, rinsed the dishes and repeated the process.
I let them air dry for about 6 days. Six days isn’t necessary, but I didn’t get around to making the serving dishes until then, so they had a while to dry.
When all was said and done the total cost of ONE 3-tiered serving platter was $3.50, dishes and glue included! Not bad!
HOW TO MAKE THE TIERED SERVING PLATTERS
You’ll need:
- clear epoxy (needs to be clear or it will look extremely tacky) and needs to be epoxy, I don’t think any other craft glue will hold forever and as much weight as the epoxy will
- the dishes you are using, depending on how many tiers you are doing
- the glasses you are using for the ‘stands’ – you can also use glass candle stick holders, I personally like the look of the glasses
Each one consisted of 1 dinner plate, 1 salad plate and 1 bowl and 2 identical mini wine glasses.
Here’s what to do:
- I began by outlining where each wine glass would go.
- I started with the bowl, which would go on the top, I laid it upside down with the rim on the surface and centered the rim of the wine glass on the bottom of the bowl and drew a LIGHT pencil line around the glass.
- Then I did the salad bowl, which was the middle tier. I used the base of one of the glasses and centered it on the top of the salad plate and drew a LIGHT pencil line.
- Next you repeat the first step, and turn the salad plate over and center the rim of a glass on it and draw a line.
- Next repeat the second step with the dinner plate, using the base of a wine glass.
- Once you have all the lines drawn on the dishes, you can mix your epoxy. If you’re only doing one of these serving platters, mix enough epoxy to cover the rim of one wine glass.
To glue everything together:
- Make sure everything is clean and the glasses have no prints on them on the inside of the glass or on the base. If you don’t catch this now and clean it, those prints will forever be a part of the serving platters since once they are glued, you’ll never get to them again.
- Start with the bowl, which is the top tier.
- Turn the bowl upside down and place on a flat surface.
- Using a toothpick or skinny wooden craft stick, apply the epoxy to the rim of the first glass. Remember to work fast. Once the rim is covered in glue (try to do it neatly – it is possible, I was able to do it), slowly place the glass, rim side down on the outline you made on the bottom of the bowl. Apply gentle but firm pressure to the glass so it adheres to the plate. Allow to sit for about 5 minutes before you continue on.
- Once the bowl is dry enough, mix up a little more epoxy (this time enough to do the base of 2 glasses) and apply it to the edge of the base of the wine glass this is already attached to the bowl. Once the epoxy is on, turn the bowl and glass right side up and slowly set it down on the salad plate where the outline is. Again, apply gentle but firm pressure so the glass adheres to the plate. Next apply epoxy to the base of the 2nd wine glass and slowly place it on the outline on the dinner plate (the bottom tier). This time I would allow both to dry for about 10-15 minutes before moving on. If you do not allow enough time for epoxy to set, the glasses and dishes will slide and shift and you will end up with un-centered glasses – doesn’t look pretty.
- After the 10-15 minutes, turn the bowl, glass and salad plate upside down so the top of the bowl is on a flat surface. Next mix up a small amount of epoxy to put on the rim of the wine glass that is on the dinner plate. Once the rim is covered in epoxy, slowly place the bottom plate and glass on the outline you made on the bottom of the salad plate. Apply gentle but firm pressure and then allow to sit for about 20 minutes.
- After 20 minutes it should be safe enough to turn back over so it’s facing upright. I let my stands sit for 24 hours before messing with them. Once the epoxy had set – those suckers were indestructible! Really!
To Clean:
It’s easiest to wipe down with warm soapy water to clean. If you have a ginormous sink – you can wash them in your sink. The epoxy will withstand all the soap and water, so you don’t have to worry about it falling apart if it gets wet!
These are WONDERFUL because they are so VERSATILE! I pulled out my 2 sets of china for everyone to dine on and I also pulled out my gold plated silverware and my SILVER silverware! Those special touches are amazing!
What special touches do you add to your holiday celebrations to make them special?
The post DIY Tiered Serving Platters appeared first on Day2Day Joys.
]]>The post Felt Fall Banner appeared first on Day2Day Joys.
]]>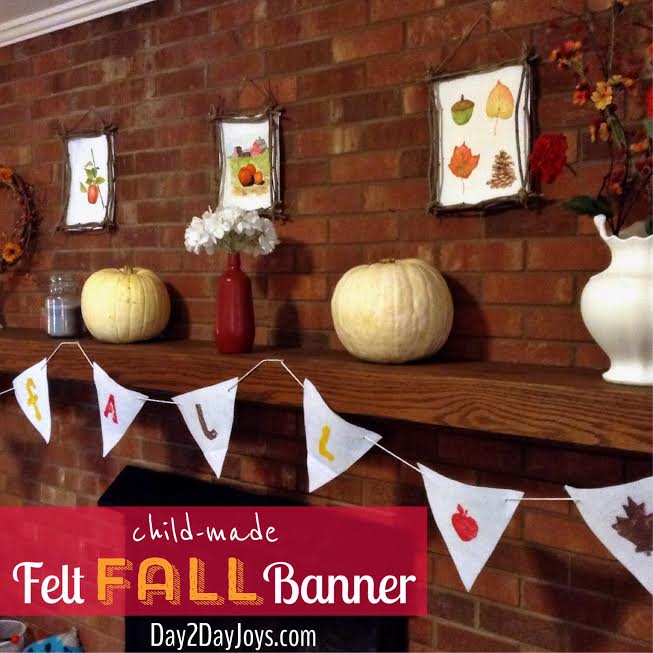 Written by Lisa @ This Pilgrim Life, *NEW* Contributing Writer
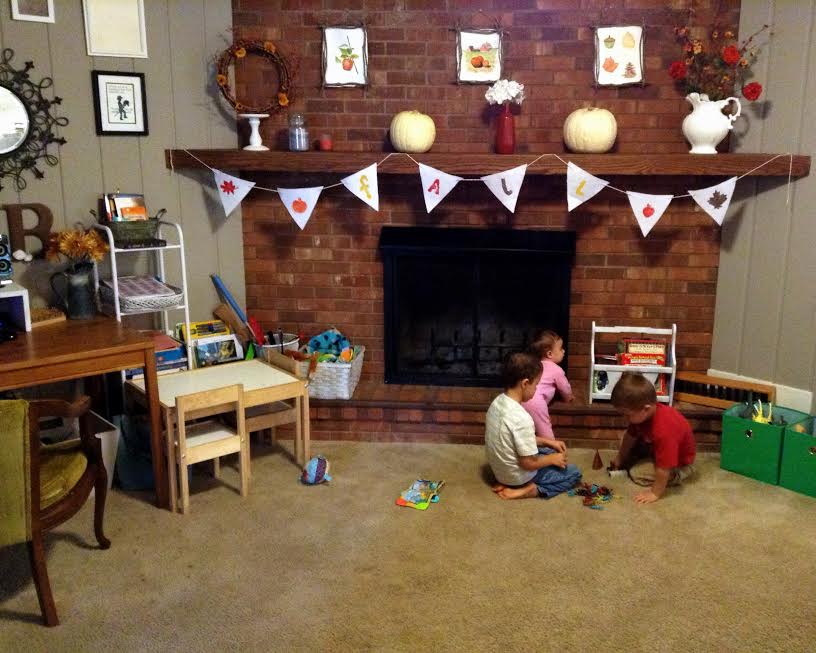
Every year we decorate the mantle for Fall. And every year the routine is basically the same.
Pull off current decor. Pull out boxed Fall decor.
Turn on Christmas music (I know, I know. But this year I have a good reason).
Try to find an arrangement of things we already have on hand or have acquired cheaply that suits our simple, clean style.
Send pictures to my best friend for a second opinion. Because she is a decorating guru. And I am not.
For the past couple of years, I have been able to count on more help than just from my best friend. My children are joining in on the action.
Like most things, they are eager to do whatever.Mommy.is.doing. We cook together. We sew together. And now we decorate together.
Sometimes this means finding random pinecones on surfaces that are in their reach. Sometimes it means reminders not to let their dinosaurs eat all the fake fruit. Almost all the time it means candles. They are big on the candles.
And I say, just go with it. Embrace their participation as a part of the family tradition. Let it be a special time. Prioritize memories over Pinterest-worthy mantles. (Not knocking Pinterest! I know it is a crucial source of inspiration for the decorating-challenged like me). Give them license to be creative and the opportunity to enjoy the work of their hands.
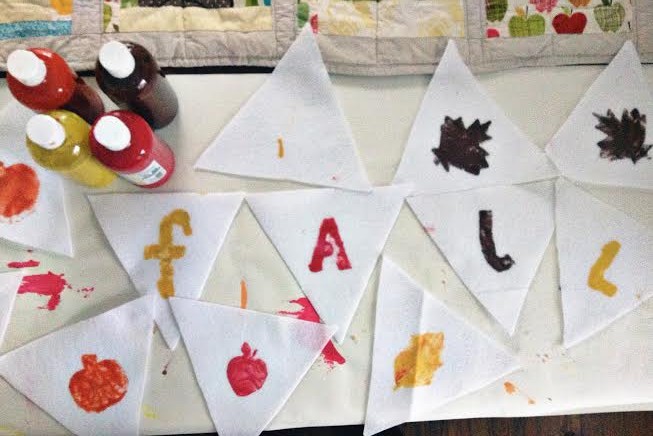
This year, try letting your kids join you in making this simple Fall banner. (If you’re really brave, you can invite friends over for a felt painting extravaganza).
Chances are good that you already have some of these materials stashed away in a cupboard or closet. And those you are missing can certainly be acquired cheaply. Plus, the stamps are quick and easy to make. They may be a new favorite here. (I’m thinking Christmas cards…)
How to make your own fall banner:
Materials Needed:
- 1/2 yard felt
- craft paint
- styrofoam plates
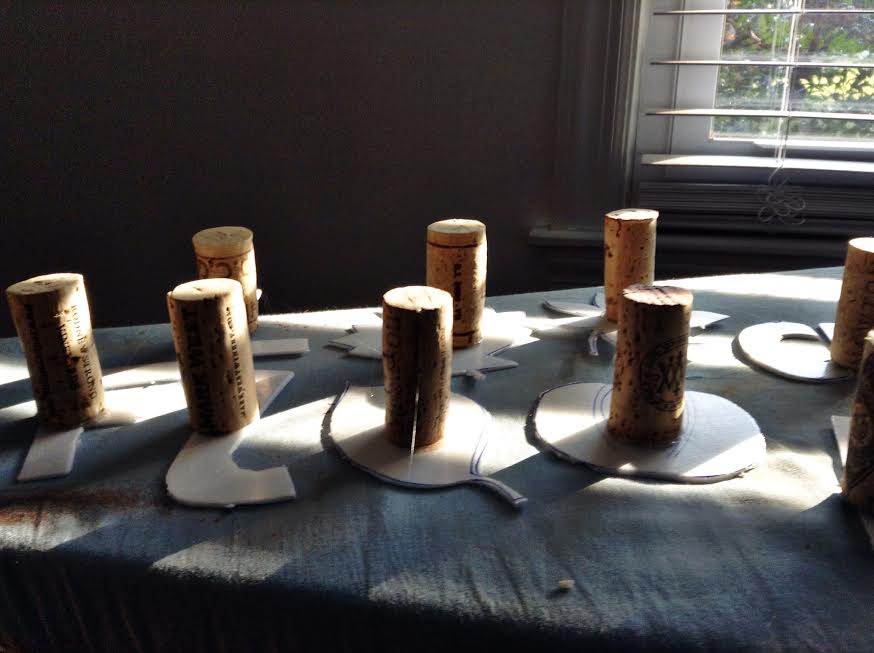
- corks
- paint brushes
Instructions:
1. Cut the felt triangles. Cut out a triangle from cardstock to use at your guide. [Cut a square 8″ x 8″. Draw a line from each top corner to the center bottom and cut.] Use this to cut as many felt triangles as you can. (Trust me, having some extras is a good thing).
2. Make the stamps/stencils. Draw the letters and/or shapes in the center of each styrofoam plate. Carefully use an exacto knife to cut each shape out. Go slowly so the styrofoam does not tear or snag. Now you have one stencil (the plate) and one soon-to-be stamp (the cutout).
Hot glue a cork to the center of each cutout and let dry.
Voila! Stamps.
3. Set the table, (the craft table). Cover the table with paper or a plastic tablecloth. (I use rolls of craft paper from IKEA for this. Easy and inexpensive). Pour paint onto uncut styrofoam plates to use for dipping the stamps. Pour paint into another container to use to dip brushes in for the stencils, (we used an empty plastic egg carton). Set out the stamps, stencils and triangles.
Even if you are only doing this with one or two children, having the supplies ready from the start is a major time and stress saver! Don’t skip this step.
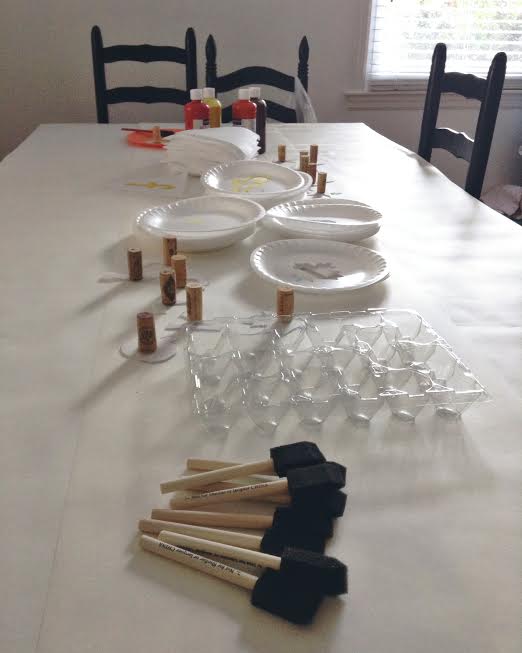
I neglected to pour the paint before the kids gathered. I wished I had remembered because waiting is soooo hard.
4. Paint the triangles. Gather around the table and get to work! (And if you’re like me, take a deep breath and remember that part of the beauty is the kid-ness of it all. Or just make plans to go back and add a few of your own pieces to the banner. No shame either way).
After each triangle is stamped or stenciled, let it dry in a safe spot.
5. Make the banner. Take the dry painted triangles and lay them out in the order you want them. Cut two small slits in the top corners of each triangle for feeding the twine through. Feed the twine through the pieces and you’re done! (Tip: I waited to cut the twine until I hung the banner on my mantle so I could determine just how long I needed it and how spaced out I wanted the triangles).
6. Hang your banner!
Happy Fall! I hope your season is filled with crackling fires, pumpkin flavored everything, and extra-special memories!
The post Felt Fall Banner appeared first on Day2Day Joys.
]]>The post Make Your Own Sea Salt Hair Shaper appeared first on Day2Day Joys.
]]>
Written by Kari @ Living Strong Health & Wellness, Contributing Writer
I live in Colorado, so having wavy hair produced by the saltiness of the ocean is, well, pretty slim.
For people like me, who would prefer to live on an island surrounded by palm trees and the ocean, but actually live surrounded by mountains and pine trees, we have to create the ocean inside a spray bottle to experience the coolness of wavy hair.
I’ve seen many different recipes, have tried quite a few, but found that this particular recipe that works better with my hair type. I’ve seen some that use coconut milk in lieu of water and I’m tempted to try it out, but think it may be too heavy for my fine hair since these sprays are all leave-in!
Remember when trying some out for yourself, take into consideration your hair type. Is it thick or fine? Do you have a lot of hair, or is it thin? Does your hair tend to get oily fast? Keep all these in mind when adding the oil, gel or conditioner and then watch how much you spray on your hair. It doesn’t take much to do it’s job!
DIY Sea Salt Hair Shaper
What You Need:
- 1 tablespoon sea salt
- 1 cup of warm water
- 1 tablespoon conditioner, hair gel, moisturizing natural oil or a few drops of essential oil (if you have fine hair, or tend to have oily hair, decrease this amount or leave it out all together)
* I used coconut oil in my final recipe, but have also used Aveda Shampur conditioner as well
What You Do:
- Place all the ingredients in a bottle with a fine mist sprayer.
- Shake before each use. Here you have the option to adjust the recipe according to your specific hair type, condition and needs.
- You can use this on wet or dry hair. Also, start with a little then add more if you want more wave. Starting with too much may end up leaving your head too oily or greasy!
*makes approximately 8 ounces
Go ahead! Even if you can’t get ocean wavy hair the authentic way – whip up some ocean in bottle and just go with it! You’ll look like you just stepped off a beach!
What’s your favorite go-to hair style for the summer?
The post Make Your Own Sea Salt Hair Shaper appeared first on Day2Day Joys.
]]>

